
Club Night Report
Wednesday 14th January 2026
Club Night Photos for Wednesday 14th January 2026 - Guest Demonstrator: Bryan Milham
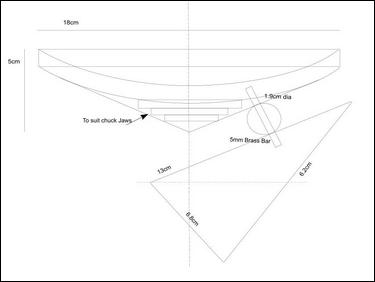
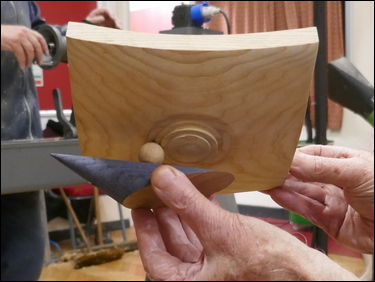
The demonstrator for the January 2026 meeting was a warm welcome to a long-standing regular visitor Bryan Milham.Bryan announced that for the evening he would be showing - something a little bit different - something he had called "A Supported Bowl" - which consisted of a cone shaped base, cut off at an angle, a square edge bowl with a feature base - both joined together by a small sphere - and all held together with the aid of a piece of brass rod. Bryan has helpfully supplied a drawing of the assembled pieces - which can be downloaded as a PDF file from HERE
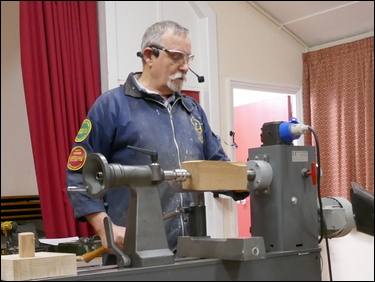
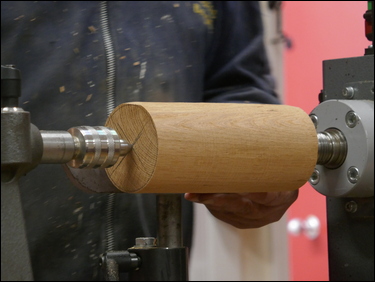
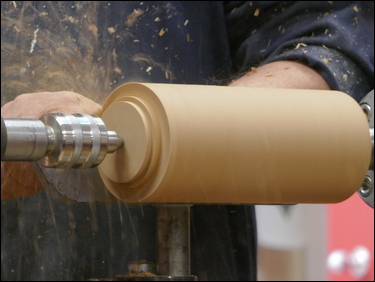
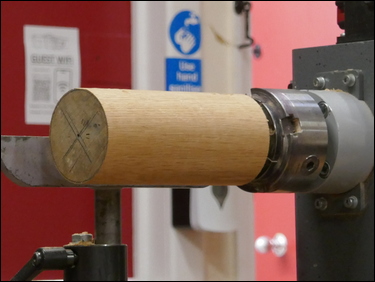
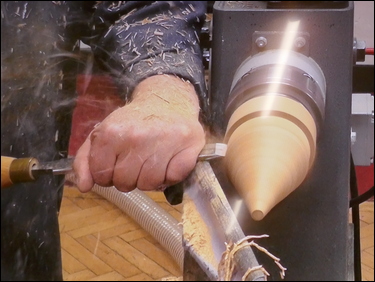
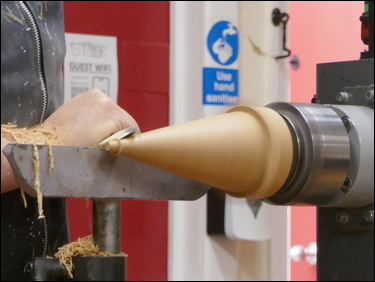
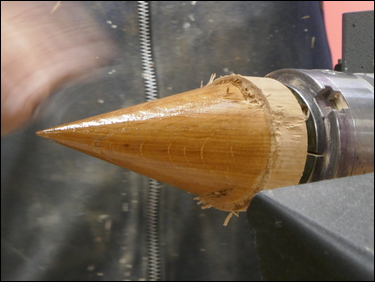
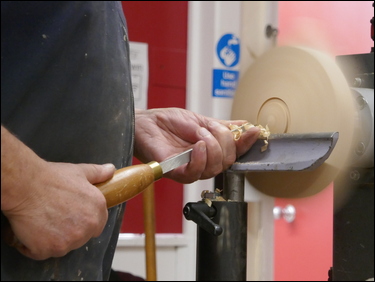
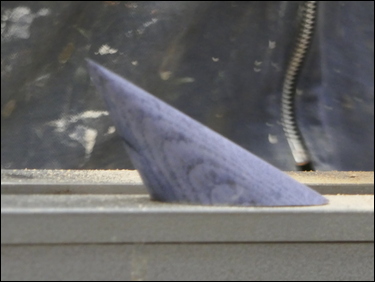
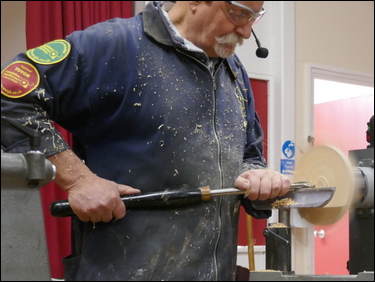
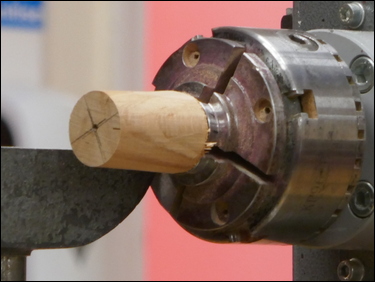
Bryan started with a piece of oak approx. 3" square by 8" long, mounted between centres. Using a spindle roughing gouge he trued it to round, squared the end and cut a tenon on the tailstock end. Now mounted in a 4-jaw chuck - the tailstock end was trued with a skew chisel and a groove cut near the chuck to provide some 'working room.' The cone shape was roughed out with the spindle roughing gouge and then finish turned smooth with a skew. Bryan provided plenty of tuition basics along the way - marking a black line on the centre of the skew (the woodturners plane) to emphasise the 'pivot' point, and showed how easy it was to get a (deliberate) catch in the work. The cone was sanded through the grits to finish. Bryan then applied white vinegar rubbed into the grain with wire wool to achieve a blue/ black stain, produced by the vinegar and wire wool reacting with the tannins in the oak. The cone - still mounted in the chuck was removed from the lathe.
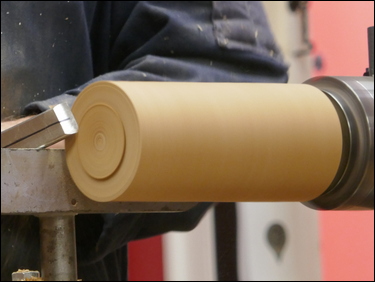
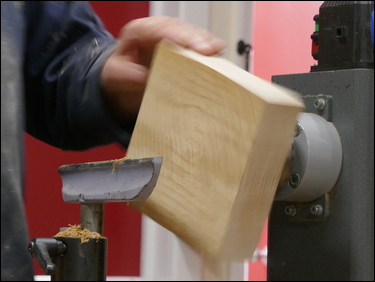
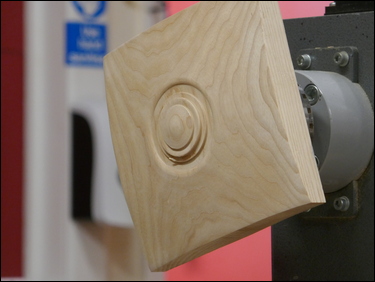
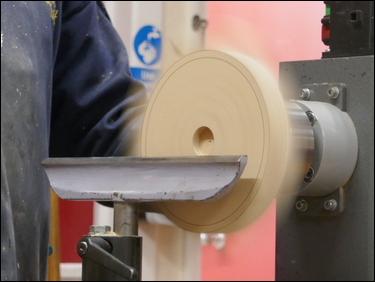
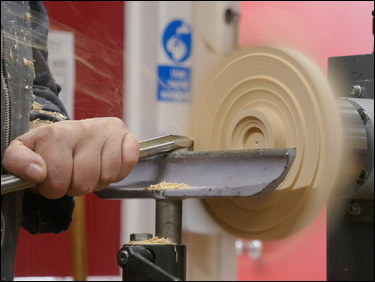
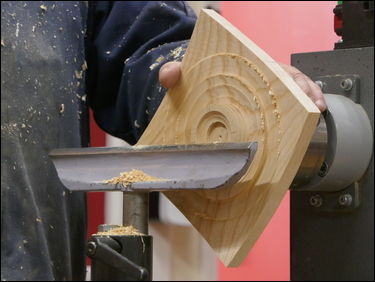
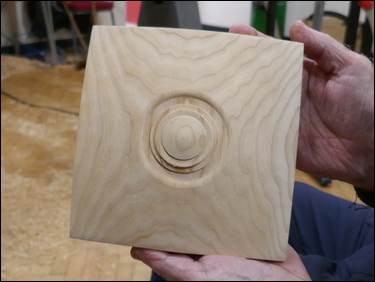
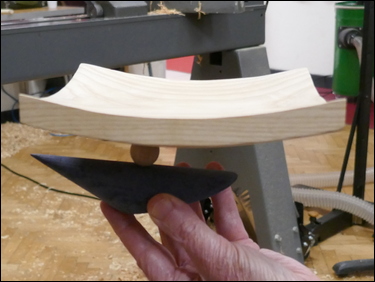
The ash bowl blank, cut accurately to 7" square by 2" thick, was mounted in a 30 mm diameter Forstner bit hole - that had been previously drilled on a drill press - on a 4-jaw chuck. An angle was cut on the front of the blank, attempting to match the taper angle of the cone. Bryan emphasised the danger of the rapidly spinning corners of the blank - and stressed the need for caution when turning in this area. It was suggested that a piece of tape should be applied to the toolrest to define the closest a hand/ fingers could travel along the toolrest, and stay safe. The part was power-sanded as far as possible - then the 'corners' were sanded with the spindle stopped. A decorative feature - several grooves and a rounded end were cut into the base of the bowl. One of the 'grooves' was sized to produce a spigot to fit the jaws of a 4-jaw chuck. These were all finish sanded.
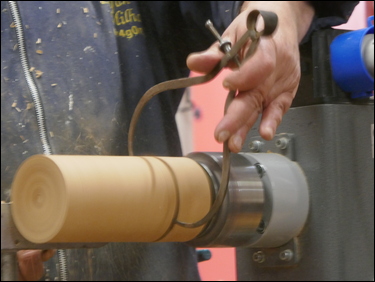
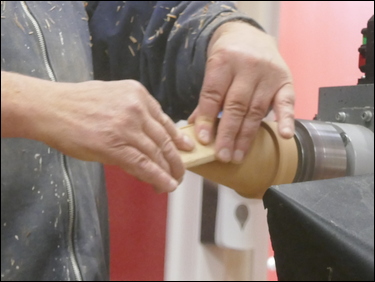
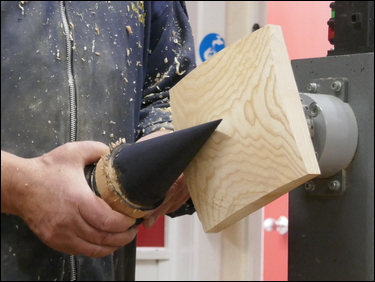
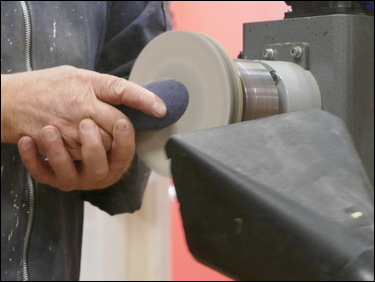
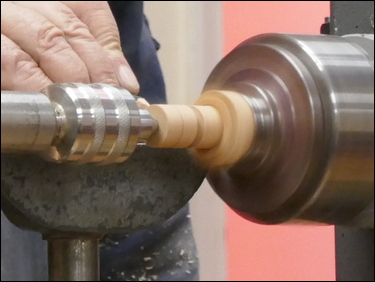
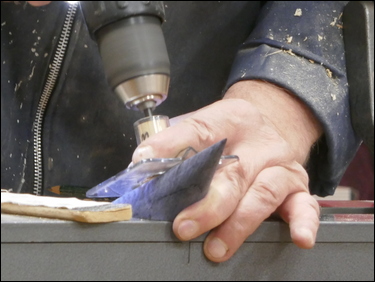
The cone and chuck were re-mounted on the lathe, and the spindle was locked in position. Bryan then used a fine-tooth, Japanese pull-saw the cut the cone off at an angle. A home-made, Velcro faced sanding disk was mounted in the chuck and the base of the cone was finish sanded.
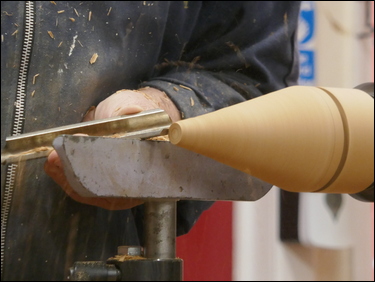
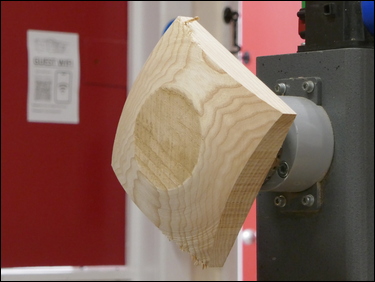
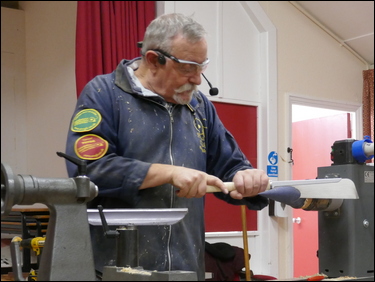
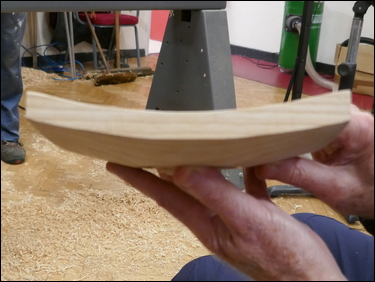
The bowl was re-mounted in the 4-jaw chuck, on the spigot to enable the piece to be hollowed. A bowl gouge was used throughout the hollowing process, with multiple checks carried out on the wall thickness being made, and hollowing to achieve a constant wall thickness, which resulted in parallel edges on the bowl. The bowl was then power sanded through the grits.
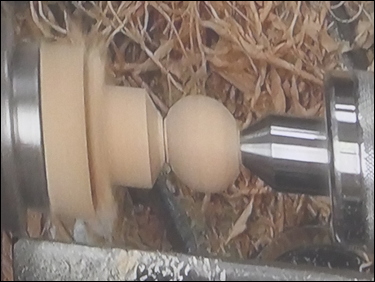
The third component was the making of a small 19 mm diameter sphere. A piece of ash - 1 ¼" square by 2 ¼" long was held between centres, one end was rounded and a spigot was cut for a 4-jaw chuck. This was then mounted in the chuck and a 5 mm diameter hole was drilled through the part. Tailstock support was provided and Bryan proceeded to turn a sphere, utilising a skew chisel. The sphere was finish sanded and was then parted off with the skew, into the drilled hole.
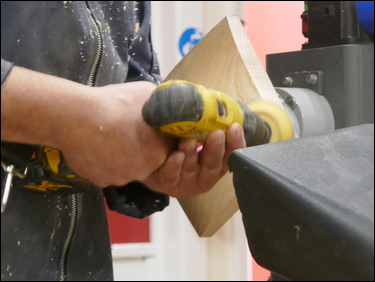
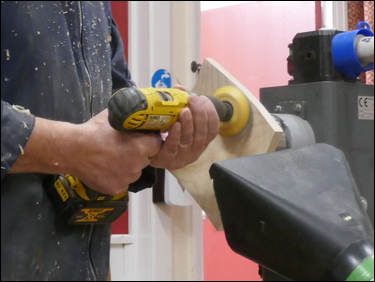
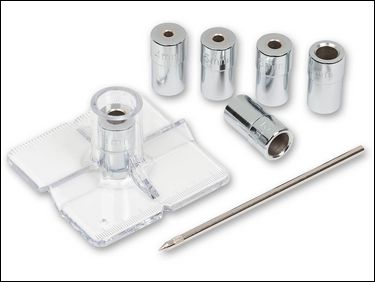
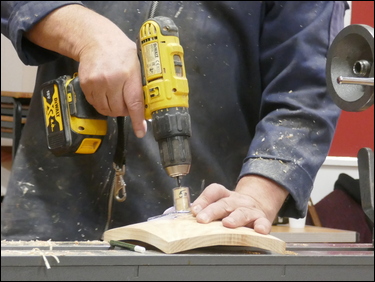
Next, the assembly of the three component parts. Bryan marked the position for the hole and then used a very simple drill guide kit - where a bush mounted in the guide, was held onto the cone shape. The guide held the drill square to the surface as Bryan drilled a 5 mm diameter hole. The marking out and drilling was then repeated on the underside of the bowl. A 5 mm diameter brass rod was cut to length and the three components were assembled using CA glue.
NOTE: the drill guide used in the demonstration was Part Number: 210235 - which is available from Axminster Tools.
See: https://www.axminstertools.com/axminster-drill-guide-kit-210235
Tonight, we were treated to the processes and techniques, with plenty of hints and tips, needed for making three individual components - that were assembled to create a very different and attractive piece of work.
Thank you, Bryan!
 |
 |
 |
 |
 |
 |
 |
 |
 |
 |
 |
 |
 |
 |
 |
 |
 |
 |
 |
 |
 |
 |
 |
 |
 |
 |
 |
 |
 |
 |
 |
 |
 |
 |
 |
 |
 |
 |
The Display Table was well supported and showed a number of interesting items...
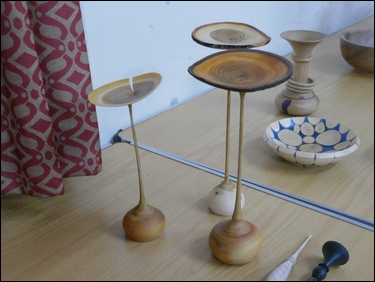
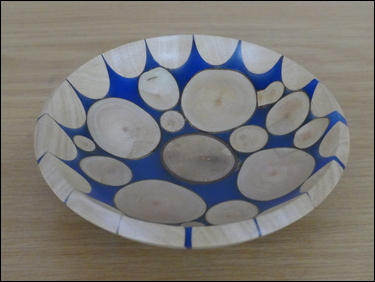
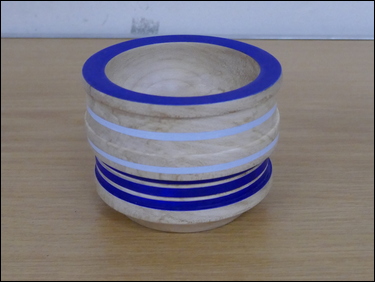
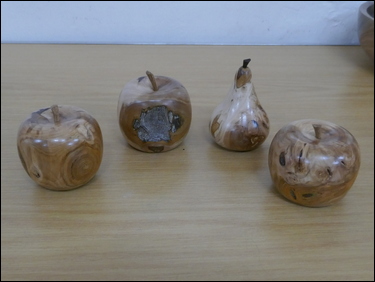
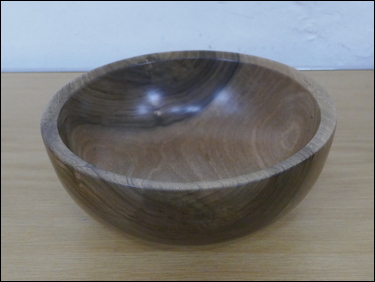
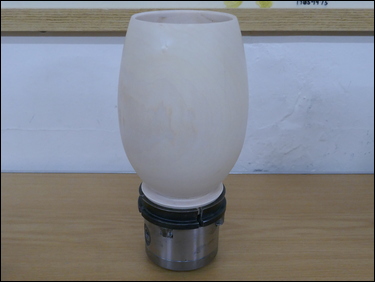
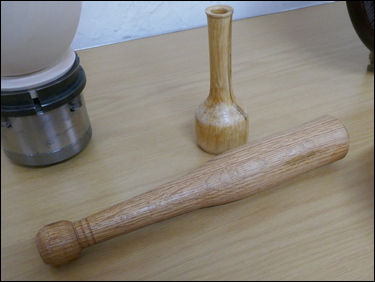
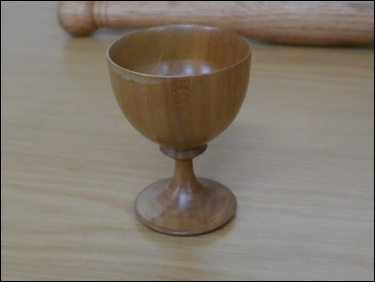
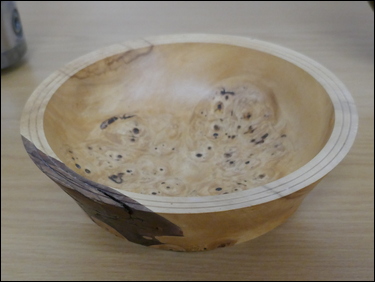
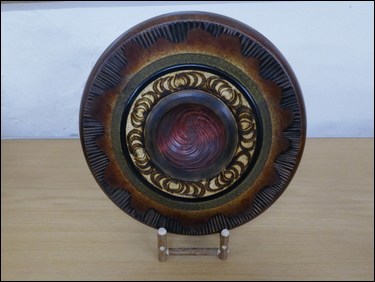
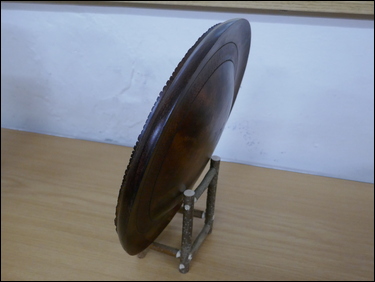
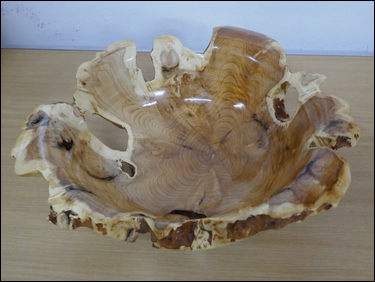
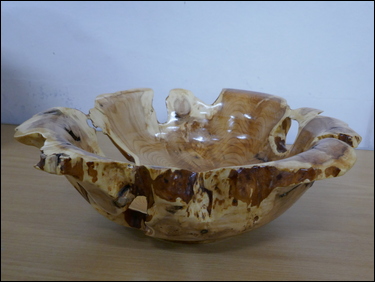
Martin Barrett had several items on display, where he showed the marking-out of a blank and the finished result of the making of spiral flute finials. He also showed three very thin stemmed goblets made from wet cherry. Dave Branscombe presented a composite resin and timber slices bowl made in silicon rubber mould - and then turned. His second item was a small elm vase holding three captive rings. Ayhan Dawood showed an experimental practice piece, where he used colour and Milliput epoxy putty in the making of a small straight sided cup. Steve Alexander displayed several apples and a pear made from the branch of a Bramley apple tree. Tim Mortimer presented a walnut bowl, along with a large, tall, thin-wall, sycamore vase. He was looking for suggestions as to what to do with it next? The consensus of opinion said that it should be stained/ coloured. George Gansbuehler showed an oak, skew chisel practice piece - where he had made a rounders bat. He had also made a small weed pot, made from a hornbeam branch, rescued from a Council skip. John Lockhart placed three items on the table - the first was a small thin-wall goblet made in cherry, the second was a fine bowl made from a horse chestnut burr and the third was a very large salad bowl made from an apple burr - utilising a bowl saver to get the most timber out of the wood. Frans Brown presented a large sycamore, shallow bowl, that he had turned, textured, carved, stained and pyrographed to create different decorative effects on its surfaces. The back of the bowl was rounded and had also been textured. Don Webster showed a large yew root bowl, that owing to its delicate and holey nature had taken him a 'while' to make. The surface finish was a number of coats of finishing oil.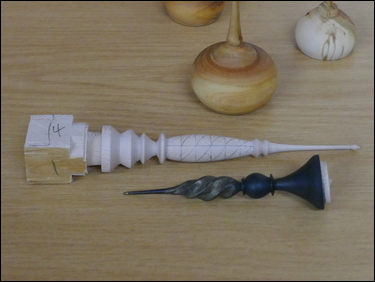 |
 |
 |
 |
 |
 |
 |
 |
 |
 |
 |
 |
 |
 |
 |
 |