
Club Night Report
Wednesday 10th June 2015
Club Night Report for 10th June 2015 - observations by Vernon Hughes
 |
 |
 |
He started by fabricating a pair of screw chucks, one of which was needed to make the first piece of the evening, an apple. He then went on to make a bracelet and a matching pendant, to give a short introduction to egg turning using a highly original cup chuck and then finished off by completing a bowl originally turned wet which had become seriously misshapen during the drying phase. All of this was achieved in the time it would take many of us to work out how to make the pair of chucks.
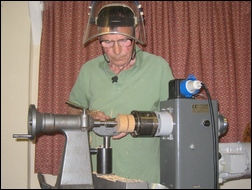
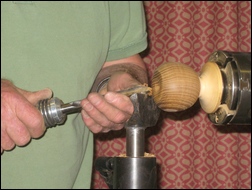
Wasting not a second Dave plunged straight into making the screw chucks using a single blank 70 x 70 x 60 mm - which would make 2-chucks. This was mounted between ring centres, and using a 2" roughing gouge it was quickly converted to a cylinder. Very short dovetail spigots (say 3 mm) were turned on both ends to a size to suit his Axminster chuck jaws. The blank was then mounted in the 4-jaw chuck on one of the spigots. The mid-point of the cylinder was found by eye and marked with two faint pencil lines. A parting cut was made at that point but stopped leaving a central diameter of say 25 mm. Parting was then completed with a fine saw. A centre hole for the screw was made in two steps using a hand-held engineering drill set into a steel handle. To prevent 'wander' a short section of drill bit was used initially, the bit then being extended to sufficient length to complete the hole right through (subsequently proven to be at the dead centre of the chuck body). The smaller end of the chuck was dished slightly, the screw was super-glued into place after countersinking and a leather washer was positioned on the screw to give a soft point of contact during turning. Dave gave a fine point of advice about removing and then remounting a piece during the final stages of make - mark with a pencil the jaw holding positions on the spigot to permit re-mounting in exactly the same position to sustain perfect accuracy throughout the whole procedure.
 |
 |
 |
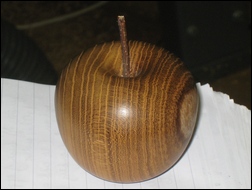 |
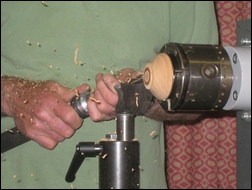
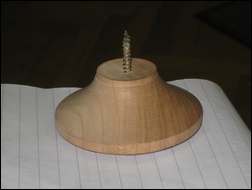
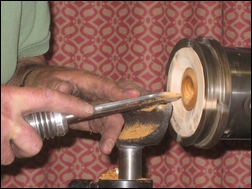
Apple - Dave mounted a 70 x 70 x 60 mm Laburnum blank on the screw chuck with ring centre support at the tailstock end. He explained that 'the rule of thirds' works well with fruit whilst marking the blank with a pencil-line at circa one third distance from the headstock end. Keeping the pencil-line he first partly shaped the top of the apple and then the lower section. The tailstock was moved back to permit taking out the lower core centre into which a clove would be inserted later. The apple was then reversed on the screw chuck, to complete shaping/ rounding of the top of the apple, a small spindle gouge then being used with a drawing (not pushing) action to make the hollow for the stem. The apple was sanded through the grits and then removed from the chuck. A home-made mandrel/ pigtail holder was then mounted in the chuck jaws - complete with a first buffing mop. Sanding sealer was applied and wiped dry at once before buffing. A fresh mop loaded with carnauba wax was then used to burnish the apple. The final task was to drill deeper at both ends before inserting the top stalk and clove at the base centre. The former can be any suitable type of hedgerow material; his was from a Weeping Birch in this case, but Dave advocated close observation of nature's design, which should then be copied by careful sourcing. Click here to download Dave's PDF file on making the screw chuck and an apple.
 |
 |
 |
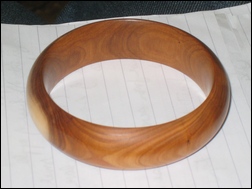 |
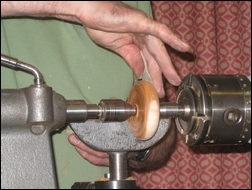
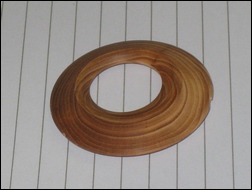
Bracelet - A circa 90 mm diameter blank of Yew branch wood was used for this. Thickness was approx. 25 mm. This selection gave the opportunity to retain a flash of white sapwood on at least one part of the finished piece. The blank was mounted between ring centres with the object of producing a bracelet of outer diameter 85 mm and inner diameter of about 67 mm. Precision is important to the appearance of this product.
The outside diameter was turned to 85 mm diameter and both end faces of the blank were cleaned up. The centre point was marked on the width of the blank - followed by a pencilled circle of 67 mm on both faces. The outside surface was then shaped with care to a bead/ smooth dome shape with a spindle gouge. Sanding of that surface was completed there and then. The tailstock was then taken back and the piece would normally be transferred to specially made wooden chuck jaws designed to grip the bracelet without marking it. Unfortunately, they had been left at home! However, a solution came at once to the practiced hand. Larger jaws were fitted (in a trice or two) to Dave's standard chuck and were used to grip the finished outer surface of the bracelet, but not before four strips of fine leather were inserted to protect the sanded surface. A narrow parting tool was then used at the 67 mm line to penetrate about half way into the blank, which was then promptly reversed to complete the centre removal stage. The toolrest was brought up very close to the work for this step. Slight shaping of the inside of the bracelet was then undertaken first on one side and then on the other after reversing. The surface was sanded through the grits as normal. Sealing was achieved in-hand, as with the apple, and the bracelet was then handed round unpolished for inspection. Perhaps the outstanding aspect of this highly skilled achievement was the demonstrated ability to grip a finished outer surface in metal chuck jaws without leaving any sort of mark provided you have strips of leather to hand.
 |
 |
 |
 |
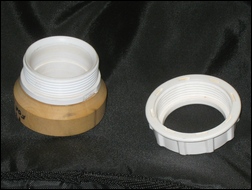 |
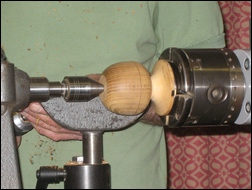
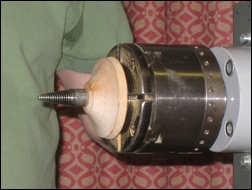
Egg - Dave said an egg should be made from an 50 mm diameter by 80 mm long blank (to produce a finished size egg at approx. 45 mm diameter by 60 mm long) to suit the exceptional/ original cup chuck he had found for holding it whilst finishing the ends. This turned out to be a 40 mm B & Q kitchen drain coupling/ waste connector - which, when screwed tight, holds the egg perfectly. The coupling can be fitted with your own make of wooden adapter to fit in your chuck.
 |
 |
 |
 |
 |
 |
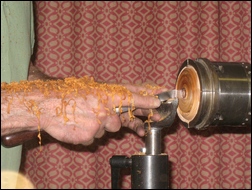
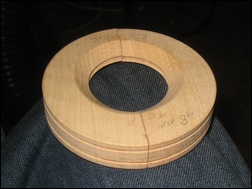
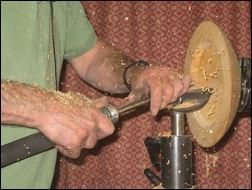
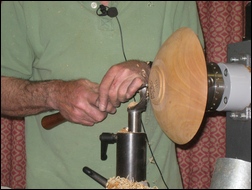
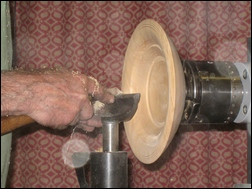
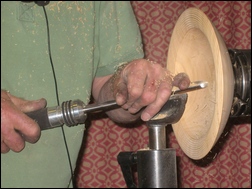
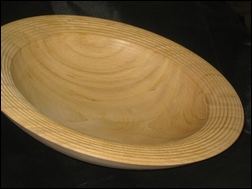
Bowl - This was an approx. 9" diameter, previously rough-turned bowl (with rim) in Cherry that had dried seriously out of shape. It had a short foot and the usual short spigot that was used now to remount the bowl. Briefly, it was faced off at the rim and the inside was re-cut. Then, most unusually, a dovetail groove was cut on the inside of the bowl at 108 mm diameter using a skew. This was to provide a fixing point for his large chuck jaws but Dave emphasized that the technique could be used for any size of jaws available. The bowl was then reversed into that groove and it held perfectly. The foot and outside surface were then reshaped and perfected in very careful and precise steps. The piece was then reversed again to finish the rim and the inside surface. Again, this was done with great care and attention to fine points. The last but one step was to decorate the rim using his renowned design of beading tool, a parting tool to which a chainsaw file had been applied to produce two pointed tines on either side of a gentle curve. Final shaping of the inside of the bowl was then completed.
Dave finished all the aforementioned work well within the time allowed and had remained as cool as a cucumber, as they say, throughout. This had been a stupendous achievement made with effortless ease by one of the best in the business. Thanks a million Dave on behalf of all present!
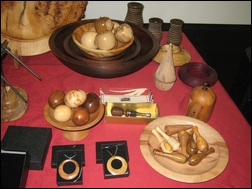
This month's Show and Tell theme was - A Pierced or Lattice Work Item.
Unfortunately, this was not well-supported - although those Members who did put items on the table are clearly, very talented, highly skilled and good-looking individuals... ;-)
|
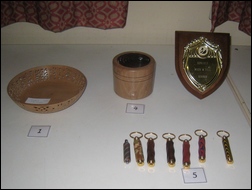
Harry Rock entered a lidded box in Beech with a latticed insert and |
 |
 |
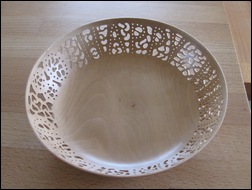
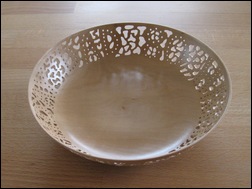
| This month's winning entry was from David Branscombe with a thin walled and very cleverly designed and executed pierced dish. It was made as an 80th birthday gift for his father Richard. The pierced letters around the sides read - "Happy Birthday Dad 80" |
 |
 |