
The Lockdown Projects - Page 1
On this page there will be displays of work created by Members whilst on lockdown. These are the 'Lockdown Projects'. This is the equivalent of the 'display table' from Club nights. This is Page 1 of the projects - click HERE to display Page 2 or HERE to display Page 3 and HERE to display Page 4 or HERE to display Page 5
or HERE to display Page 6
Here is some of the Members' work created in lockdown…
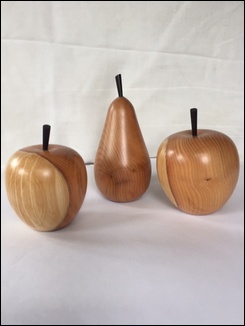
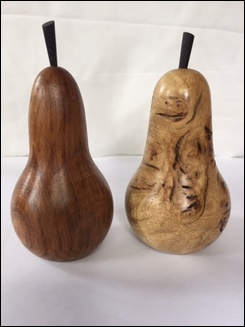
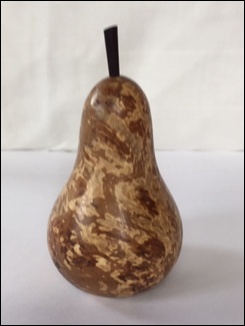
| Ken Gateley has been quite busy in his workshop recently. He decided to have a go at making apples and pears in various timbers - left to right - 3 in yew, brown oak, burr oak and copper beech burr, all with ebony stalks. |
||
 |
 |
 |
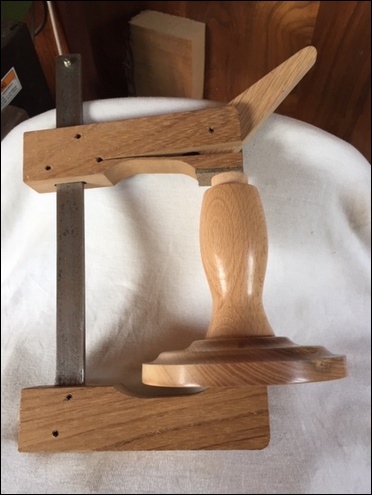
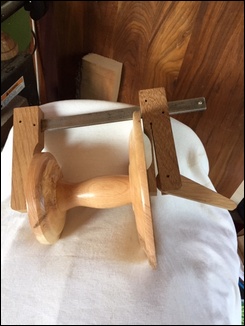
| Here we have an example of utilising a tool made originally as a project from the NWWA Jigs and Tools special interest group. |
||
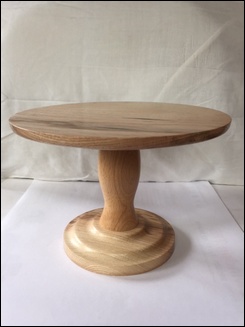
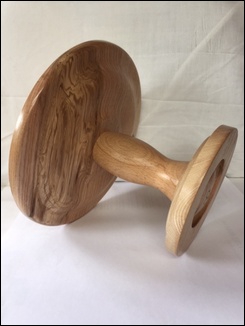
| The Jigs and Tools project was to make a number of Klemmsia (style) cam clamps. Ken made two different sizes. This type of clamp exerts the pressure via an eccentric cam (top right in the photo) - and has cork pads on the arms. Here the clamp is used in the glueing up of the three component parts of a cake stand - made in olive ash, with a beech centre support. The stand is approx. 8.5" diameter (top piece) by 5.75" tall. |
 |
|
 |
 |
 |
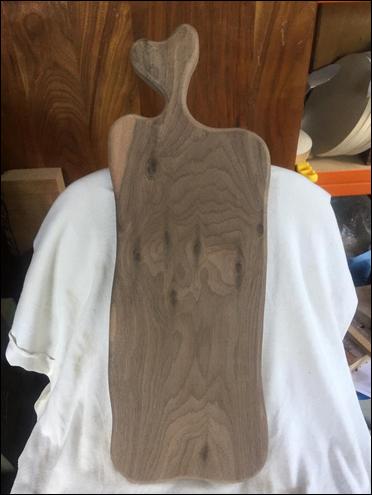
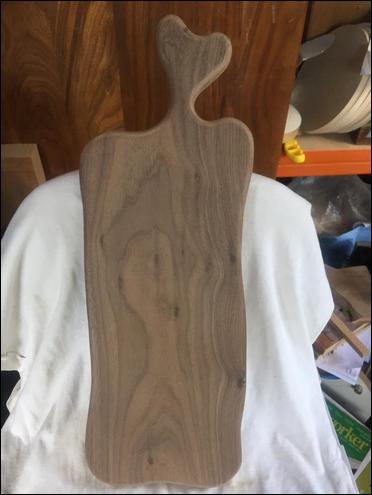
Ken also enjoys 'flat work - here is a chopping/ serving board in walnut - sizes are approx. 18.5" by 6.5" by 1" thick. Sanded on both sides and ready for a couple of coats of rapeseed oil. The heart shaped handle makes an interesting feature. |
||
 |
 |
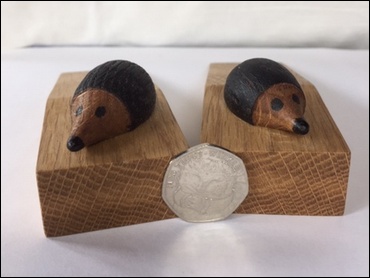
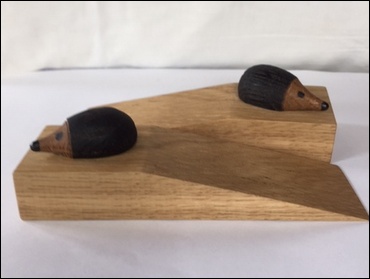
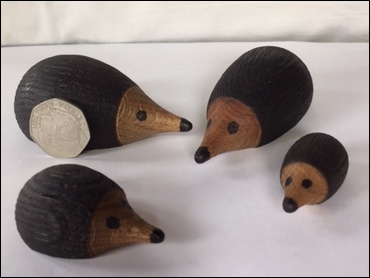
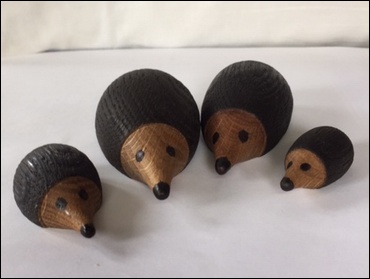
A fun project - making hedgehogs! These are made in a variety of sizes to create a 'family' - see the 50p coin for an idea of scale. All are made in oak - the largest is approx. 3" long by 1.75" at the widest point and the smallest is 1.5" long by .75" wide. The item is turned, scorched with a blow torch, wire brushed to remove any excess charcoal - which also provides a 'hairy' effect and re-turned to clean up the 'face'. Finally, a flat is sanded on the base and a coat of Liberon finishing oil is applied. The door wedges are also in oak - with the hedgehog held on via two small dowels. |
|
 |
 |
 |
 |
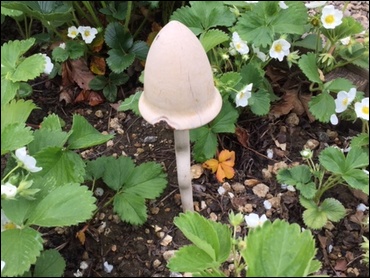
| Something for the garden - a large mushroon - 4.5" tall by 3" diameter in hazel, lurking in the strawberry patch. |
 |
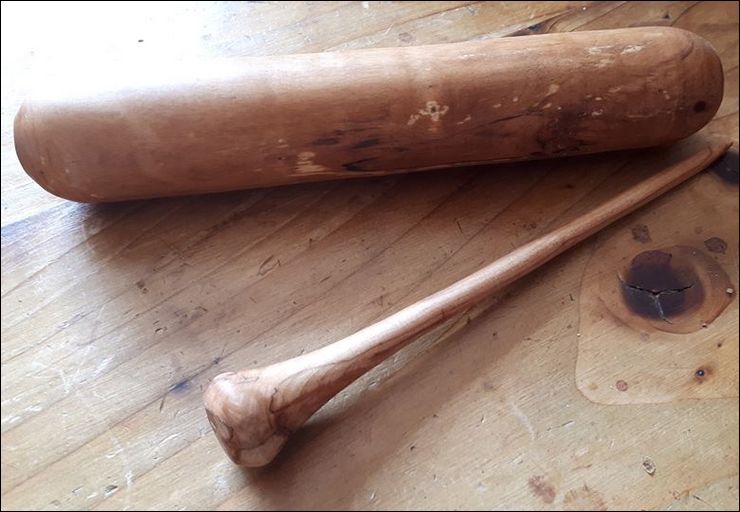
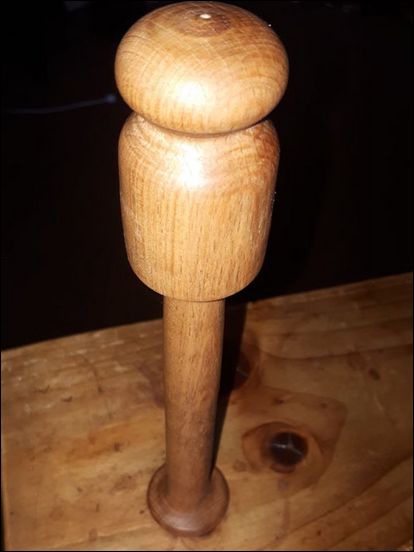
| John Sawyer has been working on a number of projects - here we have a small rolling pin (approx. 8" long) and a hair pin - made in decorative cherry wood from a felled tree in John's garden. Followed by a spurtle (for stirring porridge), made in elm - approx. 6" long by 2" diameter and a lidded salt pot - made in free NWWA timber, species unknown - approx. 4" diameter by 8" tall. All items are finished with food grade Flax Oil (Linseed oil by another name) to avoid any allergy issues. |
|
 |
|
 |
|
 |
 |
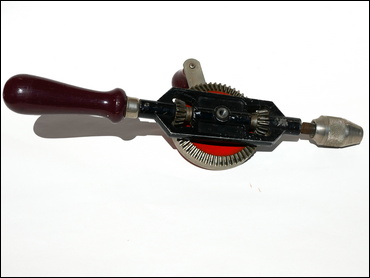
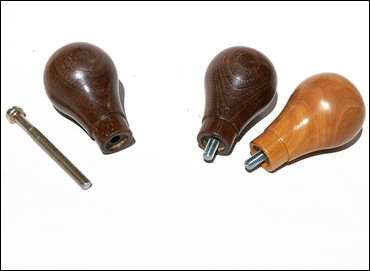
| Harry R eventually ventured into his workshop - now that it is not too cold and has worked on a couple of projects. A friend wanted a replacement handle for an old Stanley 803 hand drill (picked up for £1 at a car boot sale) - there is a very similar model - the Record No.123. A spare was also requested as a 'nice to have'. There are two different designs - the handle on the left (walnut) has a through hole and a bolt - and the two handles on the right (walnut and apple) have a 2" length of M6 threaded rod, superglued in place. The handles are 1.625" diameter by 2.5" long. |
|
 |
 |
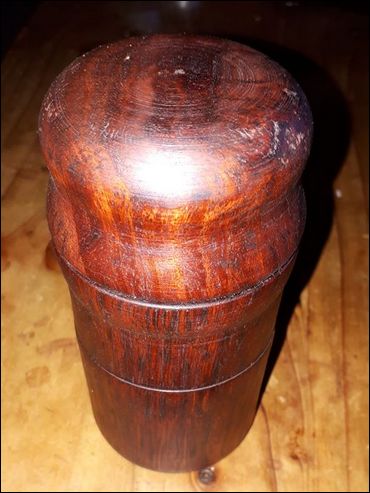
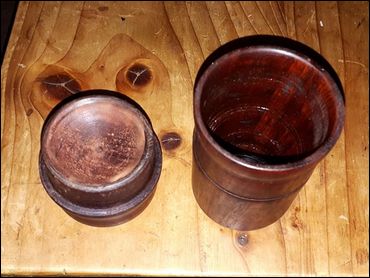
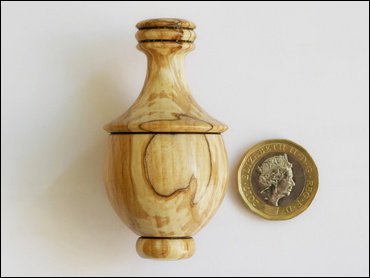
| This light pull in spalted 'treewood' was inspired by an article in the January 2020 edition of Woodturning magazine. The result is a bit 'heavy' for a light pull at 65 mm (2.560") long by 34 mm (1.338") diameter. The shape is loosley based on a 'Grecian Urn'. |
 |
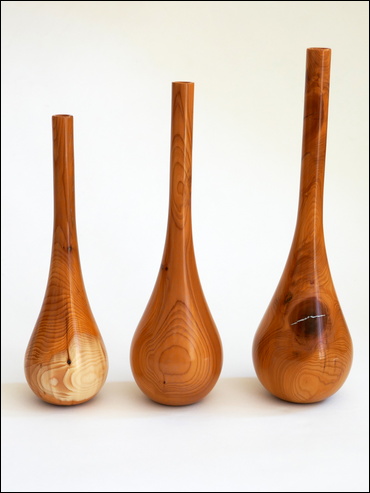
This project was to make a group of three Weed Pots in yew. The timber was originally purchased from NWWA in February 2008... The pots are 11" tall by 3.25" maximum diameter, the diameter at the top is .625". The other two pots are 10" and 9" tall - with all dimensions scaled proportionaly to suit. The largest piece had a split in a knot - later filled with aluminium powder and superglue. This project would work very well in a dark timber. |
|
 |
 |
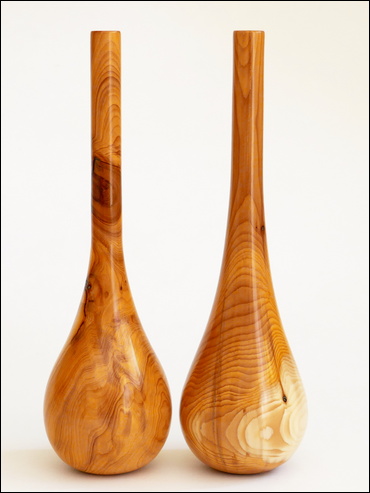
The next two photos are showing a manufacturing failure! The photo on the left is 'wrong' (although it does have gorgeous grain patterns) - as the top parallel section is too long and 'not in proportion' to the other pots. The photo on the right shows a replacement item that is a better fit in the group. |
|
 |
 |
|
|
|
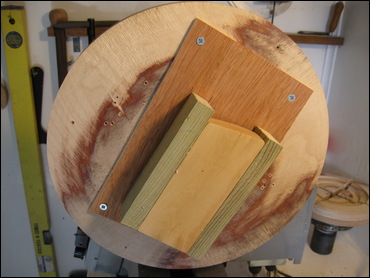
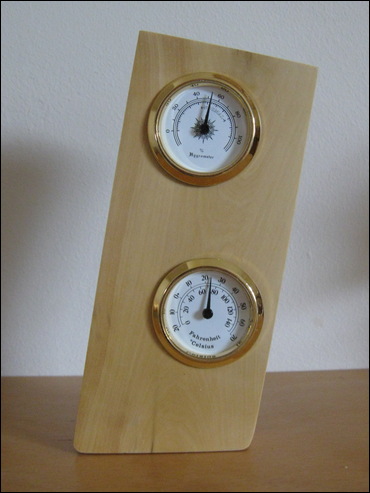
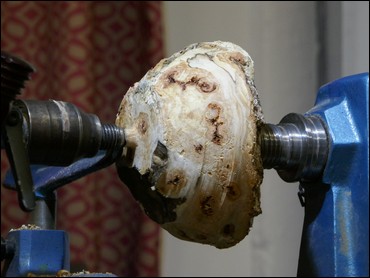
| Richard Branscombe has been exploring off-centre turnings. The first project is a Weather Station - utilising a home-made faceplate. Additional blocks of wood are added to the faceplate to act as counter balances - the turning speed is approx. 500 rpm. |
|
 |
 |
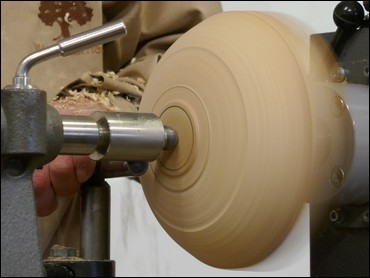
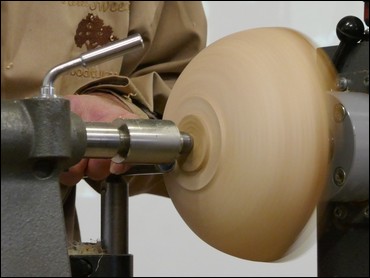
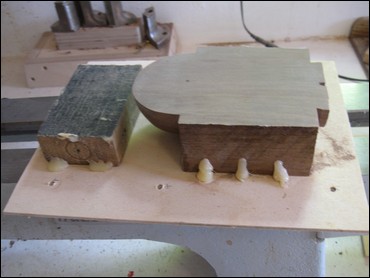
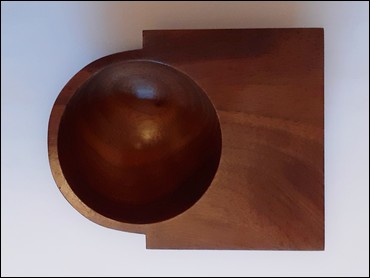
Richard's next project was to create a Peanut Bowl - which involves both split and off-centre turning. He has created a step-by-step set of photos to show how it was made. |
|
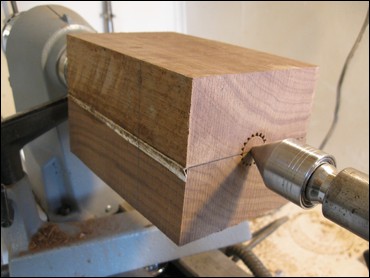
| Two blocks of wood (Walnut) approx 150 x 100 x 50 glued together using a paper joint and mounted on the lathe to turn a spigot to - be held in the chuck |
 |
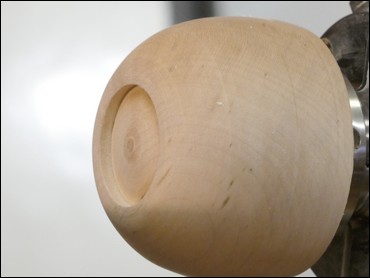
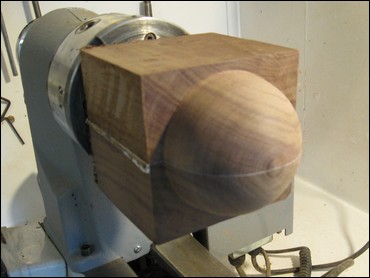
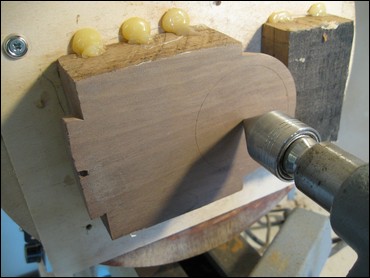
| The workpiece mounted in the chuck and a 80mm dia hemisphere turned on the end using a 1/4" bowl gouge and a 3/8" parting/ beading tool to achieve the sharp corner. A template was used to check the curvature. |
     |
 The turned block is separated at the paper joint and hot-melt glued on to a temporary backing sheet of plywood along with a counter-balance piece of wood The turned block is separated at the paper joint and hot-melt glued on to a temporary backing sheet of plywood along with a counter-balance piece of wood |
 |
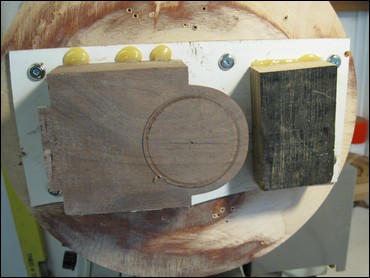
| The workpiece is lined up the centre point of the bowl using the rotating tailstock - before attaching the temporary backing plate on to a larger plywood face plate - mounted on the headstock |
 |
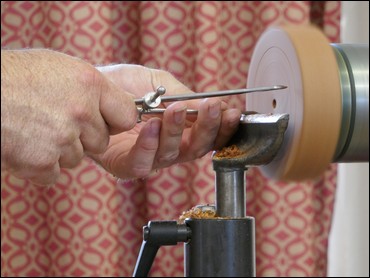
| A very shallow test cut was made to ensure the positioning is correct |
 |
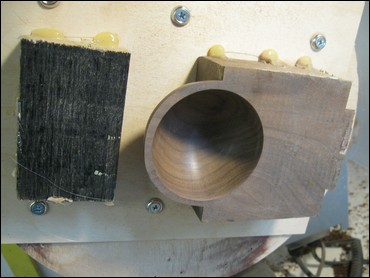
| The bowl with a 70mm diameter hemi-spherical recess after it has been turned, sanded, sealed and finished. The completed bowl was removed from the faceplate - the initial spigot was cut off and then all faces were sanded, sealed and polished. |
 |
| Final result - side view |
 |
| Final result - view from above |
 |
| After having this project partially completed and lying around on his benchtop for a while - Richard finally completed his Handled Jug with matching stopper. The jug is approx. 75 mm diameter by 240 mm tall. The handle was cut from a piece of 8mm thick sapele and hand carved, sanded and then polished. The handle is held in place by 2 x 3mm wooden rivets. The jug was hollowed from the bottom to leave a wall thickness of about 8 mm and then a bottom plate added to finish it off. The timber used was sapele and has been finished with sanding sealer and polished via the Beal Buffing system. |
 |
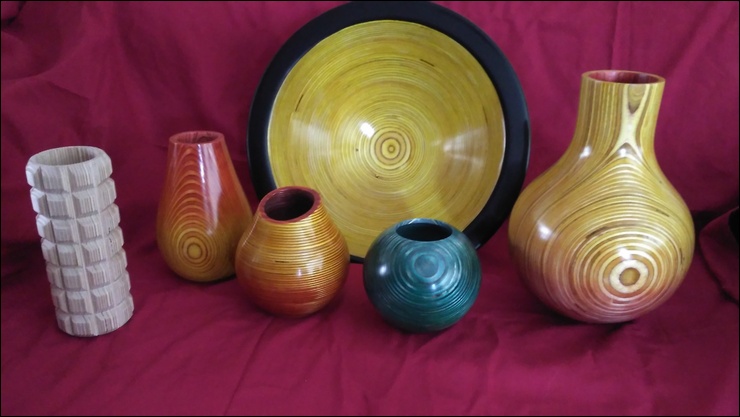
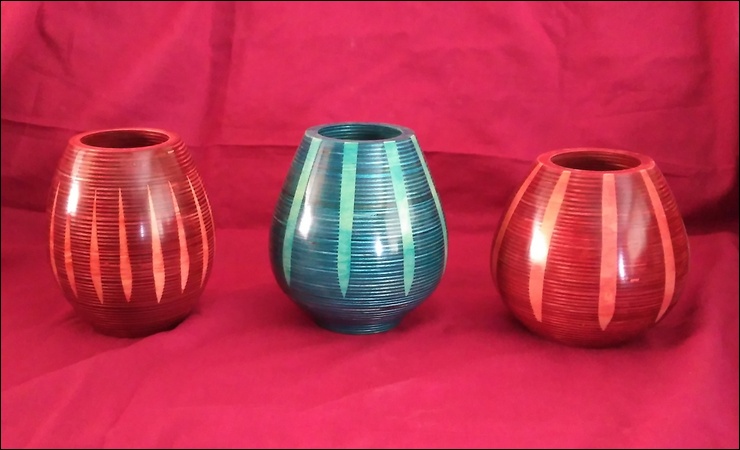
| Bob Sawyer has been 'playing' with plywood! Here are some examples of his results - incorporating some work with a router and colouring. Evostick PVA wood glue was used to glue the stacks of blanks - mainly for its fast grab ability. NOTE: the different orientations of the 'stacks' of timber - horizontal, vertical and at 45 degrees. Chestnut spirit stains were used for the colouring. To get an idea of the sizes of the items - the red/ yellow pot (2nd from the left in the picture below) is approx. 5" diameter by 7" tall and the blue spherical shaped pot is approx. 6" diameter. |
|
 |
|
 |
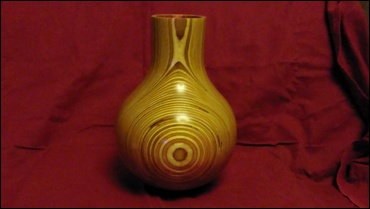 |
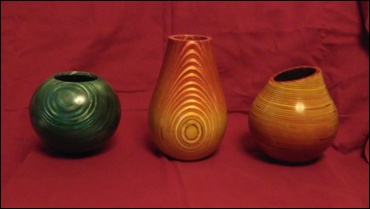
Bob has also been working with his router on the lathe. Using a 'V' shaped cutter a number of grooves are cut around the outside profile and then filled with Ronseal Multipurpose Wood Filler (readily available from Toolstation, Screwfix, Wickes etc.). After drying and sanding the project was stained - Chestnut Spirit Stain - NOTE: the stain does not penetrate as well into the filler as it does into the wood. Finally, melamine lacquer and waxed. The left and middle pots are approx. 6" tall and the pot on the right is approx. 5" tall. |
|
 |
|
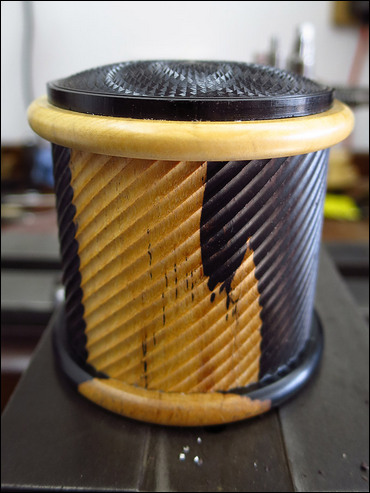
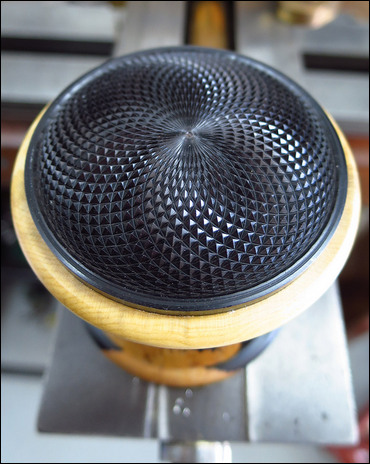
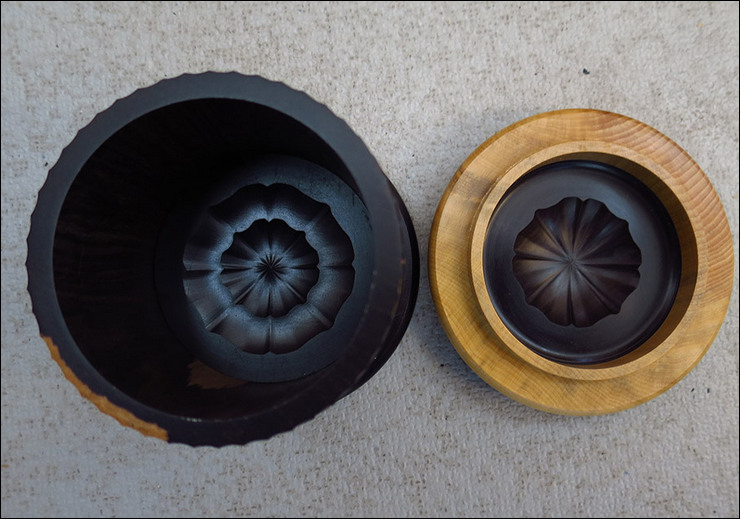
| Arthur Kingdon has created a box in African blackwood, with some sapwood, along with a bead of boxwood on the lid. There are 48 spiral flutes on the box body and 48 eccentric circles on the domed lid. This was machined on an Evans ornamental turning lathe dating from 1880! The interior of the base and the underside of the lid were decorated using a rose engine, that was made by a toolmaker friend of Arthur's using a mixture of old and new components. |
|
 |
 |
 |
|
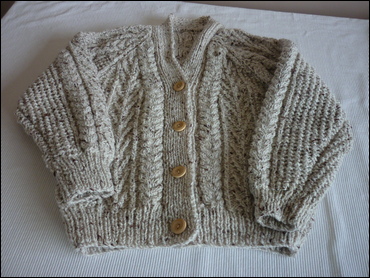
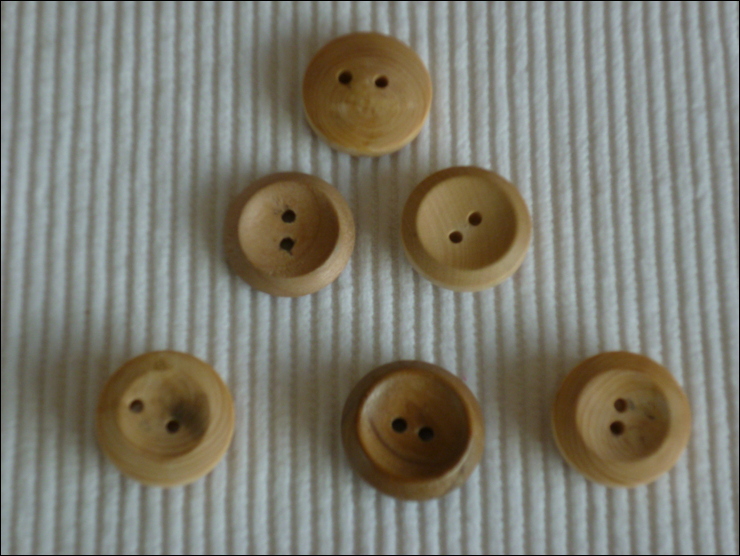
| Ian Full has been in his workshop making Buttons - to be sewn onto some knitwear made by his wife. Ian's wife knits for a friends charity and had completed two cardigans - white/ tan cardigan (left) would fit an 18 month old child and the darker cardigan (right) would be suitable for a 12 year old child. However, she was unable to go shopping for the buttons needed to complete the items. Ian made the buttons (all were 22 mm diameter) - one set in box wood, turned with the grain parallel to the bed and a second set in cherry, with the grain across the bed. Both ways of the grain direction seemed suitable. |
|
 |
 |
 |
|
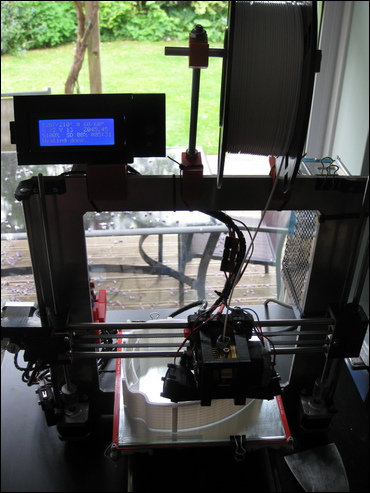
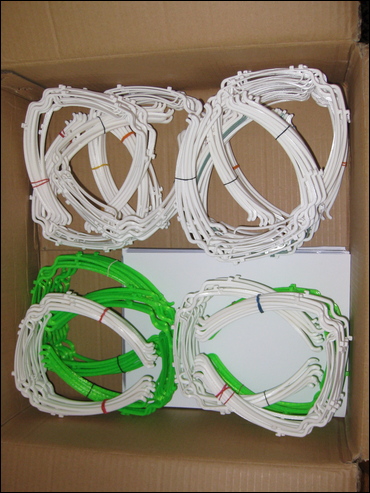
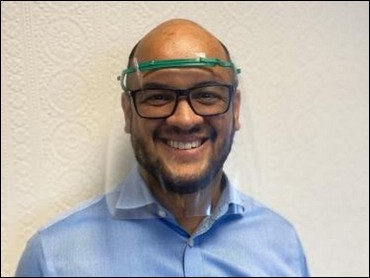
| Mike Crawshaw For the last 6 weeks (currently it is mid-May) of the lockdown Mike has been printing PPE Visor Frames on his 3D destop printer. This is an essential part of the Personal Protective Equipment that will protect the user against health or safety risks at work He is a member of a local group - Shield Wiltshire - which has a large number of volunteers printing or delivering visors in the local community. They have already delivered over 14,000 visors to Wiltshire and Thames Valley Police, care homes, pharmacies, voluntary groups, undertakers and Erlestoke Prison, which ordered 500 units. 1,000+ visors went to Great Western Hospital in Swindon. Mike reports that he has learned a lot more about 3D printing, especially the variation in filaments that are nominally the same. |
|
 |
 |
| Example of the Visor in use - the acetate shield - approx. A4 size - is clipped to the headband made on the 3D printer. Note: this is NOT a photo of Mike :-) |
 |
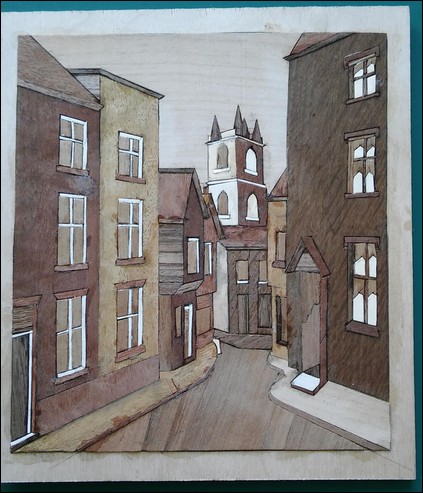
| Eric 'Sam' Pearce has been busy in his workshop completing a marquetry picture originally started by his father. The size is approx. 7" wide by 8" tall. |
|
 |
|
| <Top of Page> |
|