
Club Night Report
Wednesday 9th September 2015
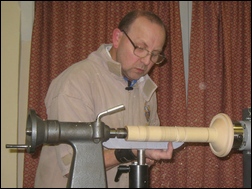
Club Night Report for 9th September 2015 - observations by Vernon Hughes
 |
 |
 |
 |
 |
 |
Maintaining his policy of avoiding repetition he had decided on a candlestick as his spindle turning demonstration piece and gave us a choice from two designs. Both were as fine as you would expect but we seemed to have no difficulty in making up our minds. The chosen design was then carefully wrapped and put away as if to make the point that our stick would be made using measurements and working to a plan, not by reference to 'one made earlier'.
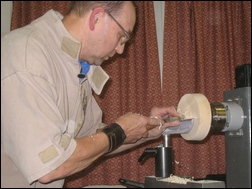
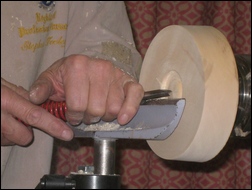
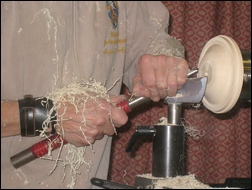
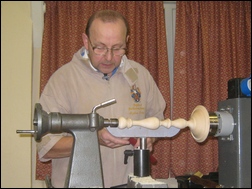
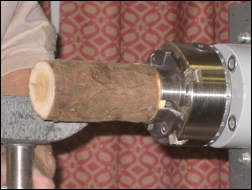
Steve started by explaining that he likes to bring a large display of finished work but could not do so this time because the bulk had been packed with most of his tools for shipment to Ireland for a major symposium there (The Orange) to which he had been invited for the first time.With candlesticks he always makes the base first and he mounted a circa 7" diameter blank of Sycamore on a screw chuck, with tailstock support initially. He mentioned for the benefit of less experienced turners that the diameter of the hole drilled should match that of the core of the screw, not the full thread-inclusive diameter. In this case the screw was over-long for purpose; he overcame that by use of spacer discs. Work on the underside of the base was fairly conventional but so professionally executed including sheer scraping of the highest order - "better than abrasives" - (fine, fine shavings from a lowered toolrest position and using pushing and pulling gouge movement). Features included undercut (dished) base and a finely cut 2" diameter recess for chuck mounting with a perfectly crafted 'button feature' at its centre. Steve emphasised the importance of protection against dust at all times. An explanation of his preferred finishing process was then given although he would leave his work unfinished for others to complete due to the timescale needed. Sealing and waxing would be fine but he strongly favours oiling. He always uses 'Chestnut' finishing oil and applies between 10 and 15 coats on larger items. They are applied allowing for 'drying' between each coat until the timber's 'suction' demands have been completely satisfied. Upon reversing the blank it was deemed to be too thick and Steve started reduction by producing a thin ring obtained by pushing a fine parting tool into the top surface near the rim and then a similar position on the side. The ring was sufficiently substantial to be capable of use for any number of purposes. The base was then shaped to acceptable proportions and lines before a Forstner bit was used to cut a 25 mm hole of suitable depth. It was then de-mounted for work on the stem to proceed but would be re-mounted later.
 |
 |
 |
 |
 |
 |
 |
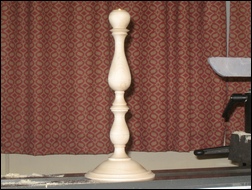 |
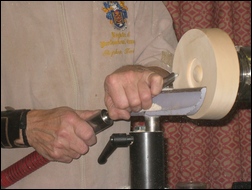
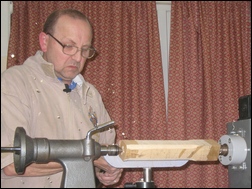
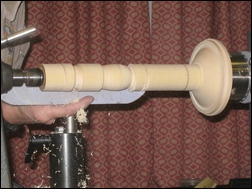
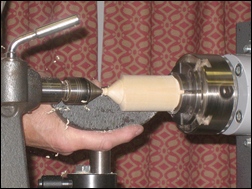
The square-section blank for the stem measured about 12" x 2" square and was mounted between a 4-prong drive centre and a revolving centre at the tailstock end. A spigot to fit into the base was soon made at the tailstock end, care being taken over all dimensions, and the need to allow space for the accommodation of glue was emphasized. This included cutting two shallow ring grooves in the spigot.
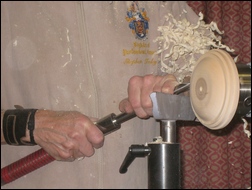
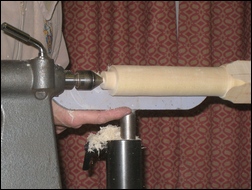
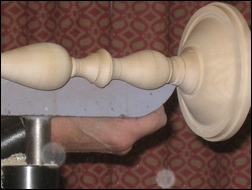
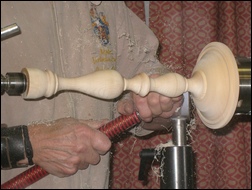
The base was then re-mounted in the chuck and the stem fitted into the base for completion of the stem-shaping phase. The reason for this order of work is to get the shape of the complete piece right throughout, and to achieve a happy marriage between stem and base. Roughing down and shaping commenced at the tailstock end over about a third of the length initially, but extending gradually all the way down to the base. Measuring and marking disciplines were applied rigidly throughout, in most cases removal of pencil marks at high and low points being left to the very last moment. If vibration occurs as the stem becomes thinner it can usually be overcome by taking the tailstock back a tad to relieve the tension. The many points of general advice included the following: during shaping "if you don't like, don't do!" (said near the base); when cutting waste - practice tool action in the waste as you get to the desired shape; it is permissible to go against the grain over very short sections at a time; in spindle work the shapes used boil down to beads, coves and fillets in various forms and an angled fillet can be seen as a bird's beak; spindle turning is fascinating because it provides so much opportunity to use the three basic shapes; when appropriate remove the piece from the lathe to stand it upright to check acceptability of overall appearance.
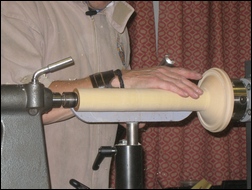
The final task was to finish the top of the stem and prepare it to receive a brass cup for the candle. In this case the work had to be done (cleverly) with tailstock in place because the stem was not a sufficiently tight fit in the base. Steve then rounded off this part of his demonstration by emphasizing a golden rule - in spindle work - always work from high points to low!
 |
 |
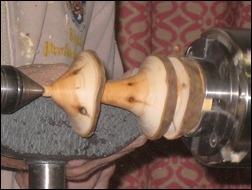
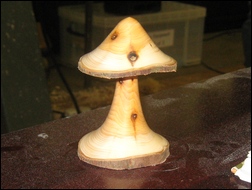
We were then shown how to make an appealing-looking hedgehog and a classic mushroom.
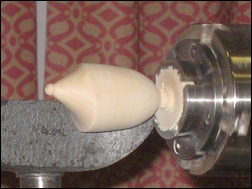
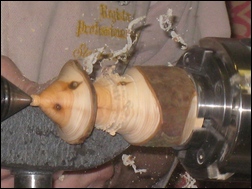
The hedgehog started with a square section 7" x 2" square blank mounted in dovetail jaws on this occasion but gripper jaws should normally be used. Roughing down to a cylinder was started at the tailstock end and completed by reversing the blank in the jaws. A length of about 4" long was then parted off and mounted in the dovetail jaws in readiness for a finely engineered adjustment. Having previously sharpened a spindle gouge to perfection - Steve reversed it and struck the blank with the handle to achieve perfect off-centre realignment! (approx. 5 mm). The tailstock point was then brought up, making contact well away from the original centre but still inside the perimeter line. This permitted shaping of the hedgehog with the tailstock removed briefly at one point. The timber was then re-seated back on centre for the shaping of the rounded 'rear end' and finally parted off. The finished creature would then have 'eyes' and 'spines' burnt in appropriately, and a flat spot made on the base to permit stable positioning.
 |
 |
 |
 |
This had been a thoroughly entertaining and instructive evening in the hands of a consummate professional. Thanks Steve!
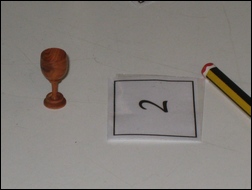
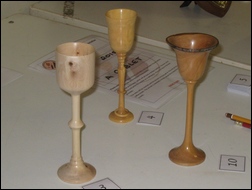
This month's Show and Tell theme was - A Goblet. This was not well supported - nevertheless, there was a very nice miniature goblet complete with captive ring and a natural edged goblet in Apple.
 |
 |
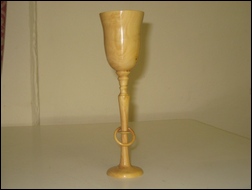
| This month's Show and Tell winner is Richard Branscombe's goblet made in Box wood complete with a captive ring. |
 |