
Club Night Report
Wednesday 11th October2017
Club Night Report for 11th October 2017 - observations by Vernon Hughes
 |
 |
 |
 |
 |
 |
 |
 |
 |
 |
 |
 |
 |
 |
 |
 |
 |
 |
 |
 |
 |
 |
 |
 |
 |
 |
 |
 |
 |
 |
 |
 |
 |
 |
 |
 |
 |
 |
 |
 |
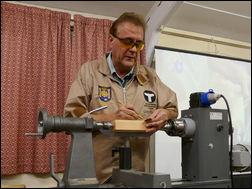
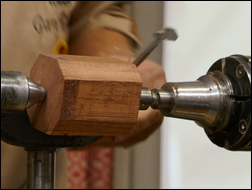
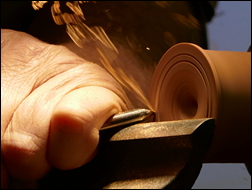
Using a square-section softwood blank Gary gave us a few minutes on the basic shapes used in spindle turning and how to make them confidently and repetitively. Every move was inevitably perfect, but he also demonstrated a dig-in deliberately to explain exactly how and why such mistakes occur. This led him to advise that keeping the hand (not just fingers) on top of the tool is not only a sound safety precaution, but speeds up turning as well. In this preamble the final piece of advice was to keep practising each action and shape until tool discipline clicks and repetition can be readily achieved.
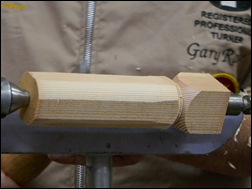
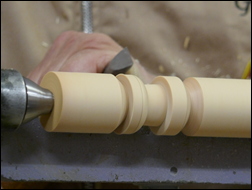
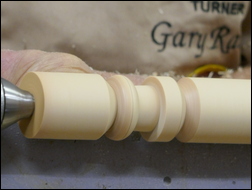
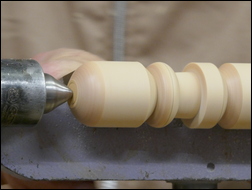
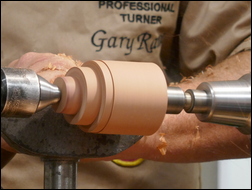
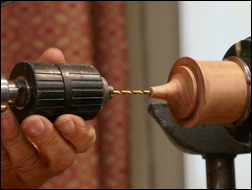
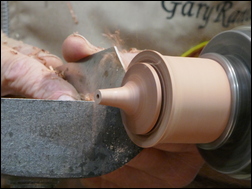
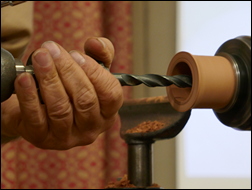
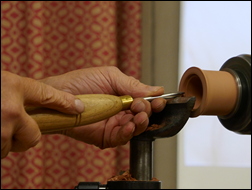
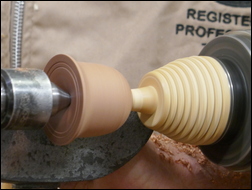
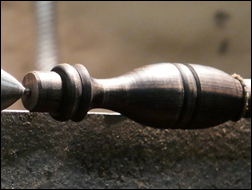
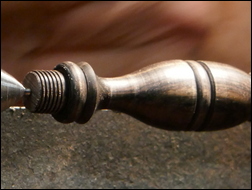
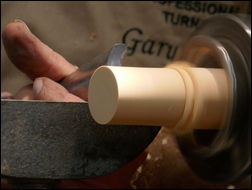
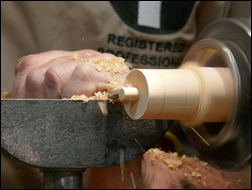
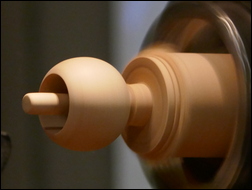
Preliminaries over it was time for the main event, the making of a Salt Bell. It was explained at the outset that the finished shape would be in the form of a small bell requiring three components, so we understood early-on the shape of things to come. The bell and a handle were readily understood but the hollowed out bell would then be closed with a tightly fitting insert in the shape of a flanged or trumpet-like funnel with a disguised flush joint. The funnel would point up into the mouth of the bell leaving space all round it to hold the salt. Its purpose is to allow delivery of salt to its intended target when the bell is shaken up and down. The length of the funnel therefore has to be just right. Bubinga (from Cameroon) had been chosen for the bell and insert and a cylindrical blank was mounted between centres. In using a vernier to check the desired diameter of the cylinder Gary underlined the importance of taking the corners off the jaws to prevent kick. A pencil line was applied about 2/5 of the blank length from the tailstock end; this shorter section being for the insert, with 3/5 remaining for the bell. A spigot for chuck mounting was made at the headstock end of the blank. Shaping of the funnel was quickly achieved and, using a Jacob's chuck, a 3 mm hole was drilled into its centre, at reduced speed, to the full intended length of the funnel. Gary advised that 3 mm is an ideal size which strikes a precise working balance between clogging and being too free. Before parting off a witness mark was made on what would be the flat base surface of the bell for use in obtaining an exact fit of the inverted funnel base. The bell section was then mounted in a chuck for the hollowing out stage (beautifully executed). A 12 mm hole was then drilled in the top of the bell to create an aperture soon to be threaded to accept the screwed-in handle.
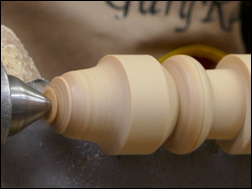
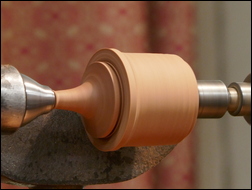
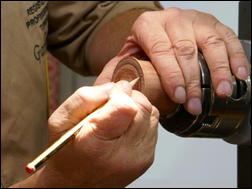
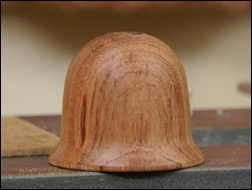
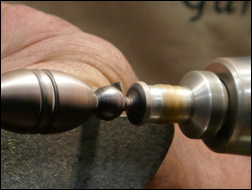
With the bell section still held in the chuck a tap was then used (exceptionally) to cut the thread in the drilled hole. Gary explained that thread chasing could not be achieved comfortably with Bubinga. (Note: So far as I am aware threading by tap is rarely found in woodturning and I had been led to understand years ago that it was not a practical method of thread-making in wood?). The next step was to achieve a perfect fit by the inverted funnel into the base of the bell, the witness mark being critical to getting a perfect fit. It took several fittings to get the perfect match one of which seemed likely to end with the flange jammed in too tightly, but the master rose to the challenge without turning a hair. The grain was then lined up and the funnel was glued into position using Titebond 2. The perfect join was marked with a pencil line before the base was decorated with two v-cut circles which disguised the joint completely. A jam chuck was then used to take the bell blank with light tailstock support while the bell shape was made. Sanding was carried out to a fine level before attention turned to making the handle.
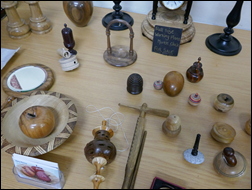
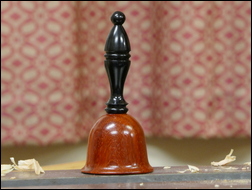
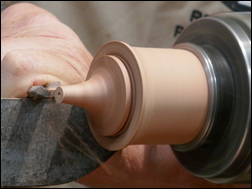
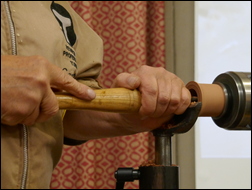
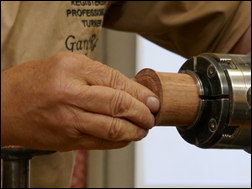
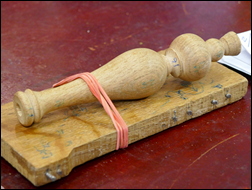
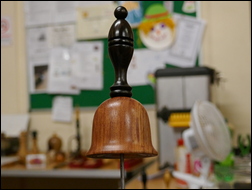
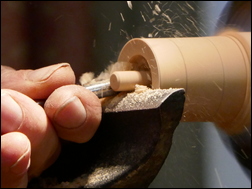
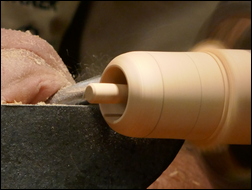
Gary explained that a very hard, straight-grained timber was required to accept the necessary thread on one end. A scratch card was used to mark out all the key points on a piece of Ebony which was then shaped perfectly using best spindle-turning practice. In using a roughing out gouge to convert the blank from square to round section Gary employed the very useful (but rarely mentioned) technique of keeping a thumb in the flute of a roughing gouge to act as a chip deflector. Another tit-bit concerned Boxwood about which he explained that although it splits readily during drying it will never split again. Photographs show the fine shape achieved in turning the handle, which then required a thread for screwing into the bell top. This was performed conventionally with a chaser, a task in which candle wax on the smoothed toolrest can be used to assist the tool to slide. The first, rapidly chased, thread was made a little too large deliberately in order to explain and demonstrate the process for reducing thickness along part or the whole of the thread length. The point was also made that the teeth of a chaser must not 'bottom out'. Several passes were needed to get a perfect fit, but in Gary's hands a perfect result was achieved with certainty. Suddenly, the handle was sanded and complete; it was parted off and screwed into the bell top, fine salt was poured in neatly through the base aperture, the up-and-down shaking action was demonstrated and that was nearly it. However, finishing was still required and was achieved with an acrylic spray sealer - with the bell skewered onto the end of a long thin spike. After drying it was de-nibbed all over with 800-grit abrasive on a pad and sprayed again. Gary declared that spraying is an art in itself. Two other completed Salt Bells were displayed to show the quality of shape and finish obtainable on this unconventional item. What a novelty to challenge your mealtime guests with!
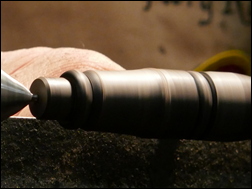
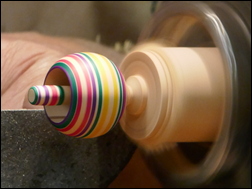
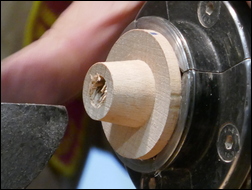
With time remaining; Gary then went on to make a decorated 'Tippy Top' and to explain some aspects of tool grinding. He emphasised that the finished diameter of the top MUST be right (32 mm). He mounted a small Beech blank in the chuck (not an ideal method he said), brought it down to the required diameter. A short, 7 mm diam. spindle was turned at the tailstock end and its corner was taken off. The sphere-shaped body was then turned and hollowed down beside the peg to a depth of 14 mm. Coloured rings were then applied using permanent markers obtained from eBay at approx. £3.50 per pack after sanding all over. The top was then parted off and the bottom was sanded. It was spun straight away but (as Gary expected) did not tip. The answer was to invert the top and plug the peg into a hole in the remaining waste timber in the chuck - acting as a jam chuck. It was tapped in lightly with a hammer before a tad more was turned off the bottom end of the top. When spun now - it tipped perfectly through 180° and carried on spinning perfectly.
After the tool grinding advice it was time to finish. We were just left with a sense of admiration that so much could be crammed into one short evening. Thanks were duly expressed and the applause was commensurate with the evening's entertainment delivered more than expertly to a full house.
<Top of Page>
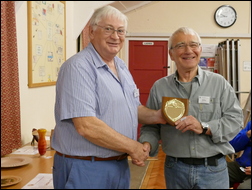
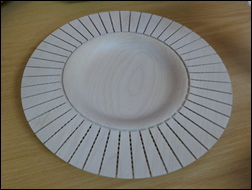
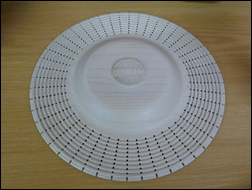
| This month's Show and Tell was: A Decorated Item |
||
| The Show and Tell winner (Open Category) was Arthur Kingdon with a finely turned and pierced platter in sycamore. The photo on the left is the top face and on the right, the underside of the item. |
||
 |
 |
 |
<Top of Page>