
Club Night Report
Wednesday 15th March 2017
Club Night Report for 15th March 2017 - observations by Vernon Hughes
 |
 |
 |
 |
 |
 |
 |
 |
 |
 |
 |
 |
 |
 |
 |
 |
 |
 |
 |
 |
 |
 |
 |
 |
 |
 |
 |
 |
 |
 |
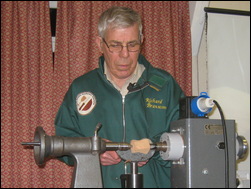
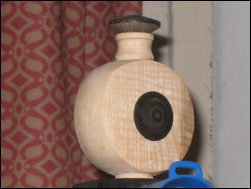
Tonight's multi-axis demonstration was to show the making of a bottle flask. To ready himself for the task Richard had not just made one earlier; he had made it that afternoon. Samples were passed round for close examination.
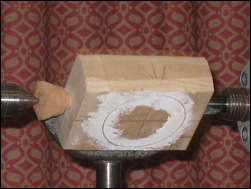
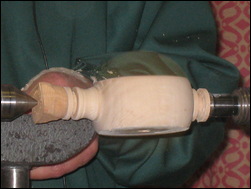
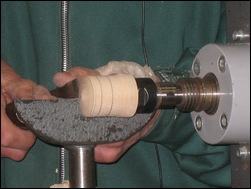
He started with a pre-cut rectangular Ash blank of dimensions approx. 130 X 100 X 36 mm thick. Having found the end centre-points a 16 mm hole was drilled through the full length of the blank with a Forstner bit used at both ends of the blank. It was then removed while a small piece of 'treewood' was mounted and rounded down to make a plug stopper to fit in the long hole at the tailstock end. The essential feature at this stage was a tight fitting (16 mm diameter) short spindle section and this was achieved after discarding a first one that was just a tad slack when test-fitted in the main body. Back then to that blank which was mounted between centres with support from the temporary stopper plugged in. The corners were turned off to give four straight lines of maximum width for use as datum points from which to find the exact centres of the two main faces of the blank. Two circles were then described on each face, the smaller ones being 18 mm in diameter to serve as points of entry during the hollowing phase. The larger circle was marked out to give the full finished dimension of the flask and its outline was accentuated by adding liming wax against which the re-marked black circle stood out distinctly and would serve as a perfect guide during turning.
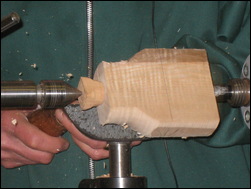
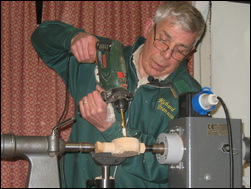
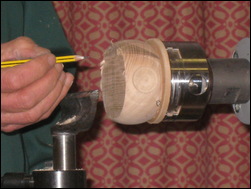
A 'Steb' centre was introduced at this point and was banged into the base with a heavy plastic-faced 'Thor' hammer (still obtainable for about £12). The neck of the flask was roughly shaped first, followed by the main body, leaving a base spigot of about 30 mm diameter. Richard advised use of the highest practicable spindle speed during this phase to reduce the risk of chipping at the edges. With the work still mounted end-to-end a 10 mm hole was drilled at the centre of one face to take a screw chuck. A brad-point drill bit was used first for precise positioning followed by an ordinary bit. Richard said that he would usually have carried out this step via his pillar drill.
Work then proceeded on developing the neck and the base spigot with some further attention to the main body. Particular attention was paid to achieving sharp delineation at the intersection between neck and body. The length of the base spigot was defined using a parting tool and the resulting short base was undercut in the usual way for standing stability. The flask was then removed using a saw to cut off the waste at the base leaving a small pip to be removed later.
Now for setting up the second axis.
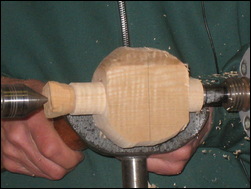
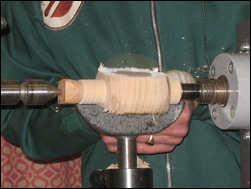
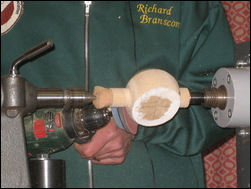
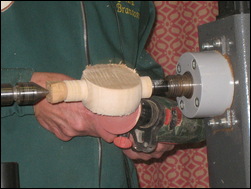
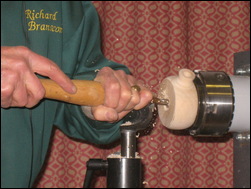
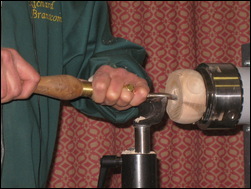
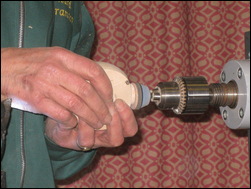
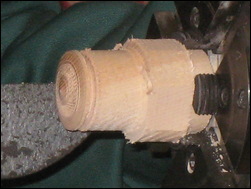
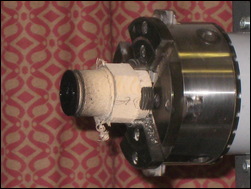
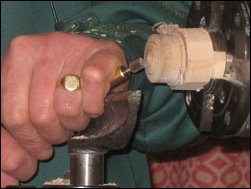
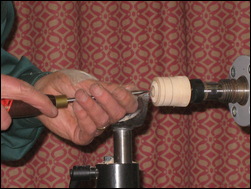
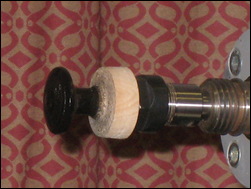
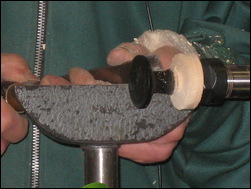
Steb drive and tail centres were removed and replaced by a chuck holding a screw to suit the 10 mm hole drilled in one face of the flask. That chuck was itself mounted on an adapter (the black cylinder) to suit the club lathe, and it had an MDF disc/ spacer to protect the face of the flask. A 28 mm recess was then cut for mounting on a chuck with expanding jaws. That chuck turned out to be Richard's new 'Axminster Evolution SK114' (with thread which suited the club lathe) onto which the flask was mounted using the 28 mm recess and small gripper jaws. A hole of 28 mm diameter was then made in the second face and taken deep into the blank. Four distinctive hollowing tools now made their appearance and were augmented by a fifth larger one with a more efficient cutting performance at an advanced stage - this was a mixture of shop-bought and home-made tooling. These tools had tips angled at either 45° or 90° to the stems and were used variously as suited the needs of the moment. Richard observed that the tool contact point is not visible in this situation and cutting has to be done entirely by feel. Progress can be monitored in part by watching for shavings being thrown out from the hole in the neck. Inside appearance does not have to be perfected with this type of piece. After further attention to the first face, including slight curving, the flask was reversed to complete hollowing from the other side followed by similar gentle curving. Sanding was carried out in a disciplined manner at various stages throughout the project. When completed and removed from the chuck a small sanding pad was mounted in the chuck to remove the base pip.
After the break came the finishing tasks of making a central boss plug insert for each face of the flask (41 mm on a 28 mm short spigot) and an appropriate stopper.
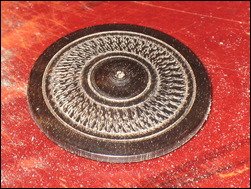
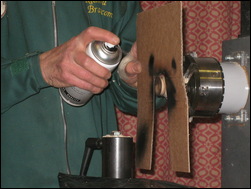
A suitable small Ash blank was mounted between centres and a spigot turned to suit the Axminster chuck. The two inserts were shaped, decorated on the top surfaces using a Henry Taylor 'Elf' decorating kit, sanded, sealed and ebonised, while the blank remained chuck-mounted, care being taken to get the fixing spigots spot on at 28 mm to fit the recesses in the flask body (and to protect the lathe and equipment with card when spraying was done).
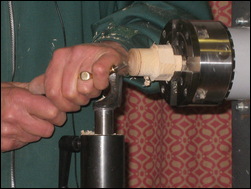
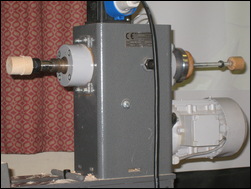
For the stopper - a small Ash blank was rounded down in the usual way (to 12 mm diameter) but then came a surprise, a collet chuck assembly being brought into play. (Note: Upon enquiry later Richard explained that he made the switch to demonstrate the use of rarely seen collet chucking methods, not because it was especially appropriate in this instance). The MT2 collet chuck was headstock mounted, along with a retaining draw-bar. Shaping, decoration and finishing, including ebonising, were performed to make a stopper to match the inserts and the completed piece was placed in a prominent viewing position with impeccable timing.
Once again Richard had carried the evening with modest but absolute competence. We are indeed fortunate to enjoy within our club the presence of one so deeply immersed in tools and equipment and their use. How fortunate too that if we have forgotten, or failed to understand anything Richard is ready and willing to deal with our questions. On behalf of all - 'Thank you Richard'!
Arthur rounded off with similar words of course, and hands came smartly together in hearty applause.
Footnotes:
- For those wondering about use of the two different chucks and an adapter for one of them the explanation is that Richard changed lathes recently. He has retained some of the old chucking but bought the new Axminster chuck to go with the new lathe.
- Richard gave detailed explanations of his sanding procedures throughout but attempting to describe them would soak up time and space and be a distraction from the main description of his work.
- Tool use: Suffice to say that Richard possesses and uses exactly the tool or device that suits him for every task. He mentioned a particular favourite - a broad parting tool which was used extensively, but it seemed to be the case that 'if you don't have it, make it or get it made'.
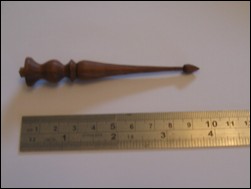
- As a follow-up on the value of collet chucks Richard has since offered a photograph of a 4" long finial made using this holding method. See final picture right hand column above.
- During his demonstration Richard mentioned that US turner Barbara Dill at www.barbaradill.com provides excellent examples of multi-axis turning between centres.
<Top of Page>
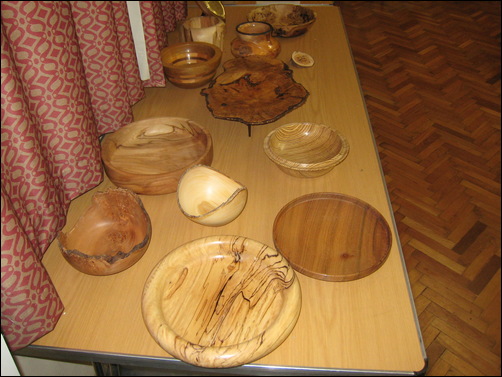
This month there were two Show and Tell Tables - using the same Theme - with a table for Novice Category and one for the Open Category.
This months Show and Tell Theme was: A Bowl
 |
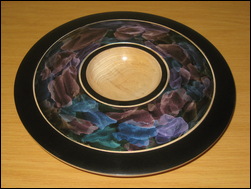
| This month's winner in the Novice Category was Kevin Taylor - with an impressive turned and decorated bowl. Procedure followed to turn and decorate bowl: 10" diameter x 2" thick Sycamore blank. Mount on lathe - turn and finish back. Remount to turn front to shape and sand through grits. Spray with Acrylic sanding sealer and denib. Spray with black Ebonising lacquer. Mark out front of bowl with bowl shape and two rings using bowl gouge and point tool. Apply another coat of Acrylic sanding sealer and leave to dry. Paint used for decoration is Josonja iridescent paint mixed with flow aid to ease application - using an airbrush this is then applied to the surface randomly until the desired pattern is achieved. The colours used, six in total - Green, Red, Violet, Blue, Turquoise and Gold. They are all white before application, changing colour when it touches the black surface. It's left for 24 hours to dry, another coat of Acrylic sanding sealer and a final coat of Acrylic Gloss Lacquer to finish. |
|
 |
 |
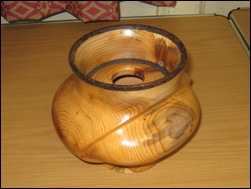
| The March winner in the Open Category was David Branscombe - with an extraordinary turned and carved - plus much hand sanding bowl in Yew. |
 |
 |