Club Night Report
Wednesday 9th March 2016
Club Night Report for 9th March 2016 - observations by Vernon Hughes
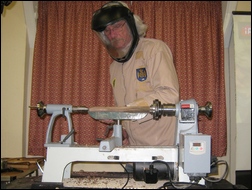
Our presenter this month was local, Bromham-based,
Pete Moncrieff-Jury RPT (see website:
www.bodrighywood.co.uk). He was appearing for the third time in fourteen months (see Club Night Reviews for 14th January and 12th August 2015). He presents himself as a waste-not-want-not 'turner on a shoestring' who makes use of scraps or damaged pieces of timber that most people would discard.
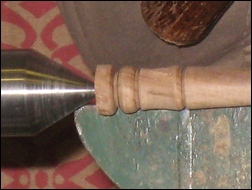
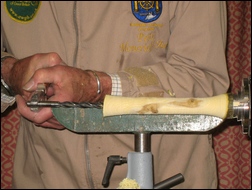
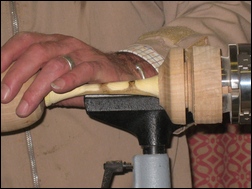
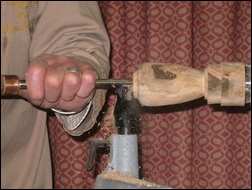
He started with a mystery piece mounting a long, narrow strip of walnut say 10" - 11" long and about 5/8" cross-section in a small chuck with tailstock support. This was roughed to a cylinder using an old carbon-steel skew that cost £1 second hand. Fine, detailed shaping was carried out at the tailstock end and a taper was started towards the other end. He used his left hand to steady the whippy length of wood with fingers curled round and tucked under at the back. Take care he advised, but this a perfectly safe practice once feel and familiarity have been acquired. After sanding the whole length, parting off was performed at tailstock end first and then at the headstock end at which the taper diminished to a point. It turned out that this finished item was a Hairstick, of which, once we focused on his display table, there was a fine array. They are marketed on good quality printed cards and priced at anything from about £7 upwards. He said that for ladies with the necessary abundant hair they are worn four or five at a time. He went on to explain the possibilities for decorating the sticks with a wide variety of pleasing features, some of which were influenced by oriental practice. He then quickly mounted a similar blank (say 3/4" square by 10" long) in the small chuck to demonstrate a way of drilling a short hole in the other end. The tailstock was removed and, unusually, a twist drill gripped simply in a hand-held pair of pliers was pushed hard and successfully against that end.
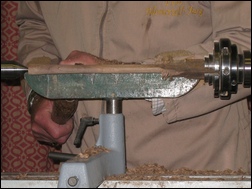
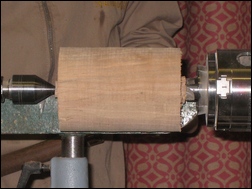
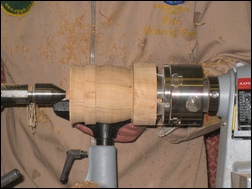
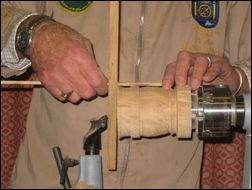
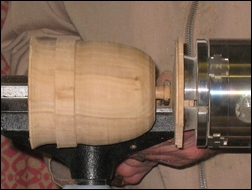
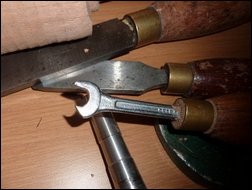
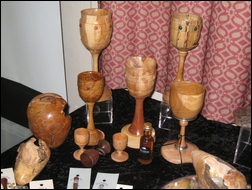
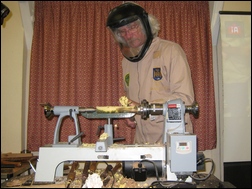
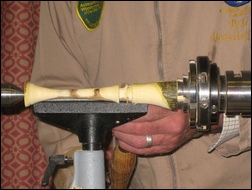
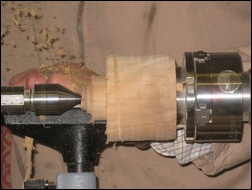
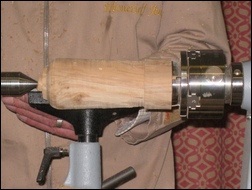
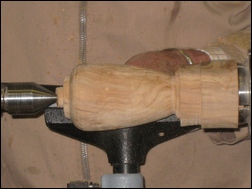
Next, we found, perhaps disappointingly, that the main project for the evening was to be goblet turning, a repeat of last August's demonstration. This report will nevertheless describe the procedure followed and will record any fresh insights or observations. Pete favours a 3-component approach (cup, stem and base) the parts being connected by cylindrical mortise and tenon joints of 10 mm diameter. A 6" long by 4" diameter blank for the cup was mounted between centres, a 4-prong drive being held in the chuck. A spigot for chuck mounting was formed and Pete emphasized the importance of getting the dimensions precisely to the chuck maker's specification to maximize grip strength. The blank was then transferred to the 4-jaw chuck with tailstock support. He explained that he completes the basic outside shape before hollowing. That was done and the tailstock was removed. A central hole was made with a small spindle gouge in the familiar way, with pauses to clear wood compressed in the tool flute. Depth was checked using a home-made but highly effective (shoestring) gauge consisting of a wooden/ dowel rod passed through a snug-fitting hole in a flat strip of timber. Hollowing was started with a spindle gouge using pulling cuts. Chatter developed, due Pete explained, to extending the tool too far over the toolrest. At this point he switched to a small ring tool (great for ripping out wood with a pulling action) obtained from a turner who found difficulty in using it. In response to a question, he explained the importance of applying the tool correctly in the right position and at the right angle. It should be tilted upwards 'so that the cut is across' said he. Contact is made with the bevel rubbing at a highish point in the downward movement. The tool should be held down hard on the rest. Hollowing would be completed using a 'French curve' scraper. Note: the goblet cup needs to be 'thin'/ thinner at the top edge - and can be tapered/ thicker towards the base - this helps with the feel of the item and with the balance. After final shaping of the outside of the cup including a flat at the point of contact with the stem, attention then focused on forming a 10 mm diameter tenon or spigot on the base of the cup. This was completed with a purpose ground, open-ended spanner complete with wooden handle featured last time. (Note: It is worth taking a close look at the form achieved by grinding if you plan to create one of these tools.) Pete chose this point to recommend that 'Cascamite' be used as a preferred adhesive in goblet work. He also made the general points that goblet and chalice shapes can be researched usefully on-line and that "Rustins two-part Plastic Coating" should be used for finishing as it is food-safe, and fully liquid-proof when properly applied. It remains useable for 2-3 days after mixing - store in a sealed plastic container kept in the fridge.
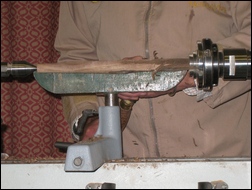
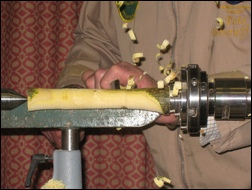
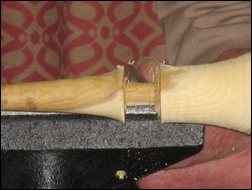
The goblet stem: A quite chunky piece of bent laburnum branch wood had been chosen for this and this prompted a description of the advantage to be gained by using such material. It was mounted between centres, the morse taper of the drive centre being held in the chuck. The acceptability of this was also explained. A tenon/ spigot was made at one end and duly mounted in the chuck. With the tailstock removed a 10 mm drill held in pliers, was again used to make the mortise into which the cup spigot would eventually fit. The tailstock was then re-mounted to keep the work stable for accurate shaping. A flat top was made to match the flat on the bottom of the cup. During shaping with a spindle gouge some of the dark heartwood began to appear through the cream sapwood to great effect. Pete advised that the 'rule of thirds' is applicable to goblet making and that the cup can be taken as the top third while the stem and foot can be proportioned to achieve the other two thirds. It was observed that this proportion can sometimes look a little 'top heavy' - depending on the actual shape and decoration - so a 50/50 proportion may be more desirable. A 10 mm spigot to fit into the base was then made using a parting tool but perfected with the spanner tool. In the workshop he would sand at this stage. The fit of the cup spigot in the stem top was tested and it was then time to move on to the base.
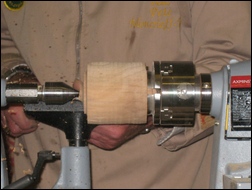
A blank with pre-prepared spigot was mounted in the chuck with the accompanying comment that the base diameter should be slightly larger than that of the cup to ensure stability. The cup and base came from the same piece of timber initially. The 10 mm hole (mortise) for the stem tenon was made with a drill held in pliers as before. The tailstock was then brought up for support while the base was shaped quickly. Only partial parting off was undertaken on the base - ensuring that it was slightly concave - for stability and all three parts were then assembled lightly for effect with paper stuffed into the cup for protection before removal of the work from the lathe.
Pete finished off the evening with a further short demonstration of hollowing using a blank say 7" long by 3" cross-section. He had earlier made the observation in respect of drinking vessels that sycamore is the only truly non-toxic wood. (Note: this struck a chord with me; on a training course in the late 1950's we were informed that sycamore was used for all Royal Navy wooden galley implements). And there the evening ended with the usual expression of appreciation. Despite the duplication Pete held our attention.
<Top of Page>
This months Show and Tell theme was - Condiments.
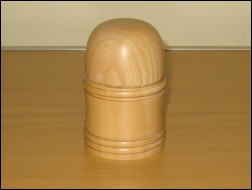
A Pepper Mill in ash and sycamore from
Ian Full
|
|
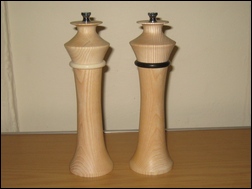
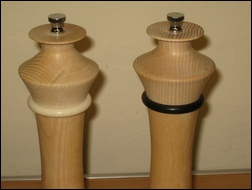
Salt and Pepper Mills in spalted beech
with beech tops from Phil Tucker
|

|
This months Show and Tell Winner with matching Salt and Pepper Mills in ash - with African blackwood for the pepper and imitation ivory for the salt was from Arthur Kingdon
|
|
|
<Top of Page>