
Club Night Report
Wednesday 14th June 2017
Club Night Report for 14th June 2017 - observations by Vernon Hughes
 |
 |
 |
 |
 |
 |
 |
 |
 |
 |
 |
 |
 |
 |
 |
 |
 |
 |
 |
 |
 |
 |
 |
 |
 |
 |
 |
 |
 |
 |
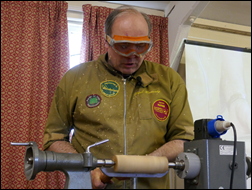
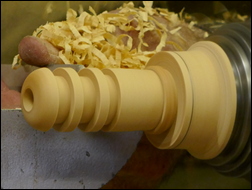
The subject for the evening was to be screw-threading, and two items emerged by the evening's end. The first was a needle case/ sewing kit incorporating an unusual bobbin (thread holding) capability, and was a remarkable two thousand year old throw-back in design. Paul started with some explanation of the tools to be used, including handle length, pitch sizing and selection, the need to fettle most new tools to remove incomplete teeth and sharp corners, ensure the toolrest is smooth and without any nicks, the relationship between pitch and timber hardness, etc. Turners new to the subject were advised to start with a pitch of 16 or 18 tpi (and Arthur interjected to advise members that the Club has a set of 16 tpi chasers for hire - see HERE).
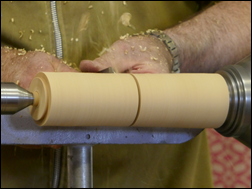
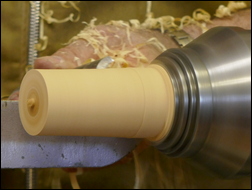
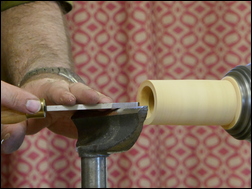
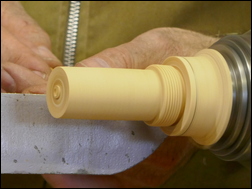
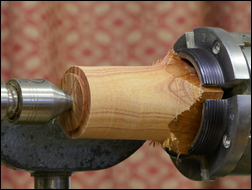
A Boxwood blank of approx. dimensions 8" long by 2.5" square was mounted between two ring centres for the needle case. It was roughed down to a cylinder and the ends were cleaned up with a large parting tool. Spigots were prepared at both ends using callipers to get the exact dimension for fitting the selected jaws. The importance of sizing spigots to a chuck's 'ideal circle' and to a length to ensure support by the face of the chuck jaws was emphasised. Both spigots were then dovetailed before the blank and drive were removed and a chuck was mounted (with the advice that a check should always be made to ensure that the face is clean).
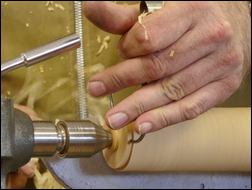
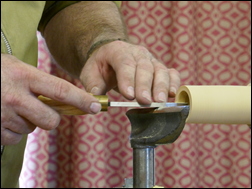
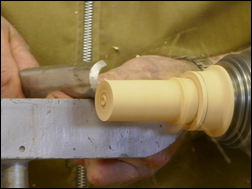
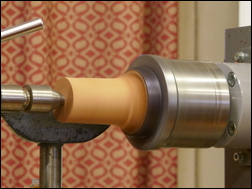
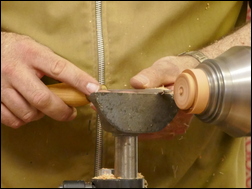
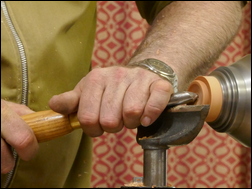
A different, pre-rounded, blank was mounted at this stage for working demonstration purposes; and advice was provided that 400-500 rpm is, importantly, an appropriate working speed. The leading corner of the blank was rounded away slightly to allow a thread to be started easily, and a groove was cut at the point where the thread would finish, to provide a positive run-off point. Using a 16 tpi chaser at an angle of approach of about 45° - a first thread was started. As the work advanced the angle of approach was gradually reduced until movement was in parallel with the spindle centre-line. The end result turned out to be a double spiral which was duly removed and replaced with a single thread; but the opportunity was taken to make several points including the essentiality of sharp tools, the value of any wood wax as an easing agent and the idea that a thread can be made longer than required in some instances and then shortened to the ideal.
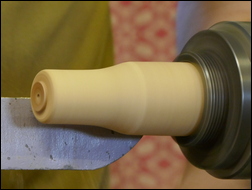
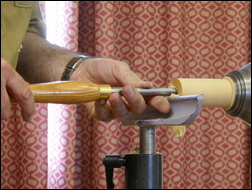
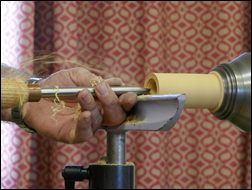
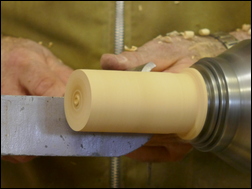
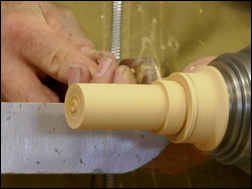
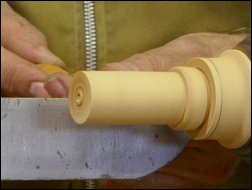
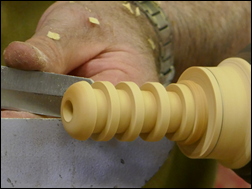
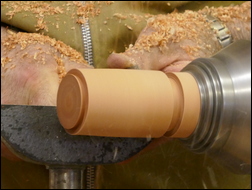
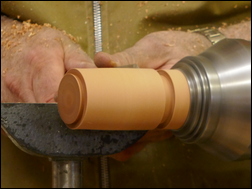
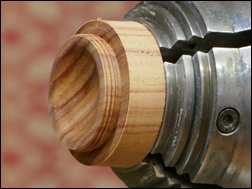
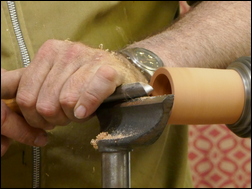
Then we got back to the needle case, the blank being mounted in O'Donnell jaws. It was parted into two pieces not quite 50/50 to allow for an appropriate fit. Paul made reference at this point to the intended design of the case going back to Roman times (which set one of our members' brain racing - see more anon). The first section of blank was hollowed out to make a screw cap for the case, a round bar scraper being used to achieve a straight internal wall surface. Paul had fashioned the scraper himself and ground the cutting edge so that it is on the centre-line of the bar or very close to it. The hole size was sufficient to allow a good fit with the other half, but leaving a wall thickness sufficient to accept external decoration if desired. On completion of hollowing a groove was cut internally to give the recommended run-off point at the end of the thread (which in his experience should be longer than actually needed). The (deep) thread was then quickly cut, starting at the 45° angle employed earlier and soon working round to parallel. The two sections were then swapped over and the depth of the first was marked on the second as a reference point. The finished diameter required for what would be the base of the needle case was established at the headstock end before the diameter of the male section was then turned down to the right size and tested for fit. A 2mm run-off slot was cut by parting tool at what would be the finishing point of the thread and against a shoulder at the base of the piece. There then began a repeated process of thread cutting followed by test fitting of the needle case top, turning off the completed thread (crests) and re-chasing until a good fit was finally achieved. Paul emphasised here that both sections of the case MUST be threaded at the same lathe speed. When a fairly satisfactory fit had finally been achieved Paul then hollowed the spindle using a spindle gouge (as a drill) to create the needle storage space, and then followed up by using a parting tool to cut spaces along the body to serve as bobbins, i.e. thread storage spools. Grain alignment was then tackled by finely tuned cuts to the face of the cap. External shaping was not done in this instance to save time but would offer a pleasing design opportunity according to personal taste. A final action would be to clean up the ends but again this was not tackled on this occasion to save time. Two ways of holding the work for this purpose were described, viz: make a suitable mandrel or fit into a chuck taking every care to avoid damage.
By this time John Sawyer had recalled (? miraculously) seeing just such a design found amongst Roman remains at Carlisle and he succeeded in tracing it with an internet search on his mobile phone. How truly remarkable!
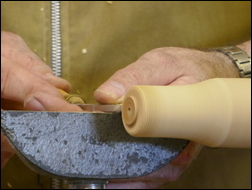
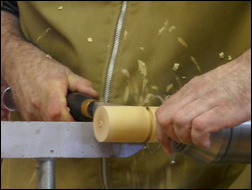
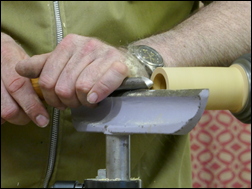
The second piece of the evening (a box with narrow threaded lid) was to be made in Brazilian Tulipwood, an expensive hardwood with alternating cream and raspberry-red stripes. A blank of 2" approx. square section was mounted direct into a chuck with say a 4" length protruding. Roughing down was achieved rapidly and a small spigot was made and shaped. The spigot was used to remount the piece in a different set of jaws, and after further roughing down a dovetail shaped spigot was then cut at the tailstock end. The bulk of the blank was then parted off leaving a remarkably thin section in the chuck to form the screw-in lid. A short section was undercut to an appropriate diameter and a run-off slot was cut between the section to be threaded and a shoulder at the headstock end. The square corner left by the parting tool was rounded slightly and a thread then cut, starting at the now familiar 45° angle before straightening up. The inside surface of the lid was then dished and polished. The larger section of the original blank was then mounted in the chuck and the process of hollowing out the box began after marking with carefully measured reference points. Pulling cuts with a spindle gouge were employed in hollowing followed by the scraper to straighten the interior sides. The thread cutting stage was soon reached and followed the same pattern as before. Time was becoming a pressing issue and prevented finishing work and perfection of the lid/ body fit. Good grain alignment was achieved though.
All too soon the demonstration had to come to an end but in thanking Paul for a fascinating and confidently delivered presentation Arthur Kingdon recalled some observations by the late master turner Bill Jones, who had rated thread chasing the most challenging work for a demonstrator to attempt due to the high risk of getting it wrong! In this instance we had ended up with two pieces completed needing only fine tuning to perfect them. Thanks Paul!
<Top of Page>
There are two Show and Tell Tables - both using the same Theme - with a table for Novice Category and one for the Open Category.
This months Show and Tell Theme was: A Box
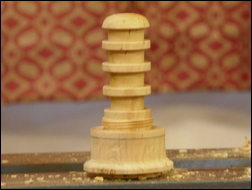
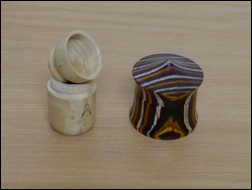
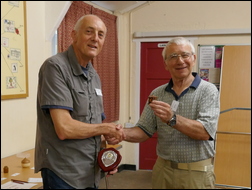
| This month's winner in the Novice Category was Steve Body with a lidded box in 'stripey' coloured plywood and a threaded box in apple. |
 |
 |
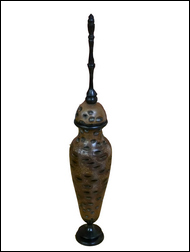
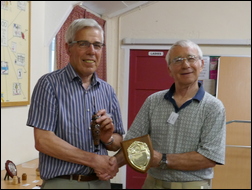
| The June winner of the Open Category was Richard Branscombe with a banksia nut and finial box |
 |
 |