
Club Night Report
Wednesday 11th June 2014
Club Night Report for 11th June 2014 - observations by Vernon Hughes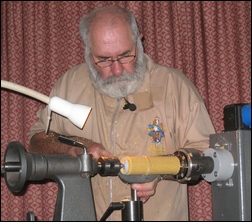 |
 |
 |
 |
 |
 |
 |
 |
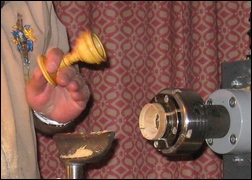
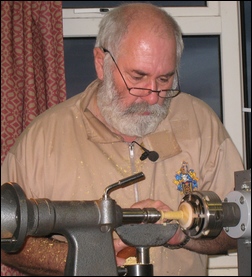
This was a return visit by John Boyne-Aitken from Trowbridge, aka 'The Bowler-Hatted Turner'. We saw the hat, and observed the effect achieved at the start, but John soon abandoned it in the evening warmth. The subject for the evening was to be A Finial Box (or Pot) and, without preamble, John produced a blank in Pau Amarello (Brazil) of dimensions 2" square section and just over 6" in length. Boxes come in all shapes and sizes but the choice of blank indicated intriguingly, that this was going to be a small, narrow object of some considerable height in proportion to the width.
Design - John said that he does not use the 'golden mean' - but concentrates instead on achieving a shape and proportions that look right. However, he worked roughly by eye to divide the blank into three (the rule of thirds) and set out (surprisingly?) to make the base of the box from the 2/3 rds section. It emerged gradually as the demonstration progressed that John was aiming at a box base shaped like a wine glass complete with stem and foot as can be seen in the photograph of the finished piece.
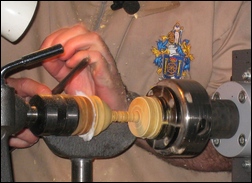
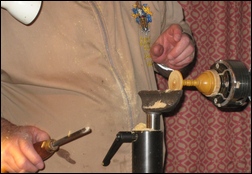
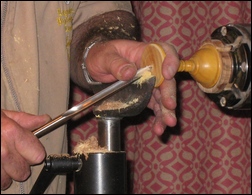
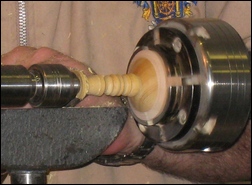
Method - The blank was mounted between centres and roughed down to a cylinder. Dovetail spigots were shaped on each end. The blank was then mounted in a chuck with tailstock support and marked with a line at the 'eyeballed' parting off point. The parting cut was started but John paused to stress the importance of witness lines when making lidded objects and he marked one out accurately on the top end of the base section to indicate the inside diameter of the bowl rim. This step is crucial to achieving a tightly fitting lid in due course. The parting cut was then widened before parting off with a narrower tool. Hollowing of the bowl was then started using a 'bedan' chisel (10 mm square) modified into a scraper. The advantage of this design of scraper is in its greater thickness and the resultant greater cutting strength - less vibration. John reminded us that the scraper tip must always cut at the centre line of the piece. He completed the hollowing, removed a slight residual pip and finished the inside of the bowl by sanding (at reduced speed), application of friction polish followed by carnauba wax and beeswax and then made an accurate recess for the lid using the witness line. External shaping of the bowl was then completed with a spindle gouge followed by a demonstration of bead cutting on the stem which was then removed to make way for his final design using beads and coves as shown in the photograph. The foot was shaped and the external surface of the whole base was then sanded and polished. Before parting off with the customary undercut using a 3 mm parting tool (not his thinnest) John emphasised the importance of resisting the temptation to touch the work at this stage due to the need to allow time for the wax to harden and to avoid applying fingerprints. Then came a most imaginative (and fairly time-consuming) method of removing the small residual nib at the underside centre of the foot. Using the off-cut still held in the chuck jaws John created a collet to hold the inverted box without damage to or marking the finished rim (for detailed explanation see below). This permitted the final cleaning up of the underside of the foot, sealing and polishing.
 |
 |
 |
 |
 |
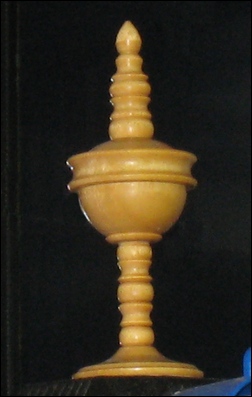 |
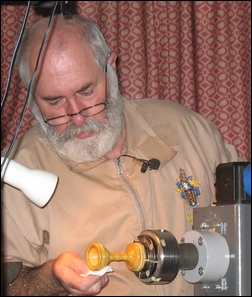
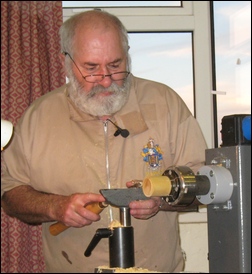
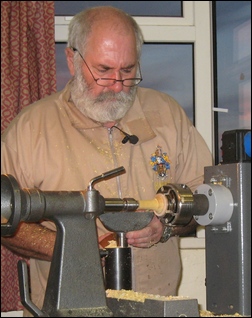
The Finial Lid - With the shorter blank mounted in the chuck without tailstock support John formed the insert to fit snugly, but not too tightly, into the recessed rim of the box. A chatter tool was applied to the exposed surface and gilt cream was applied and buffed to produce a highly pleasing finish. Another collet ring was then made from Beech in next to no time to receive the inverted lid. The tailstock fitted with a ring centre was then brought up to give a little support during the fine work of finial creation. John works freehand on the shaping but advised that fine marking out can be employed or a self-made scratchstock using plywood and panel pins can be fabricated. The shaping was finished rapidly including careful paring cuts at the point to remove a fine split at the end of the blank. The usual finishing stages were completed before final parting off to a fine point using a skew. 'Go as fine as you can at the point' was John's final instruction! (For detailed observations see below).
The Collets - These can be made from the offcuts left in the chuck after parting off close to it or from small pieces of scrap wood mounted accurately in the chuck. In brief - all the wood remaining in the chuck is removed with the exception of a narrow ring at the perimeter. This is then taken out of the chuck to permit cutting out of a narrow section (use your bandsaw?). When replaced in the chuck a piece of work can be mounted and gripped effectively by the collet; as the gap narrows by squeezing up when the chuck is tightened. John further advised retention of all chuck-mounted offcuts even if not required immediately - because they can be converted into screw chucks by accurate insertion of No. 8 screws etc., or they can be converted into support pieces for use at the tailstock end.
Other Useful Points - Pau Amarello may also be found described as 'Yellowheart'; when roughing down, work from both ends of the blank and adopt a swaying motion; use ears as well as eyes when turning to pick up on flaws or splinters in the timber which may be best chiselled off with the lathe stationary; get the best finish from a scraper that you can manage - this will save on abrasives; sand with both hands in operation at once to reduce risk of possible tendonitis in the longer term; turn down the lathe speed to sand to allow the abrasive to work effectively and to avoid 'bounce'; when mounting a chuck on the drive spindle do not spin it on - but thread it on carefully; make thin separators (washers) to prevent chucks jamming on drive spindles, but when a chuck does jam use wooden leverage to free it, not metal; pencil lines are too thick for accurate marking out, whereas the point of a skew for example will provide the necessary precision; fluted beading tools are available and are fine for repetitive bead turning but it is usual to roll them with a spindle gouge; he used a spindle gouge to make coves rolling it through the full 180 degrees; when sanding do not skip the grits, ensure that crisp details are not spoiled by sanding and ensure that scratch lines are not sanded in (do not press too hard); when sanding exotic timbers be particularly careful to avoid overheating because it can easily cause heat checks.
Conclusion - This was yet another first class demonstration which held everyone's attention at every point from start to finish.
<Top of Page>
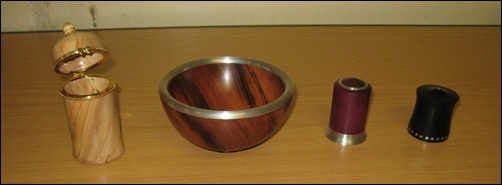
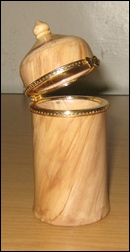
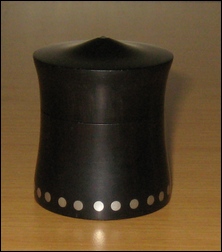
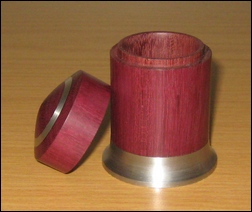
The Show 'n' Tell theme for the evening was Wood and Metal Combined - this was not as well supported as some of the other themes - but, there were some very nice items on display.
 |
 |
 |
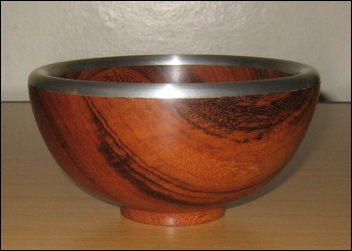
| This month's winning entry was a superb 'tree wood' (something I found under the workbench) combined with a cast and machined pewter rim by Ian Full It measures approx. 5" diameter by 3" tall. |
 |