
Club Night Report
Wednesday 12th July 2017
Club Night Report for 12th July 2017 - observations by Vernon Hughes
 |
 |
 |
 |
 |
 |
 |
 |
 |
 |
 |
 |
 |
 |
 |
 |
 |
 |
 |
 |
 |
 |
 |
 |
 |
 |
 |
 |
 |
 |
 |
 |
 |
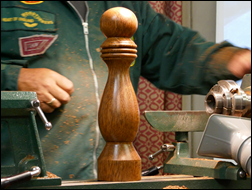 |
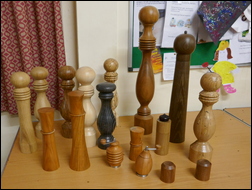
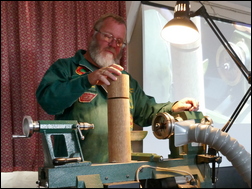
Keith's smock front was resplendent with badges including that of AWGB Tutor. His subject was to be Salt and Pepper Mills and he started by recounting the story of his journey through the subject over the last 30 years. During this he emphasised that he does not like measuring except for dimensions to do with 'fit' of which there are really only three essential ones in mills. It became clear as the evening progressed that he had developed clear themes for shaping but once timber had been selected and prepared he could achieve superb designs in a very wide range of sizes without much stopping to measure. He was able to show that 'when you have to stand up to use a mill you have arrived'; but at the other end of the scale his small nutmeg grinders were perfectly and interestingly formed. Despite his aversion to measuring he had nevertheless produced a high quality drawing incorporated in a magnificent 7-page handout-worksheet (Click HERE to download a PDF copy) to support his demonstration, and a batch of these were circulated for use by club members. Keith advised that the highly detailed drawing incorporated in the handout would simplify the note-taking task. On the assumption that anyone interested will be able to gain access to the document I will happily accept the idea that this description of the evening's demonstration can be shorter than usual. We can, however, look at the shape, size and proportions of his demonstration piece and pick up on the order of work described in the handout and some of the wide-ranging advice given.
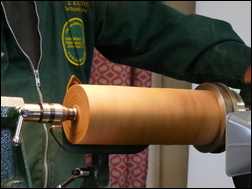
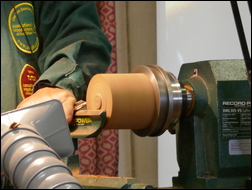
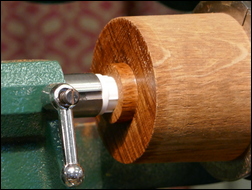
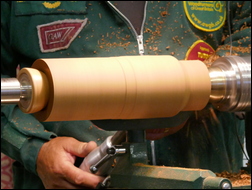
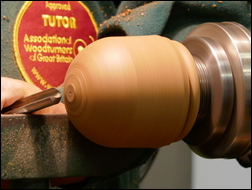
The chosen timber for this evening's mill was Brown Oak (let him know if you have any to spare) and the partially-prepared cylindrical blank (say 16"long by 4" diameter) mounted between centres was parted with a bedan (preferred to a parting tool) into two sections in a proportion of about ¾ (base) to ¼ (top). Keith stressed that, after parting, care should be taken to ensure grain alignment in the finished piece by keeping in mind that 'the top of the bottom has to match the bottom of the top' and the two sections should therefore be managed (and marked) accordingly.
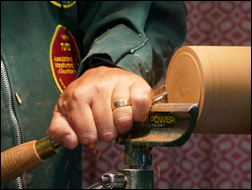
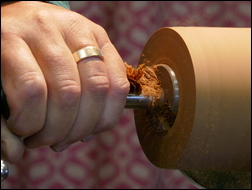
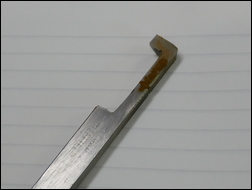
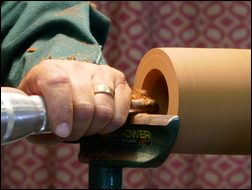
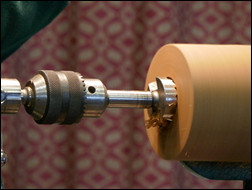
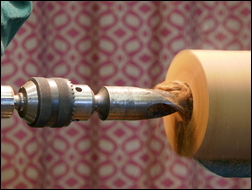
Making another specific point he said that he mounts his sections so that they sit on the back of the chuck jaws, and he then proceeded to so mount the larger (base) section with the top in the jaws. Tail-centre support was used briefly whilst the cylinder was perfected by roughing down a fraction more but soon gave way to the toolrest mounted across what would be the bottom of the base of the mill. Keith made the point that that surface must be perfected at this stage because there can be no going back to it later. Facing was done with a spindle gouge before the drilling phase began. A 1¾" diameter saw-tooth bit was mounted in the tailstock to cut the first (largest diameter) recess followed by a 1½" diameter bit to make the space for the grinder mechanism - this was one of the 'critical' dimensions and must be 34 mm deeper than the 1 ¾" recess.. The first half of the long hole was then drilled with an exceptionally solid-looking 1" bit. This was withdrawn several times to clean up and to apply his own mix of melted carnauba and beeswax for lubrication. The next step was to cut the recess (at 400-500 rpm) for the lugs of the grind mechanism (Crushgrind with long stem) to lock into. An L-shaped recess tool is needed for this and not surprisingly Keith had ground his own perfectly-formed tool-for-purpose. Note: Robert Sorby manufacture a specific tool for this - 895CGH (approx. £30). To achieve reasonably accurate drill depths he explained that the rim of a saw-toot bit can be used as a depth guide-cum-measure but for greater accuracy pencil marks can be made on the tailstock quill to show depth achieved. Note also from the drawing the angling of the interior wall face. The bottom was sanded with Abranet (mounted by Velcro on a strip of plastic milk bottle) working through the grits, sealed using thinned cellulose sanding sealer and wax polished. Keith explained the thinning by his desire to get the sealer into the wood not just on it.
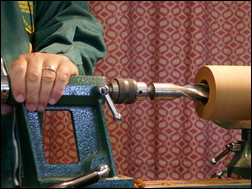
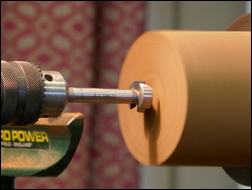
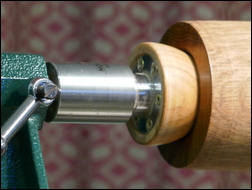
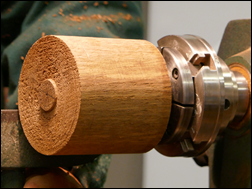
The blank was then reversed for two drilling operations, firstly using the 1½" saw-tooth bit to create a recess into which a spigot on the top section would fit comfortably. Depth was not critical provided it was sufficient to accept the full length of the spigot. That was followed by the 1'' diameter drill bit to complete the full-length borehole. The solidity of all the equipment used resulted in a seamless meeting with the hole drilled from the other end. The end surface was cleaned with a spindle gouge and made slightly concave. It was sanded through the grits and light sanding of the central hole was done using a cylindrical insert. The end was sealed and the piece removed from the lathe.
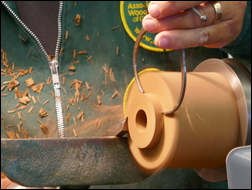
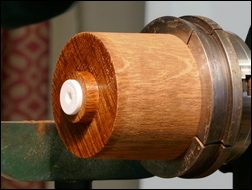
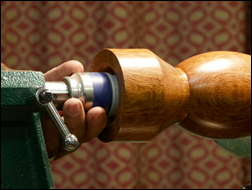
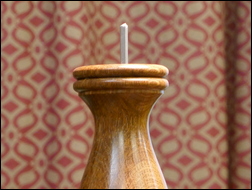
The top was then mounted in the chuck, grain alignment deciding which end was held in the jaws. A 7/8" diameter hole was drilled out straight away to take the drive mechanism. Depth must allow for the spigot and the drive; he usually finds it convenient to drill to the full length of the saw-tooth bit but this will of course depend on the dimensions of each individual mill. The spigot was then shaped to a 1½" diameter and to the width of the bedan blade. The base was then pushed on to check for fit but was tight. Slightly loose is better than slightly tight and a little more was taken off the spigot. A good fit is achieved in these circumstances by starting with a slight taper and straightening up. The bottom of the top was sanded, sealer was applied and shavings were used to burnish. The recess for the drive lugs was then cut using the L-shaped recess tool and the point was made that the nylon drive will not survive any hammering or tapping and must be pressed into position. This was done using the tailstock quill to press the component to its locking point. Once in it will not move said Keith.
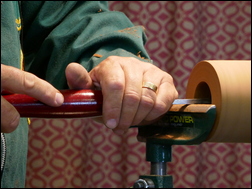
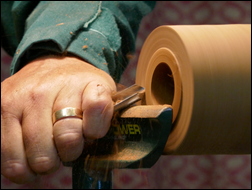
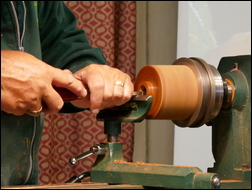
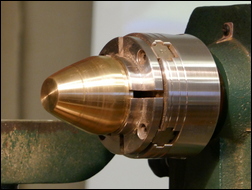
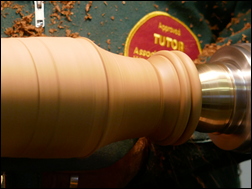
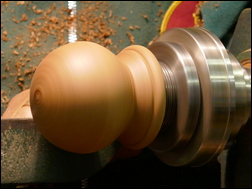
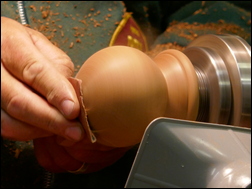
Now for the external shaping - the base was mounted between two domes, a fine self-made brass one (could easily be made of wood) in a chuck at the headstock end and a dome mounted on an Axminster tail centre with faceplate. The top rim was narrowed a little with the comment that he rarely uses drawings; they are embedded in his head! Two beads were cut at the top using a heavy-duty Ashley Iles beading tool flute-down with the caution that precision is crucial. Go too far or press too hard and tear-out of end grain is likely to occur. Below the beads the shaping is a matter of personal choice of design, but keep the central hole dimensions in mind throughout, especially at the bottom end where the largest hole has been made. In his designs he tends to make the belly a little narrower than the base. The piece was then sanded, sealed and burnished with shavings and polished.
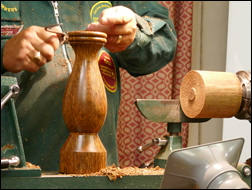
The domed centres were then replaced with a chuck in which the top was mounted, the spigot being held in the jaws. A bead was made to meet and match the two beads on the top of the base and then a sphere was created for effect. A slightly flattened sphere also works well. Keith likes the diameter of the sphere to be a little smaller than the belly of the main body. In this case a brass fitting was not provided at the top but this is a common feature in mills and can be added at will. Sanding, sealing, burnishing with shavings and polishing were then done to complete the piece.
Final assembly was then achieved speedily, the base grind assembly being pressed in and surplus grind bar being cut off neatly and filed carefully to a neat finish. A fine looking piece was ours to behold and it was promptly donated for inclusion in the very impressive/ generous assemblage of items for sale at Dave Newman's NWWA stand at the Prospect Hospice in Wroughton, Wiltshire.
Yet again we had been entertained/ instructed right royally and following Arthur's enthusiastic formal thanks we needed no further encouragement to deliver a lusty round of applause.
<Top of Page>
There are two Show and Tell Tables - both using the same Theme - with a table for Novice Category and one for the Open Category.
This months Show and Tell Theme was: An Open Theme - for Charity (Prospect Hospice)
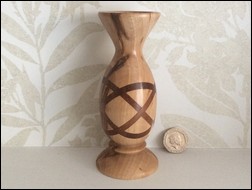
| This month's winner in the Novice Category was Pete McManus with a laminated Vase in beech with B&Q 'dark wood' strips |
 |
 |
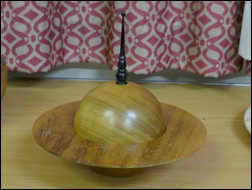
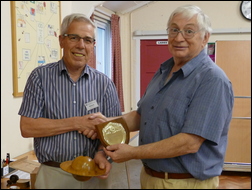
| The July winner of the Open Category was Richard Branscombe with a fine Saturn box |
 |
 |
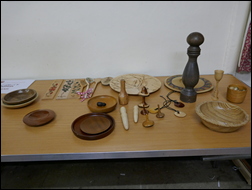
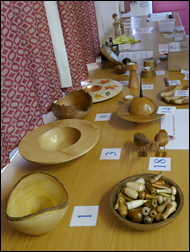
| All of the items on the table on the left were donated to the Prospect Hospice in Wroughton - the Show and Tell table items on the right also went to the charity |
 |
 |