
Club Night Report
Wednesday 13th July 2016
Club Night Report for 13th July 2016 - observations by Vernon Hughes
 |
 |
 |
 |
 |
 |
 |
 |
 |
 |
 |
 |
 |
 |
An engineer by profession he continues in employment, but plans to take up woodturning as a full time occupation in retirement a couple of years from now.
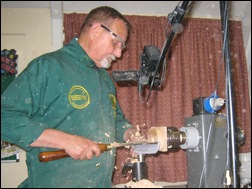
The masterly demonstration was accompanied by heaps of information thoughtfully delivered. These observations contain a description of the order of work and the turning itself followed by separate coverage of many of the useful and wide-ranging points made during the evening.
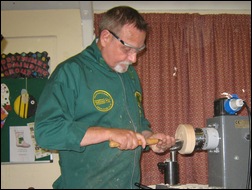
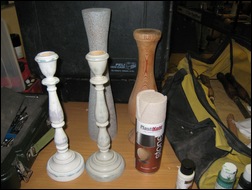
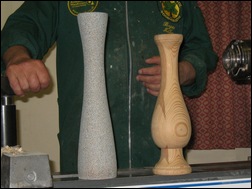
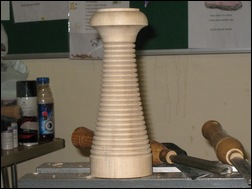
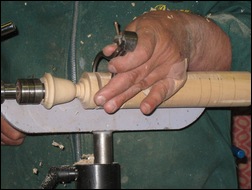
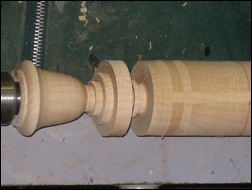
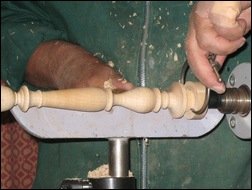
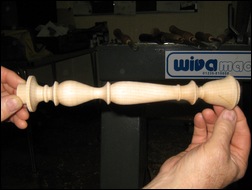
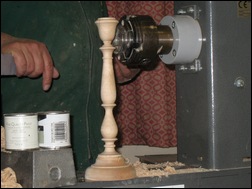
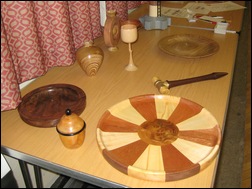
Bryan described himself as a spindle turner by preference but one who performs faceplate work as required by his main theme, e.g. to make the base needed for this evening's principal item, a traditional candlestick. He promised to unveil a particularly delicate piece of spindle work later. Use of colour would be featured as evidenced by his dramatic display table; and he emphasised that it is essential to provide a non-flammable interface between candle and wood to comply with current safety regulations. Click HERE for PDF handout on Candle Safety.
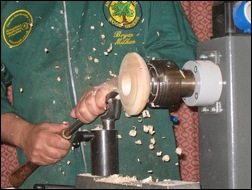
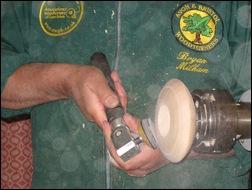
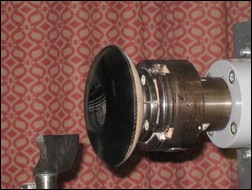
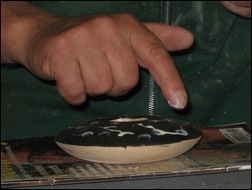
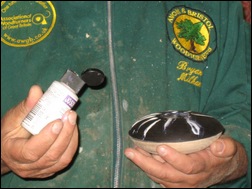
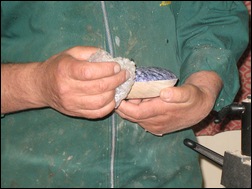
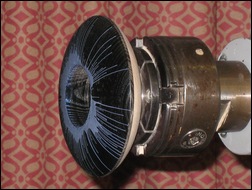
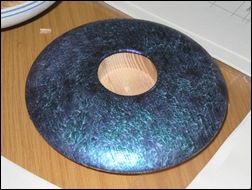
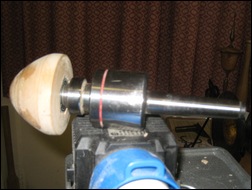
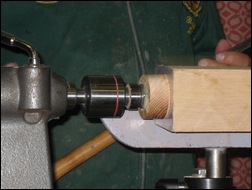
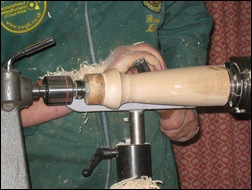
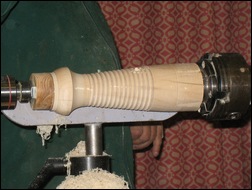
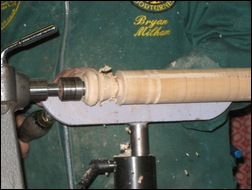
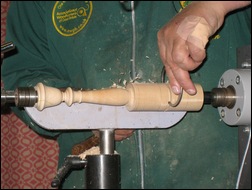
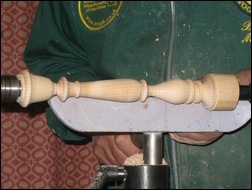
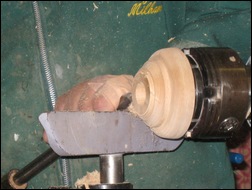
The demonstration started with a 5" diameter by 1.5" thick circular blank mounted on a 1" diameter hole. The circumference was marked to give two sections approximately 3/5 and 2/5 of the thickness, the latter being chuck-side at this stage although it would finish up as the top of the turned piece. The larger section was shaped with a pleasing curve, and a shallow recess was cut for chuck mounting. It was left unfinished, however, to save time for the more interesting work to come. The blank was then reversed and the top shaped in a curve to match the underside, and the original 1" diameter hole was enlarged to create a straight-sided recess made to receive a glass insert to hold a tea light. Tool choices for making the recess were described. Bryan is a keen user of an inertia sander (lathe speed about 500 rpm) going through the grits to get a smooth finish. After sanding the top surface it was sprayed black with Chestnut ebonizing lacquer, care having been taken to protect the lathe and chuck with a neatly arranged cloth drape. The short drying time required was filled with information about several aspects of colouring. This included use of two tea light holders prepared and ebonized earlier, that he decorated by free expression (dabbing) using Jo Sonja white acrylic paint. Bryan showed how the paint can then be spread further, at will, using any suitable material including, for example - bubble-wrap and/ or a rolled-up carrier bag (ragging) to spread and 'pull off' the wet paint.
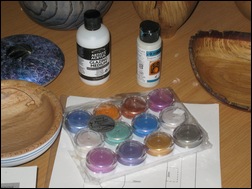
Turning back to the (now dry) working example on the lathe - Bryan then carefully spread a bead of the JS white paint around the inside rim of the centre recess with the lathe static. When satisfied with the distribution, the lathe was switched on to reach a speed that caused the white paint to splatter randomly (via centrifugal force), but neatly, over the black surface. During this phase he had strongly recommended that when using plain timbers such as Sycamore or Birch then 'throw colour at them!' For example - the use of "PlastiKote" paint (source B&Q) to give Pine a 'cement like' finish. He had been influenced by the dramatic work of Jennie Starbuck (who thrilled us as long ago as August 2010 - see the Review of that month).
 |
 |
 |
 |
 |
 |
 |
 |
 |
 |
 |
 |
 |
 |
 |
 |
 |
 |
Suddenly that was it and after questions Bryan was thanked for a performance of outstanding quality, value and interest including fresh insights. In an information-packed evening not a word uttered had been superfluous! Our applause could not really hope to do justice to the achievement.
Summary of points made and information given along the way:
- Tape can be used on chuck jaws where appropriate to prevent bruising of timber. He also uses (masking) tape to protect tool edges in transit.
- If your toolrest is unsatisfactory it is possible to find local engineers who will make rests and posts to order.
- Rotary Sanding - Bryan mentioned his Simon Hope Inertia Sander (see: www.hopewoodturning.co.uk) and the fact that the head had broken. Instead of simply purchasing a replacement head for £9 he looked for other possible solutions. This led him Cobb's Tools (see: www.pad-o-vac.co.uk) whose products are also marketed on eBay. Briefly, he bought a Cobb's head and fitted it to the Hope handle and he is very satisfied with the durability obtained. He also explained the making of foam pads using medium and light density foam, contact adhesive, 2" wide hook and loop material (e.g. Velcro) obtainable from eBay. He also mentioned the light-touch sanding head that comes with the Robert Sorby Inertia Sander.
- Note that the coloured paints are made of exceptionally fine Mica dust in an appropriate carrier. Suppliers of card making materials are a useful source of brightly coloured paints.
- B & Q supply plasticoat effect paints and the DIY stores are an excellent source of cheap pine to practice with. One coat of spray paint on ordinary pine can make a dramatic difference to its appearance. In trying your hand at colour decoration experiment with anything you can think of that may produce a pleasing or dramatic effect. Tester pots and leftover emulsions are a useful source of paint, and chalk paint (emulsion and powder) can be very effective, but is expensive.
- Used aluminium drinks cans are a perfect source of thin layers of that metal. Contact adhesive is strongly recommended for gluing it to wood, but remember that both surfaces must be completely dry before making contact.
- Use of Skew Chisel - practice use in both directions, (and using both hands) then practise more and more to secure complete confidence. Muscle memory will develop from the familiarity.
- Bryan mentioned that unlike the late, great Bill Jones who described himself as a bone and hard wood turner, he had no objection to turning softer wood, but his true preference is for timber that has become available through natural processes including that from trees that have died. Other than for practice he avoids wood that has been harvested.
- In spindle work keep the toolrest as close as possible to the work but not closer than the length of the bevel on the tool in use.
- When using Danish Oil apply it morning and evening for a fortnight. It can then be buffed to huge effect.
- Useful links provided by Bryan after the meeting are: Simon Hope Tools, Pegasus Art, 50mm Hook & Loop, Cobb's Tools via eBay, Mica powder (available in many more colours if you search), 'Acrylic medium' leads to a big bottle but smaller ones are available. However, if you get twelve colours then plenty of medium will be needed. Gloss and Matt are available.
Additional References:
Threaded Live Centre from: RDG Tools - www.rdgtools.co.uk
Item Ref: 1000665 (Note: No. 2 MT only)
Price: £26.00 Inc. VAT and delivery
Jo Sonja Paints available from:
- Jo Sonya's UK Shop - www.josonjas-ukshop.co.uk/ourshop/cat_797840-Iridesecent-Colours.html
- Possibly available from Pegasus Art in Stroud - www.pegasusart.co.uk
Ashley Isles Tools available from Ashley Isles or their stall at the Yandles shows in the Spring and Autumn.
<Top of Page>
This month's Show and Tell theme was - An Open Theme. This was well supported, with an interesting and diverse range of items.
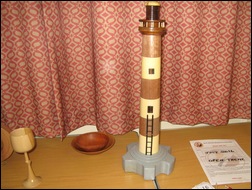
| Open theme items on the display table. Joint 3rd winner Bill Savage with his lighthouse. |
 |
 |
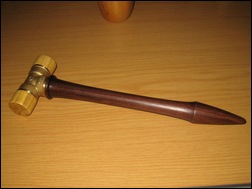
| Joint 3rd winner Richard Branscombe with a Walnut bowl (left) and joint 3rd winner Ian Full with a 'dead blow' mallet (right) | 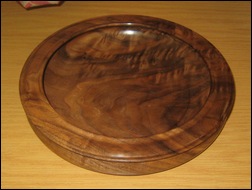 |
 |
| Runner-up this month was Arthur Kingdon with a lidded pot made from Indian Laurel and African Blackwood | 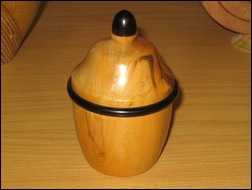 |
|
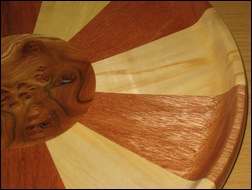
| This month's Show and Tell winner was Richard Balmforth with a segmented platter made of Burr Elm , Mahogany and Sycamore |
 |
 |
 |