
Club Night Report
Wednesday 8th January 2020
Club Night Photos for 8th January 2020 - Guest Demonstrator Bryan Milham - with observations by Bryan Milham
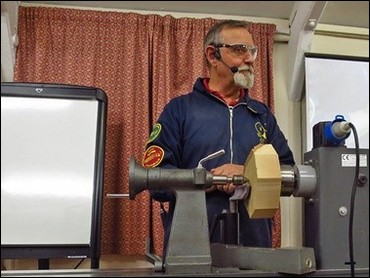
The demonstrator for the January meeting was a welcome return by Bryan Milham - for what has become his regular January visit. His subjects for the evening was investigating some of the many methods of decoration beyond the application of paints. A comprehensive and wide-ranging series of demonstrations Bryan has entitled "Beyond Colour".
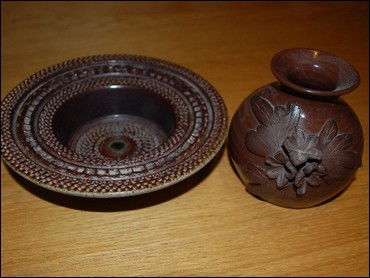
He explained that this demo was created from his collection of ceramics and glass pieces, from which he would sometimes take one into his workshop and try to reproduce it in wood and then try to understand why it worked in clay but looked completely wrong when turned in wood and what needed to be done to 'make it work'.
Also the textures that could be created in wet clay and applied decoration on some ceramics begged being explored and a method of reproducing them on wood discovered.
To allow some of the materials 'drying time', work was set aside and returned to at various times throughout the evening. For ease of following, each stage has been put together irrespective of the actual sequence they were conducted through the evening.
A list of materials used during the demonstrations and possible suppliers has been provided by Bryan and is available as a download from the Club website - there is a link to the PDF file at the bottom of this page.
First was to the use of Gesso and to look at its uses, although it was beyond the scope of the evening to actually attempt many of them.
He explained that gesso has been used for generations as a grain filler, as a non-absorbent base for paint, as a method of building up additional material to enable relief for carving and as a base for gilding as in rococo mirrors and picture frames.
It can also be used to good effect on a badly placed knot to cover it and create a 'cartouche' or small decorative panel, hence saving a nice piece of timber that otherwise might have been ignored or not used.
| The first part of the evening was a basic review of the Paul Hannaby demo as written up from 9th July 2014. |
 |
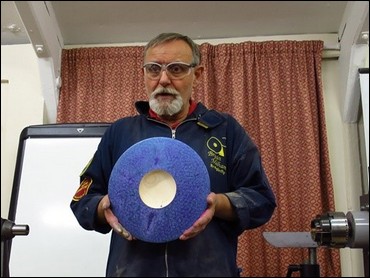
| A simple bowl shape was turned, including a foot to allow the bowl to be elevated above the surface on which it would eventually sit and therefore preventing the dried gesso from being damaged or damaging the surface. The bowl was lightly sanded with 120 grit. This was to allow a key for the gesso to adhere to. |
 |
| A thick coat of gesso was then applied all over the outside of the bowl. |
 |
| Bryan then produced a Dogs Comb and suggested that as we all had 'Dog's', we would all have a Dog Comb! The expected negative response from most of the members attending then enabled Bryan to produced, as he put it, 'some of his favourite and most used and useful workshop accessories, Bamboo barbecue skewers!' |
 |
| Three skewers were held together and the bowl rotated such that they scratched into the gesso. The skewers were moved across the whole surface of the bowl as he continued to rotate it, raising a series of relief scratches. |
 |
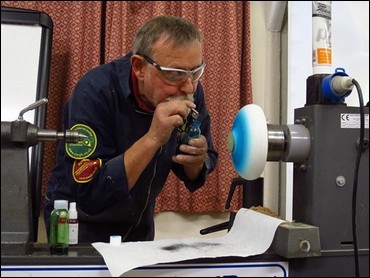
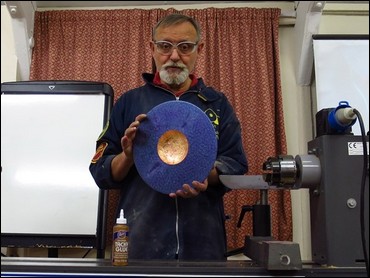
| After the Gesso had been allowed to set slightly, the bowl was returned to the lathe. Asking if, and noting, that most of the members did not have an airbrush, Bryan produced a Spray Diffuser, which when placed into spirit stain or inks and blown through acts as a venturi and propels the colour over the gesso. The blue was Spirit Stain, the pink was a mica infused alcohol based ink Bryan had found in a Craft for Crafters show he attended with his wife. |
 |
| Later again, after the colour and gesso had dried, the bowl was returned to the lathe for the last time and a light sanding to level the relief scratches and allow some of the white from the gesso to show though, lightening the overall effect. |
 |
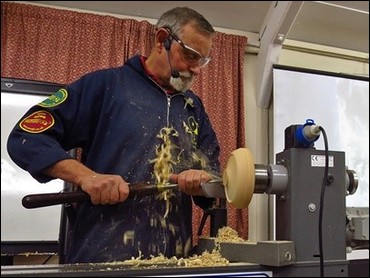
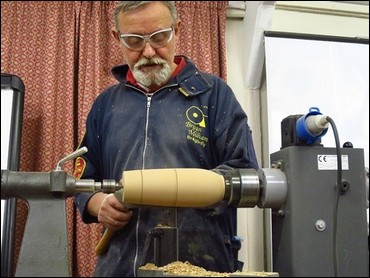
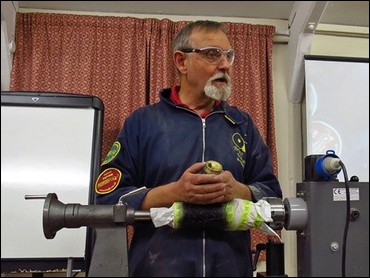
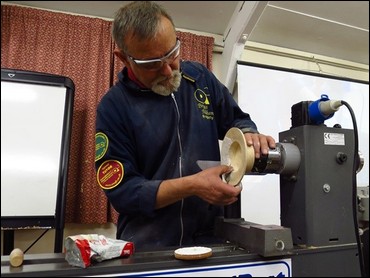
| The second turning of the evening was a decorated vase. The blank used was American White Oak. This was selected for its plain, and bland grain. Bryan showed us the Ashley Isles ½" Spindle Roughing Gouge he prefers to use and reminded us that Spindle Roughing Gouges should only be used on Spindle Turnings and not Face Plate 'Bowl' turnings. |
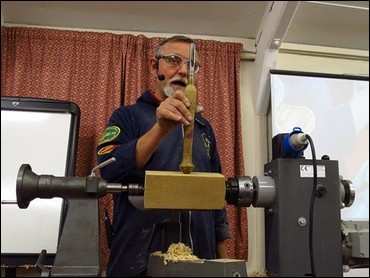 |
| Having brought the blank down to 'almost round', Bryan then switched to the Skew, a tool he is known for advocating and is an expert in its use. He took some time to explain how to become proficient in its use. To do this he drew a line down the centre of his 1" skew and then proceeded to slowly turn the rest of the shape slowly, allowing the camera to watch the cutting point, showing that it was always below the line drawn, as identified by where the shavings were coming off the tool. |
 |
| He explained that if you allowed the cutting point on the skew to move above his drawn line, which is the fulcrum, the tool will overbalance and allow the toe (long point) to drop and catch the wood uncontrollably, causing a dig in! He went on to say that if you wanted to learn the skew, then you should practice just straight planing timber with it at first, slowly building up to long sweeping shapes like ogee's. Finally beads etc., could all come later once you were able to handle the skew confidently as it was intended, as the 'turners plane.' |
|
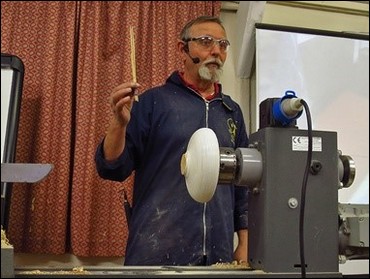
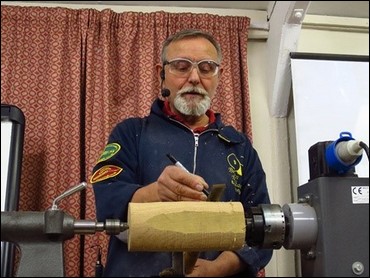
| Having achieved his desired, if simple shape, Bryan then sanded the outside of the vase to 320 grit. He explained that due to the open grain structure of oak, there was not much point sanding it beyond that. He also showed the sanding system he uses. It is based upon the Simon Hope Inertia Sander but he uses 2" & 3" heads from the automotive industry instead of those that come with the system as he finds they last much longer and are considerably cheaper. |
 |
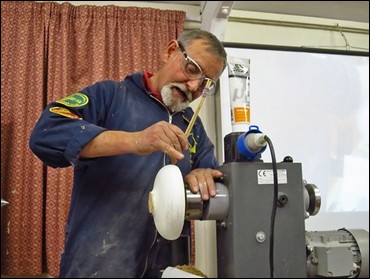
| Bryan then selected an area of the vase to reduce in diameter. Again, using his skew he cut in at both marks... |
 |
| ...and using the skew reduced the radius by 3mm, all around between the cuts. |
 |
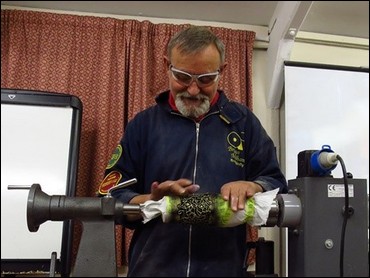
| Bryan then masked off the remainder of the vase using painters masking tape and kitchen towel. |
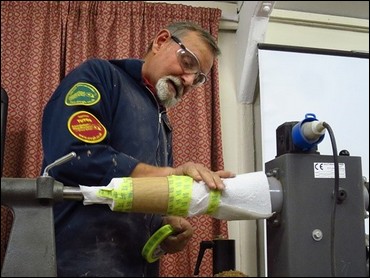 |
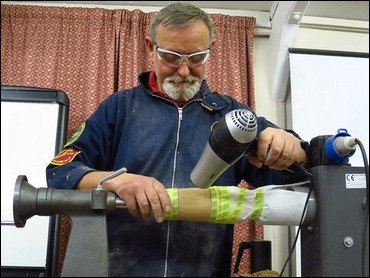
| The exposed area was then heated, he explained that the next stage involved Hot Melt Glue (HMG) and that it adhered better if the wood was hot when it was applied. (Don't tell his wife he borrowed her hairdryer though!) |
 |
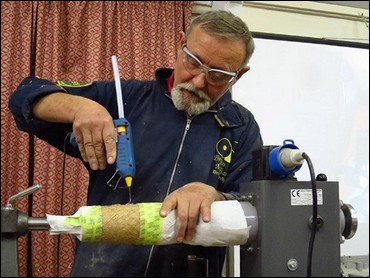
| Hot Melt Glue was then drizzled randomly all over the exposed wooden area, also allowing it to drift onto the masked off area slightly. He said there were only two things difficult about this part; making the drizzled glue pattern look random and having to keep pulling the trigger of the HMG gun. |
 |
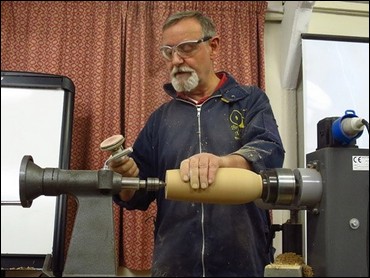
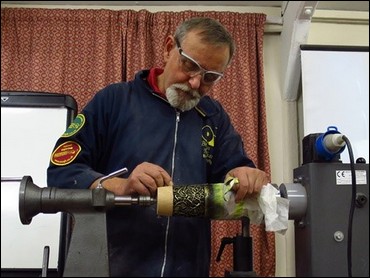
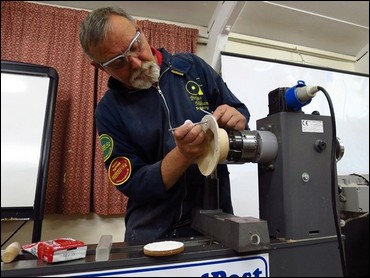
| Once the HMG was cooled, he sprayed the whole area with ebonising lacquer |
 |
| Then using a gold gilt cream, Bryan showed how to apply a small amount to the back of his 'left hand' and use the pad of his right index finger to lightly brush over the HMG such that the gilt cream picked out the higher areas and the larger areas between the glue runs. Using the cream straight from the pot would result in too much on your finger and when applying it to the HMG cause an excessive amount to be deposited and make a mess of the design. |
 |
| Once all the HMG was coated to his satisfaction, he again used his skew to cut into the corners of the masked area to cut through any HMG that did cross onto the tape. Bryan then removed the tape and masking paper and removed the vase from the chuck. |
 |
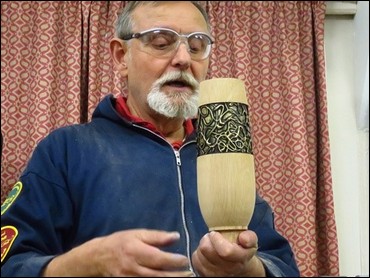
| Although the vase is only a simple shape and as yet unpolished, the decorated area stands out well against the plainness of the timber and provides enough decoration to turn the bland wood of the vase into something more attractive. |
 |
| The second part of the evening used pre-prepared blanks. It was created from some of his ceramic collection and how Bryan has used these pieces to expand and develop some of his decorating methods used on his turnings. Not all of the effects he's experimented with have yet found a purpose or use in his decorative repertoire, but were shown here as examples of different techniques that someone in the audience might find a use for. |
 |
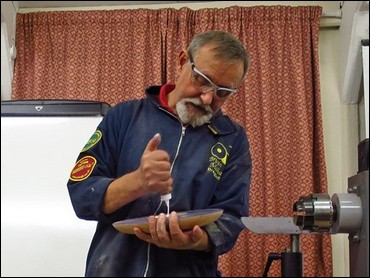
| The first was a wide rimmed bowl that had previously been coated in gesso. Bryan produced some little pots of 'Brusho' colour crystals he had found in a Craft for Crafters show. These he sprinkled lightly over the bowls rim (we took his word for that as they were so small they could not be seen). He then used a small pump bottle to 'Spritz' water over the bowl. |
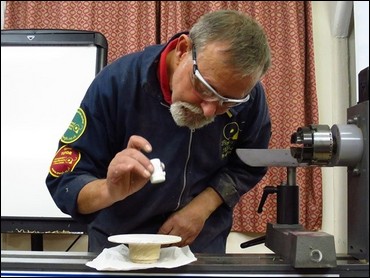 |
| Within moments the water started to react with the crystals and colours started to appear. Bryan said that as yet, he has not found a use for this form of decoration but demonstrates it as it might cause a lightbulb moment for someone in an audience and be just the effect they are looking for. |
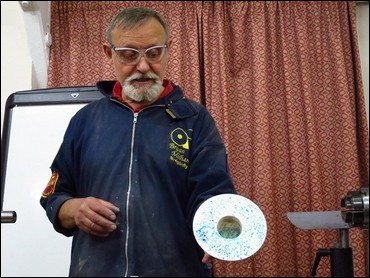 |
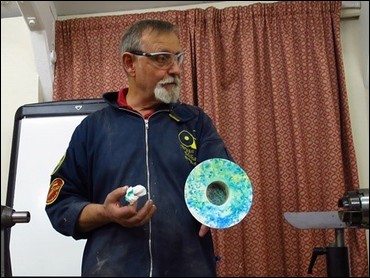
| As the evening wore on, the colours continued to expand and fill the rim with a random pattern from the 2 colours of Brusho Bryan used. Bryan informed us that there were many videos on 'YouTube' showing more techniques for using these paint crystals. |
 |
| The next technique shown involved a large platter that had previously been decorated with Jo Sonja Iridescent paints around the rim. He noted that a few areas were visible where the paint had not taken properly and so the platter had become a demonstration piece. |
 |
| The inner bowl area had a version of a PVA glue applied, in this instance it was 'Aleene's High Tack Glue' as it allowed for the demo to progress faster than having to allow standard PVA to 'go off' slightly. Standard PVA or Aliphatic (Yellow) glue can also be used. |
 |
| The glue was spread evenly and thinly all over the inner bowl area. |
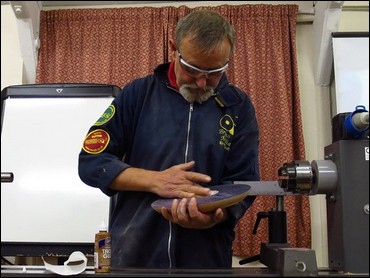 |
| Bryan then produced a pot of Gilding Flakes. Something akin to gold or other metal leaf but in small sections. He used his finger to pick up a few at a time and place them onto the glued surface, where they adhered. He continued this until the whole surface was covered. He noted that small areas might be missed but they could be finished with another small amount of glue and more flakes. |
 |
| Once the inner bowl was coated, it has to be left for the glue to fully dry before it can be burnished, to give an almost Gold Leaf appearance or lightly brushed to give a shiny but irregular surface. However you chose to finish the surface, it must be sealed with a spray varnish. This is because the metal flakes can, and will, tarnish over time if left exposed to the atmosphere. |
 |
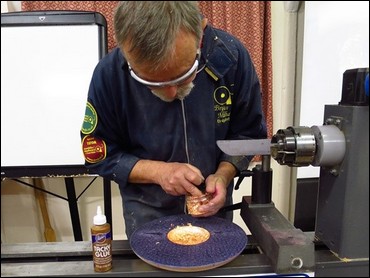
| The last technique of the evening involved the use of 'Air Drying Polymer Clay'. The clay was pressed onto the bowls rim in a thick layer, or as thick as would be needed for the decoration to be applied, and then smoothed. |
 |
| By comparing to one of his ceramic bowls he had brought along, Bryan explained that he wanted a way to create relief shapes without heavy carving into the wood. Air Drying clay does not shrink like organic clay and therefore was suitable for applying to wood where some sort of texture or decoration would be wanted. But that it had to be accepted that it would need to be painted or otherwise decorated later to hide the clay. Bryan informed us that according to the instructions, once exposed to the air, it dries in 24 hours for pieces up to 1cm thick. |
|
| Applying an embossed design to the clay using leather workers punches. |
 |
| This piece was previously covered in a thin layer of the clay and using leather workers punches and other tools, embossed with various shapes to create a design. |
 |
| By experimentation, and the use of some of his good ladies craft items. Bryan had found that the clay could be pressed into various moulds, this is a silicon cake icing mould, and allowed to harden. |
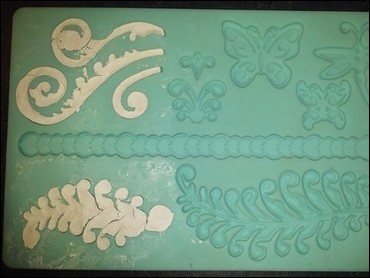 |
| The set clay could then be removed and pressed into fresh clay, or applied directly to the turned item as decoration. |
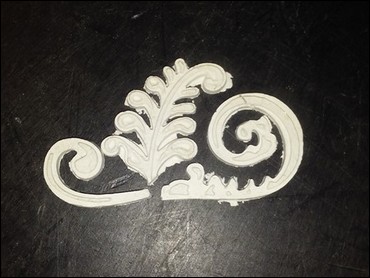 |
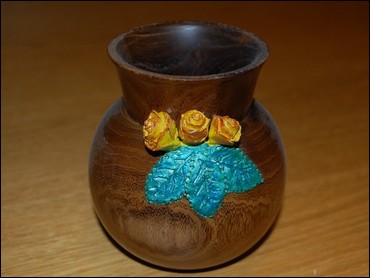
| Unlike earthenware pots and vases, wooden articles did not seem to be able to handle thick designs applied to them. However, this Rose decorated bowl was created using very thin polymer clay to create the roses and leaves which were subsequently painted. Click HERE to download a PDF file (81 Kb) showing the special products mentioned above. REMEMBER: Always do your own research - and Google can be your friend... |
 |
As usual, Bryan provided us with an excellent evening that was entertaining, interesting and informative. Thank you Bryan! |
|
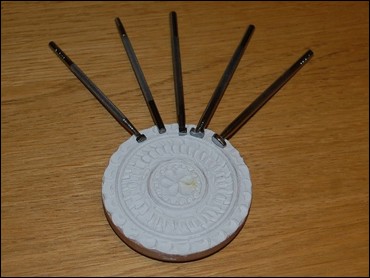
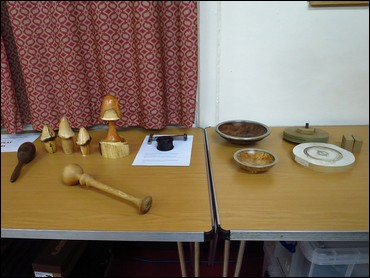
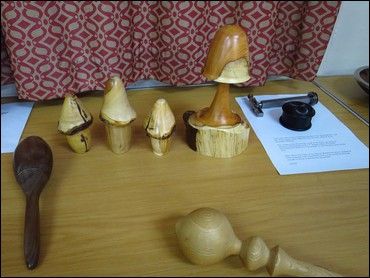
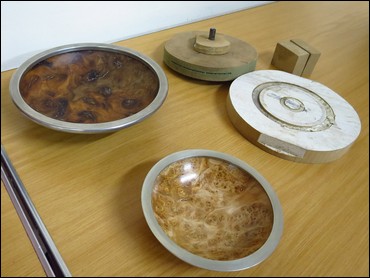
The display table showed a number of interesting items:
A maraca (singular of maracas?) that actually worked, by Richard Branscombe.
Several yew mushrooms including a large one by Dave Newman, a 'work in progress' item by John Sawyer looking for advice on turning a sphere, an ornamentally turned box in African blackwood by Arthur Kingdon (along with the eccentric cutter frame used for the box top) and a display of pewter turning showing moulds and finished items by Ken Crittle. The latter was timely and created a good deal of interest with our February 9th Workshop Day focussing on pewter use.
 |
 |
 |
|