
Club Night Report
Wednesday 15th February 2017
Club Night Report for 15th February 2017 - observations by Vernon Hughes
 |
 |
 |
 |
 |
 |
 |
 |
 |
 |
 |
 |
 |
 |
 |
 |
 |
 |
 |
 |
 |
 |
 |
 |
 |
 |
 |
 |
 |
 |
This evening's subject item was to be a bowl. That it would be of original and superb design could be taken as read. Les delivers a relentless torrent of explanation and advice throughout his demonstrations though, so to avoid blurring the lines between action and explanation this report will consist of two stages. The first will aim to give a fairly straightforward description of the main phases and order of work and will then be followed by a small selection of tips and explanations about technique, tool use and helpful advice, etc. A longer list would be highly desirable if only space and time permitted.
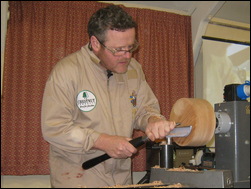
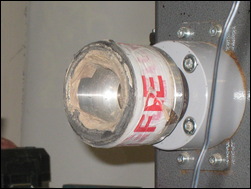
An Ash blank of nominal size 9" diameter by 4" thick was mounted on a screw that was in turn chuck mounted (my mental note upon eyeing it up at the time from my front seat was that it was 5" thick, but what matters is the finished appearance).
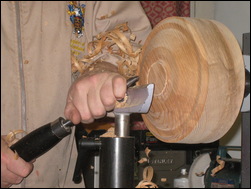
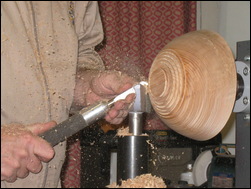
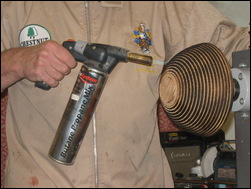
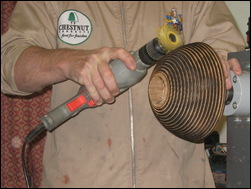
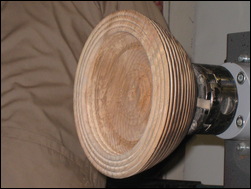
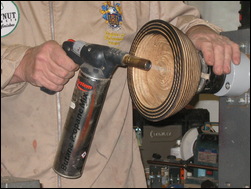
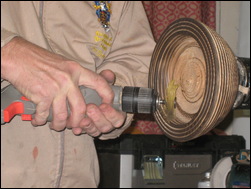
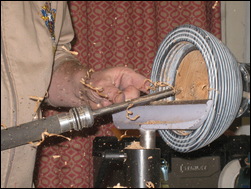
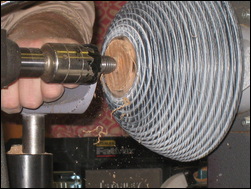
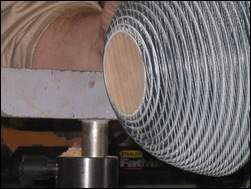
The blank was rounded down, cuts being made from each side to the centre, and the bottom surface was faced off. The bowl shape was then turned to a pleasing profile (remarkably quickly) and a spigot formed with three deft tool strokes for chuck mounting when the bowl was reversed. Starting at the base an Ashley Isles beading tool was applied to cover the full outside curve of the bowl with nicely formed beads. A blow-torch was then applied all over, more as a means of burning off loose fibres than for colouring. A rotary sanding brush in an electric drill was used to smooth the surface/ beads and remove most of the charring from the blow-torch.
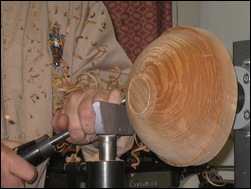
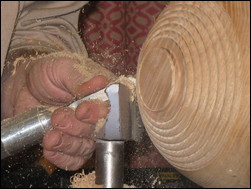
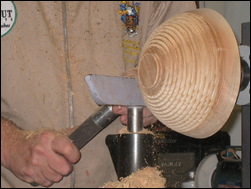
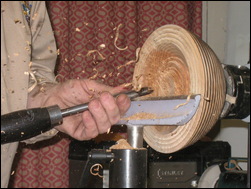
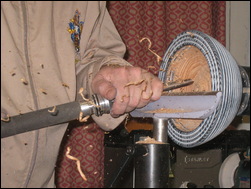
The bowl was then reversed - held on the spigot and work commenced on the top. Preparation of the surface included turning off a half-bead. Working from the rim four beads were then formed to create the top edge of the (thick-walled) bowl, the first being turned with a spindle gouge before the other three were made with the beading tool. Hollowing was then commenced and after sufficient depth had been achieved three more beads were then made at the top of the inside surface.
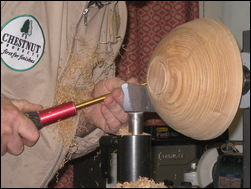
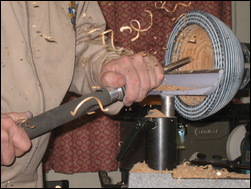
The blow-torch was then brought into play - mainly to clean up the surfaces; the four top beads followed by the three internal ones. Extensive use was made of a brush to remove thick deposits of dust at various stages - along with the sanding brush in the electric drill. After protecting the lathe all the beadwork was then sprayed with black ebonising lacquer and a break for tea was called (perfect timing to allow for drying).
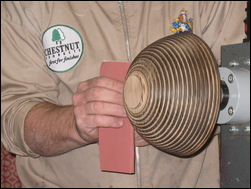
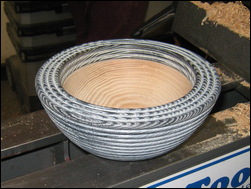
The next stage was to apply liming wax over the whole beaded areas (accentuating the grain), a striking colour change being achieved by this. A Sainsbury's shoe brush served as the application tool - along with a tooth brush to get right into the bottom of the beads. Excess liming wax was removed with paste wax. Rubbing off with a rag was carried out carefully and thoroughly, the objective being to end up with the white liming wax sitting in the low points while the tops of the beads were darkened by rubbing off wax.
The hollowing process was then completed expertly. Les demonstrated a technique for use in aiming to achieve a perfect curve in the base without leaving a pip at the centre; i.e. run the gouge in slowly and end up with the last shaving in the flute.
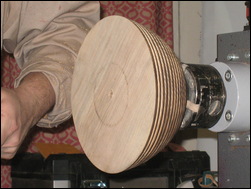
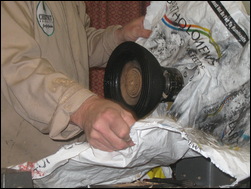
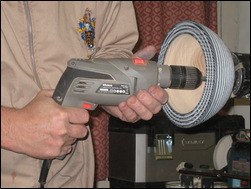
The next task now was to again reverse the bowl to permit removal of the spigot. Les asked 'who would use a vacuum chuck to hold the reversed bowl?' but then proceeded to show that it was not needed. An aluminium vacuum chuck head had been padded with foam held in place by adhesive tape. He then aligned the bowl to sit on this pad with tailstock support applied, perfect centring seemingly being achieved in the process. The spigot (now a foot) was turned down in thin slices working to an ever-ever-smaller residual pip-stem at the centre. When the surface shaping had been completed with the customary slightly dished face, Les removed the bowl and placed it face down before removing the tiny residual stem with the flick of a finger, and then carving and sanding off the last vestige. He finished off with a positive declaration that 'we don't have to have a vacuum chuck'! Well, He doesn't anyway.
That is essentially how the turning process was undertaken; now let's try to pick up on useful observations made and advice given, along the way. Keep in mind though that there are more fine points than can be fully absorbed (or fully understood) in a single demonstration (or in these notes). Personal practice under Les' eagle eye would be the only sure way of 'getting' all of them.
Les started off with a description of bowl gouge sizing and dimensions with depictions of the 'Sorby', 'Crown' and 'Henry Taylor' cross-sections. His preference is for the 'Sorby'. Some safety tips came next. Having mounted the sturdy Ash blank he cautioned against too high a speed at the start. Speed selected must be consistent with safety, so move up to optimum higher speed as the work dictates. Minimise risk and stay out of the firing line if possible by planting the feet to one side of the mounted timber position. On picking up a bowl gouge he slipped straight into challenging mode and asked us to justify the benefit of a long grind on the bevel. Whilst we were still wriggling in our seats or struggling to clear our minds he declared that he does not see the benefit of such a grind except for shear scarping. From this point on there was a steady stream of advice about tool positions and angles in relation to the work or the toolrest, and tool holding disciplines; and we were advised to be sure to learn when to use pushing or pulling cuts. Just one tiny example of the sort of advice given was that the finer the cut the firmer the hold on the tool should be. A much better finish is achieved straight away using this principle. Suffice to say that all of this is a subject for constant thought and practice.
When preparing the holding spigot at the bottom of the bowl Les stated that the recesses so popular with the old school in the past were now seen to have limitations; they are 'unversatile' and restrict the options. Spigots give every option and a stronger hold. Some argue that spigots waste timber but this can be overcome by gluing on an extra (sacrificial) piece to form the spigot.
When using a blow-torch it should not be floated about. Keep it steady; and make sure the dust extractor is switched off! Ash tears out just after the end-grain, hence the value of burning off, but is a reliable timber for work with a beading tool. So are Oak, Elm and Sweet Chestnut, but not Sycamore which has a more tender grain structure. Blow-torching can shrink timber and it is worth re-tightening the chuck accordingly.
A valuable point was made about finishing. Generally, applying lacquer on top of wax is not advised….BUT it works! Apply four or five coats.
Gouge bevels - Les used one gouge on the inside of the bowl immediately beyond the last bead with an almost straight bevel. At the bottom of the bowl he advised switching to a gouge with a 60° bevel (from his customary 45°). He said that such an angle takes away the ability of the tool to dig in or take too big a cut and it gave a so much better and safer cut. It had revolutionised his bowl turning.
Sanding - One of the more significant points made was that when using coarser grits the jumps between grades should be shorter, e.g. 60, 80,100, 120, etc. Also keep in mind that bumps can be sanded out but hollows (e.g. torn out grain) have to be removed by further turning. Power sanding is quick but very dusty. Inertia sanders are OK - but, not so good across the middle. Hand sanding is also OK - but, not quick.
There we are; that's a sprinkling from all we heard on the night. Recollections will have to suffice for anything more.
At the end of the demonstration Arthur Kingdon rounded off with the brief but telling observation that we had been treated to a combination of entertainment with learning; lots of both. Applause was delivered to suit.
Thanks again Les!
<Top of Page>
Continuing this month with two Show and Tell Tables - using the same Theme - with a table for Novice Category and one for the Open Category.
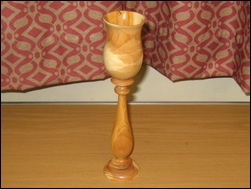
This months Show and Tell Theme was: A Spindle Turned Item
 |
 |
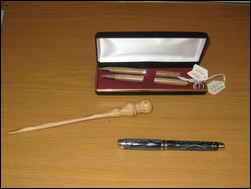
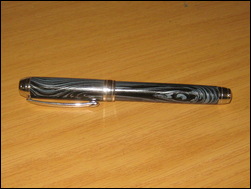
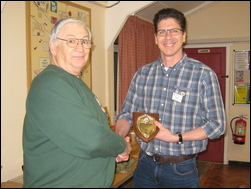
| This month's winner in the Novice Category was Dave Groves with an impressive pen made from an M3 Mokume Composite blank coupled with a Mistral Pen Kit from Beaufort Ink |
 |
 |
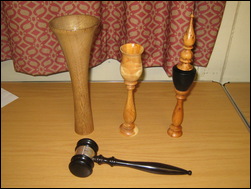
| The February winner in the Open Category was David Branscombe with a turned goblet in Yew |
 |
 |