
Club Night Report
Wednesday 12th April 2017
Club Night Report for 12th April 2017 - observations by Vernon Hughes
 |
 |
 |
 |
 |
 |
 |
 |
 |
 |
 |
 |
 |
 |
 |
 |
 |
 |
 |
 |
 |
 |
 |
 |
 |
 |
 |
 |
 |
 |
 |
 |
 |
 |
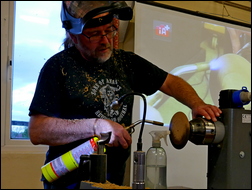
(see: www.markhancock.co.uk) opened by reminding us that it was exactly a year since his last visit on 13th April 2016. He had also been with us 25 months before that on 12th March 2014. As usual in such instances, it is well worth turning up the 'observations' on those visits.
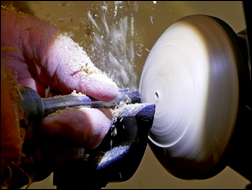
By way of introduction Mark explained that he would be showing us his way of working and his techniques; right or wrong practice does not come into his approach (note though that there is a clearly thought out reason for everything that Mark does or says; no stone has been left 'unturned'). He also explained that he does not aim to finish to gallery standard at demonstrations; and later on he added that his aim would be to encourage us to exercise our imaginations about unusual possibilities in design using (in this case) three examples of hollow forms. Tool Note: Two tools predominated throughout the demonstration, a ¼" bowl gouge for shaping and an interchangeable-tip shear scraper for surface finishing. Throughout these observations it can be assumed that these are the tools in use at virtually all stages, but a separate note will be included about the shear scraper. It is more than useful to have a number of bowl gouges with a range of bevel angles appropriate to the task.
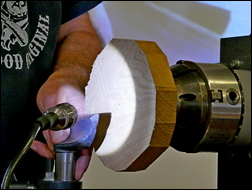
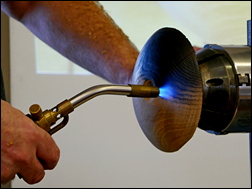
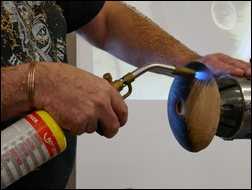
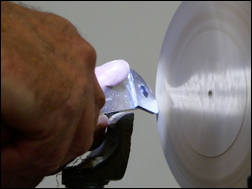
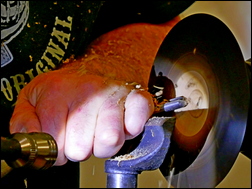
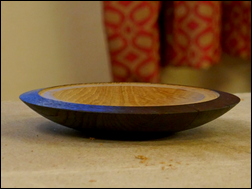
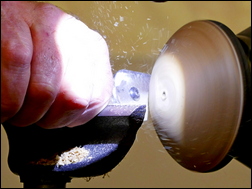
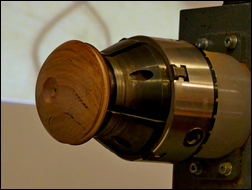
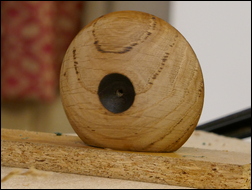
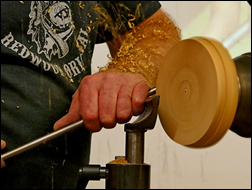
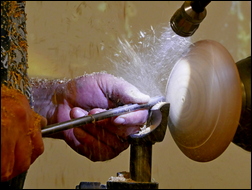
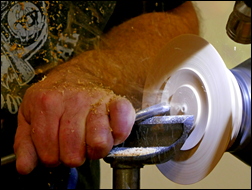
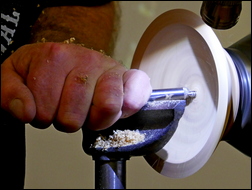
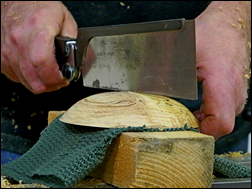
Item 1. The proceedings started with a screw chuck already mounted in O'Donnell jaws (of which there are three sizes Richard B. reminded me). Two spacers were added to reduce screw length to suit the piece of 1" thick Oak board to be used. When deciding which side of such a blank should be on view in the finished piece we should look for the 'smiley' grain orientation (although that would not matter in this particular case). A blank with multi-faceted edge was mounted and rounded down to a disc of something over 6" diameter. With his favourite grind on the gouge Mark created a nice curve with planing cuts on what would be the underside of the finished article. The centre was dished to a diameter of say 2" exposing the central screw-hole that would be used when the blank was reversed. The surface was perfected using a 'Robert Sorby' style shear scraper that he finds to be far preferable to a conventional (potentially over-aggressive) scraper. Using a lateral angle of presentation of the tip between 30° and 45° it never catches. A central 1" recess was then marked out carefully and cut before the whole surface was ebonised by burning. We were advised to use the hottest gas obtainable; not the usual propane or butane which burn at a comparatively low temperature and can thereby cause cracks and checks in timber. 'Map Plus' gas burns at 2,000°C and gives an instant effect. It is readily available in the UK, lasts for ages and costs around £40 for the ignition/ burner and £11 for a canister of gas. For example - see: www.toolstation.com - product codes 36574 and 71066. Preparation included use of a heat mat and clearance of all loose shavings. A water spray and bristle brush are also essential items of equipment. The whole surface was soon burnt and sprayed immediately with water to kill the embers. A bristle brush was applied to bring out a pleasing texture on the oak surface, the summer growth having burnt out faster than the harder winter growth and given a pleasant sheen. (Note: Dust extractors must be turned OFF when using a burner).
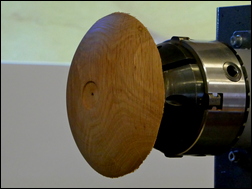
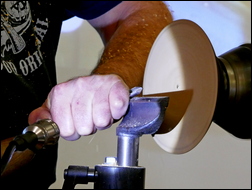
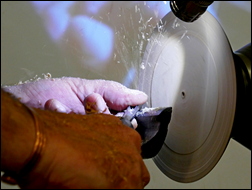
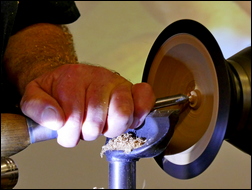
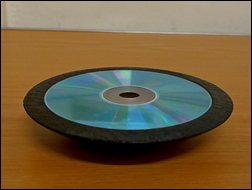
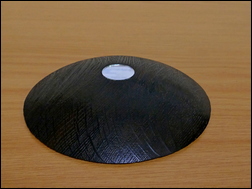
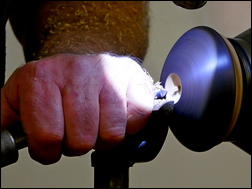
The piece was then reversed, the spacers remaining in position. The outer edge of the blank was chamfered down about an inch in from the edge, shear scraped using the rounded tip, burnt, water sprayed and brushed. Work then started on hollowing out the blank but Mark soon stopped to mark out a key diameter on the face for a shallow recess. That diameter was checked repeatedly during the hollowing phase and a small step was made at the edge. Upon completion of hollowing a small pre-prepared plain button was inserted off-lathe to plug the screw-chuck hole (it would usually be gilded). A plain CD was then fitted into the precisely measured circle, with the advice that contact adhesive should be used for fixing. Superglue reacts with CDs, glass etc., and creates unsightly marks. A 'hollow form' had been created but as a finishing touch a circular mirror was fitted into the (precisely measured) underside recess to mask the screw-chuck fixing hole. The piece was then passed round for inspection.
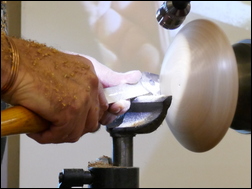
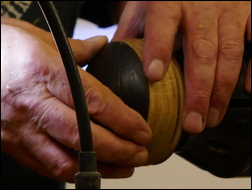
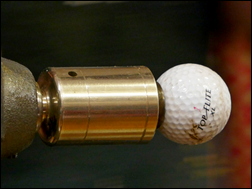
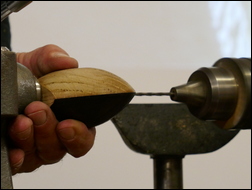
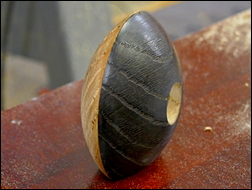
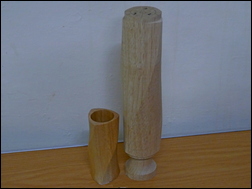
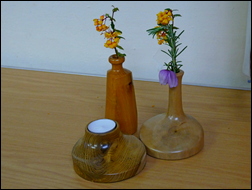
Item 2. Two 1" thick Oak blanks had been selected for the vase now to be created. Mounted on the screw chuck complete with spacer the first blank was rounded down to a circle of approx. 4" diameter. It was also faced off and checked with a straightedge, the flattest surface possible being required. The blank was then reversed on the screw and the rim squared off. The face was curved from centre to back edge and surface-finished using the straight edged tip of the scraper. (The spacer diameter had to be reduced but being of man-made composite board it could quickly blunt tools and Mark advised that he keeps an old gouge for the purpose). The curved face was then burnt, sprayed and brushed before a small central recess was cut. Work commenced on the second blank in identical manner to the first, the aim being to make two identical pieces, both with dead flat faces. The first piece was offered up as necessary to get matching diameters before the second was reversed on the screw and a similar curve formed thereon. Shape was eyed up to get it close to identical. A small recess was cut in the centre of the face and burned/ sprayed/ brushed, a narrow burnt area beyond the recess then being cleaned off with the finest of cuts. Shear scraping was then performed and Mark advised that if necessary sanding would be performed on this (i.e. unburned) side. The two contrasting halves were then glued together, care being taken to get the grain pattern to match as closely as possible. Using a highly efficient Japanese saw a suitably sized section of the perimeter was cut off to provide a flat base so that the piece could stand on its edge as a Grass Pot. The final task was to drill a small hole in 'the top' to take a selected piece of grass or similar for ornamental effect. Drilling was performed with a small gauge drill held in a Jacob's chuck which was itself chuck-mounted. Support at the tailstock was provided by a (modern) golf ball pushed in the twinkling of an eye onto the live tail-centre (see separate note at end). Quill movement was used to push the pot onto the drill. Upon completion a piece of grass was duly inserted into the hole. Mark made the point that any number of holes could be drilled in whatever positions and pattern and at whatever angles suited the maker. He aims to show techniques and ideas, not to perfect a piece, during demonstrations.
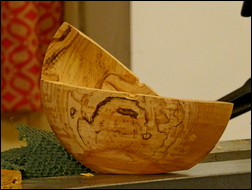
Item 3. Spalted Beech had been selected for this piece. Again, it was mounted on a screw chuck using a spacer and rounded to a circle of approximately 6" diameter. (The point was made here using a US Professor as the authority that contrary to common belief spalted timber is not dangerous to use; the fungi involved are in the air we breathe anyway, and in any case those found in dry timber are already dead). The face was curved and the blank reversed. After facing off the centre the disc was dished out before the piece was sawn with the Japanese saw into two semicircles. The hollowed out faces were then brought together at various positions to show different effects that could be achieved before being glued together in a chosen position; a small section of the perimeter was then sawn off to provide a standing base for a highly unusual pot. Mark observed that a 'Dremel' carver could be used to carve decorative shapes according to individual fancy, and it was also mentioned that small paint rollers obtainable from the children's section of art shops could also be brought into play.
Having kept us engrossed right up to closing time the moment came suddenly to show our appreciation, which was duly done albeit at the rush. Thanks Mark!
Footnotes:
Shear Scraping - Mark favours strongly the interchangeable-tip, on flat bar, design of scraper in preference to the traditional type. These can be obtained from Robert Sorby for example www.robert-sorby.co.uk - RS100KT and RS200KT or made up to your own design. He advised that old planer blades are an excellent source of suitable HSS for the tips. He also mentioned that if anyone has redundant Sorby shear scrapers he would be interested in acquiring them to pass on to his students…
Oak is an excellent timber for hollow forms.
Burning - The controlled burning of wood is accepted as an approved finish in woodturning and beyond and can also serve as a way of preserving wood, e.g. on timber used in the ground. A building cladded with burnt wood can be found on the Isle of White.
Bevel Contact - Mark placed great emphasis on the need to apply this well-known practice unfailingly and to ensure that the supporting bevel is always kept in view. Techniques for this have to be developed, and cover tool presentation angles and body positioning. See a further note below under the heading 'Guillotine Angle'.
That Golf Ball and speed of its mounting. Mark explained to me afterwards that his live centre is from 'OneWay' and has a thread behind the ring centre for various attachments. The threaded section is therefore parallel and a hole had been drilled in a (modern) golf ball to suit that section and it simply pushes on. The same can be done with the latest 'Evolution' chuck from 'Axminster' which is of similar design.
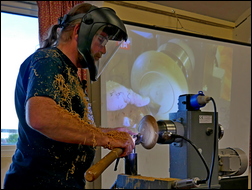
Honeywell Full Face Masks - These are obtainable for around £25 delivered (see: www.amazon.co.uk) and are highly recommended. Try a Google search for: "Honeywell 1011623".
The 'guillotine' cutting angle (Provided by Mark after the meeting):
"I have found over the years that one can get a better finish from any gouge (spindle roughing, spindle and bowl) if the cutting edge presented to the wood is at an angle of between 30 and 45 degrees from the horizontal. I use the term "guillotine angle" in the hope it sticks in students' heads, because I believe originally the French guillotine blade was horizontal at the cutting edge and they found it inefficient. When they skewed the angle its performance improved (Comment by the author: 'not everyone's dream job in QA!'). You can find numerous examples of this presentation of cutting edges throughout the whole of the woodworking industry e.g. the cutters on a chainsaw and how a hand plane is angled when planning the edge of a board.
Combining the guillotine angle with being able to see a rubbing and/or supporting bevel on the wood is the way I like to see gouges used simply because a catch or dig in is caused by nothing more than an unsupported cutting edge and if you can't see the bevel rubbing it is easier to get a catch. So for example if you point a spindle roughing gouge perpendicular to the wood you have a horizontal cutting edge and can't see the rubbing bevel. This is also a very aggressive cut on both the wood and for the user because of the increased width of cut. If cutting from right to left the user points the tool 45 degrees to the left and aims to cut with the cutting edge which is just to the left of centre of the flute of the tool you get a guillotine cut with the ability to see a rubbing/supported bevel which is a much more enjoyable cut both for the wood and the turner. And vice versa when moving the cut to the right."
<Top of Page>
There are two Show and Tell Tables - both using the same Theme - with a table for Novice Category and one for the Open Category.
This months Show and Tell Theme was: A Multi-Axis Item
Clearly, this was not a popular show and tell with very few (but displaying exceptional quality of turning) items being entered...
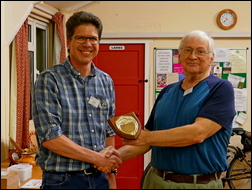
| This month's winner in the Novice Category was Steve Body |
 |
 |
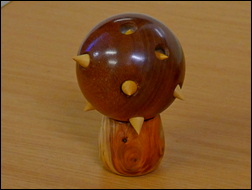
| A finely turned, intricate 'Singapore Ball' secured Third place in the Open Category for Richard Branscombe (right). Second place went to Harry Rock with a collection of varied mulit-axis items (left) |
 |
 |
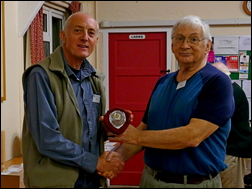
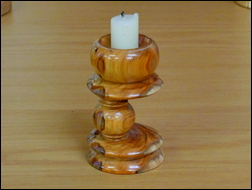
| The April winner in the Open Category was David Branscombe with his multi-axis candle holder in yew. |
 |
 |
<Top of Page>