
Club Night Report
Wednesday 9th April 2014
Club Night Report for 9th April 2014 - observations by Vernon HughesOur demonstrator for the evening was the West Midlands' Steve Heeley who is based in Cannock. He reminded us that he demonstrated spindle work on his last visit but that he generally avoids repetition on principle. This evening he would make a thin-walled (2-3 mm as it turned out) Open Form, and if time permitted he would show an approach to texturing. He emphasised at the outset that he is left-handed but has trained himself to work just as deftly/ precisely with the right. There was an unmistakable implication that we should each develop such all-round ability. His certainty of touch in every move indicated absolute confidence in, and mastery of, his methods, but he was at pains to point out that they were his methods, all the result of personal analysis of what would give the best results for him. The standards he sets himself are breathtakingly high as evidenced by his display table.
 |
 |
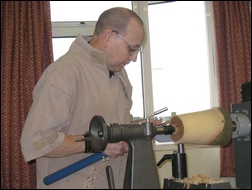
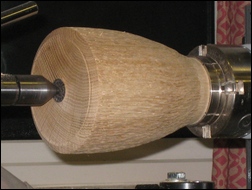
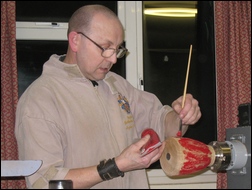
For the 'open form' piece Steve started off with a blank of wet Oak, the heartwood of which was much darker than normal and showed a clear contrast with the creamier sapwood. Dimensions were about 9" long with variable diameter between 5"-6". Both ends sloped substantially off-square. The blank was mounted between a Steb drive centre and a rotating cup-tail-centre; the latter being strongly recommended for greater holding strength between centres than would be given by a conventional point. This leads into the fact (but not a criticism) that Steve has an individualistic approach to tools and equipment and employs a kit more advanced or specialised (and costly) than that which most of us are accustomed to using. More on tools presently.
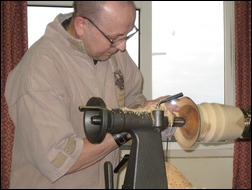
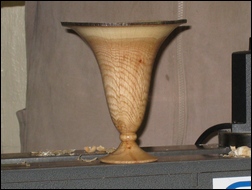
Design - In thin-wall turning (which results in the wood drying quickly) it is a matter of principle for appearance and to prevent splitting that the wall thickness be perfectly even throughout, with some possible exception at the base due to the demands of shaping. Steve emphasised that the foot of his piece would also be hollowed to match the main body, leaving the narrow bead at the intersection as the only point of greater thickness. His chosen form was visually appealing and depended on the inside surface being shaped to perfection first so that even wall thickness could be achieved by following the internal shape precisely when working the external surface. Steve's ability to achieve fine precision, inside and out, was impressive to say the least.
 |
 |
 |
 |
 |
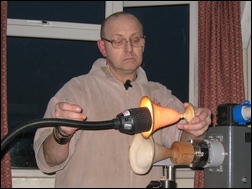 |
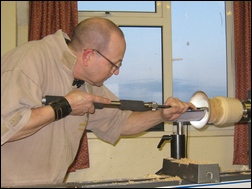
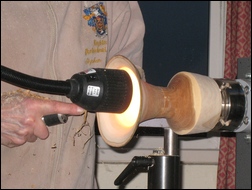
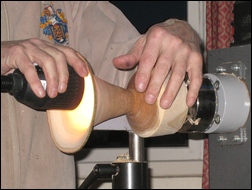
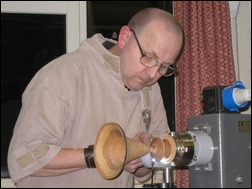
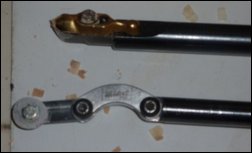
Method of Work - After squaring up the blank at the tailstock end it was partially roughed down with some tapering towards that end. A tenon to fit into his chuck jaws was then formed precisely, the thickness being measured very accurately with a neat little gauge. The ring centre was replaced briefly with a common point for tidying up the face of the spigot. The blank was then reversed and mounted in the chuck with retained tailstock support. The top end was squared and attention then paid to creating the narrow bark rim and achieving a standard strip width all round; tailstock then moved away, central nib removed and a small indent made to receive a drill tip. A drill with its own integral morse taper shank was then placed in the tailstock and a hole was drilled to the required depth. His drill was approx. 15 mm diameter but this dimension was not critical. A directly mounted drill gives significantly greater rigidity and reduced risk of 'wander' than can be achieved using a Jacob's chuck. A pointed tail centre was used briefly to maximise stability while some preliminary hollowing cuts were made. This technique is not often seen and adds to our knowledge base. The first of two 'special lights' were then introduced. The first light was a large standard magnetic base/ flexible neck and the second was a small magnetic base LED lamp that was small enough (about the size of 2 postage stamps) that it could be mounted on the toolrest (or the tool itself) - to assist with the critical task of establishing wall thickness. For the small light website see here: www.woodart-products.co.uk/3_Handy%20light.php. The tailstock was then removed for the last time and Steve then revealed his (expensive?) Woodcut/ Flexicut hollowing tools - see here: www.axminster.co.uk/woodcut-pro-forme-hollowing-system. He spent about ten minutes on precise hollowing, the result (time taken and form achieved) being critical to the visual appeal of the finished piece. The large light was then set up and positioned close to the mouth of the open form and pointing directly into it. In brief, external surface shaping is performed in short steps to retain maximum body strength throughout the shaping process. Uniform wall thickness was achieved by checking constantly (and with a practised eye) the colour of the light shining through the thinning timber from inside to the external surface. Remarkably, Steve had the hall lights turned off for a time during this phase of the project, which enhanced his ability to assess the quality of light being observed.
 |
 |
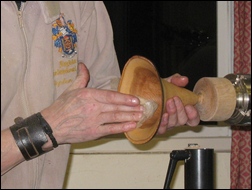
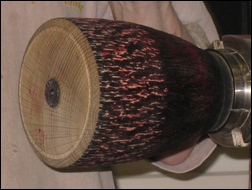
Upon reaching the base Steve explained that to his eye the diameter of the standing rim should be about one third of that of the top rim. Before starting work on the base, however, he surprised all (or most) of us by spraying methylated spirits into and over the work and setting it alight! The purpose of this was to achieve quick drying in readiness for sanding. After emphasising the desirability of keeping cuts as clean as possible while working down the form he sanded the piece using 120, 180 and 240 grits.
He described his approach to
 sanding which included the use of oil, on which he is very keen. Most of his display workhad been finished with oil and he stressed that numerous coats (perhaps up to ten) should be applied little by little until a high quality of finish is achieved. He favours 'Chestnut Finishing Oil'. In this evening's piece he judged that it was already over-dry and he sprayed a little oil inside to replace lost moisture before sanding.
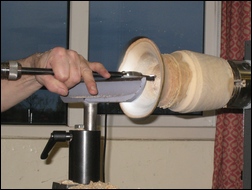
The form and proportions of the base with the bead above it can be seen in the photographs - and it will be noted that sufficient bulk remained below the bottom of the base to ensure strength and stability in the hollowing phase. He relied on the light again to achieve accurate wall thickness and again used meths for drying - but only on the external surface of the base. It seemed remarkable that he was able to complete the hollowing without tailstock support and without vibration despite the fact that the piece was connected to the remains of the blank by a spindle of ever-dwindling diameter. Numerous detailed actions were explained during the final stages including finishing but suffice to say that he achieved the maximum possible hollowing depth in the base and then parted off with the uncanny steadiness shown throughout. To complete the work he tidied up with a narrow skew a small residual internal button in the region of the bead. He had held our unwavering attention effortlessly throughout!
 |
 |
 |
 |
 |
 |
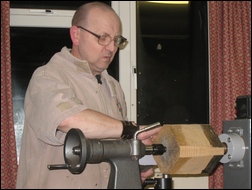
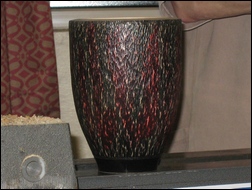
Texturing - Steve started with a square section blank in partly, but not fully dried Oak of approx. 5.5" square by 8" long. Having perfected the desired outside shape ready for texturing he applied and lit the now familiar meths to achieve a dry surface. He cut a shallow fine line near the base to mark the limit of texturing. Steve then used a Proxxon long neck angle grinder (see: www.axminster.co.uk/proxxon-lhw-long-neck-angle-grinder), fitted with an Arbortech cutter. Three passes were made with the 'texturing tool' at a steady pace along the length of the item. The spindle speed was about 300 RPM. The resulting (fluffy) surface was cleaned up with a brass brush. Red acrylic paint was brushed on with a few spaces left blank for the next colour (black) to penetrate. After brief drying the black acrylic spray was applied lightly over the red. A hot air gun can be used for drying but in this case the 'meths method' was used for speed and convenience. Abrasive (240 grit) was applied very lightly to expose a hint of red and the underlying white wood, here and there. He explained that any colours can be used as a matter of personal taste. He uses acrylic sanding sealer followed by oil to achieve his desired finish.
This brought an end to the evening's proceedings and led to two very well-earned rounds of applause.
 |
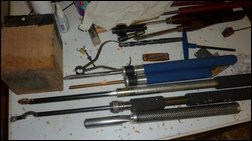 |
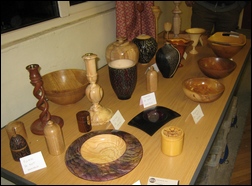
Steve's Tools - A photograph shows a good number of the tools in his kit, including the drill with morse taper shank and (I think) the ring tail centre plus the hollowing tools and some gouges. The photograph speaks for itself and it will be noted that the conventional wooden handles familiar to most of us are scarcely to be seen. He uses highly specialised, expensive tools because they enable him to reach with certainty the exceptionally high standards by which he is driven. This sets him apart from most of us but we have to admire the results. Magnificent! See Steve's display table of examples of his work…
Here's one quick philosophical question though - "Are the engineers taking tool and equipment design to such a cost level that it will be almost impossible to attract new young people to our hobby-cum-craft?"
<Top of Page>